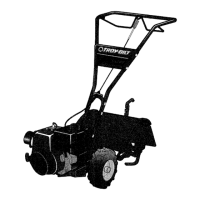
Features and Controls
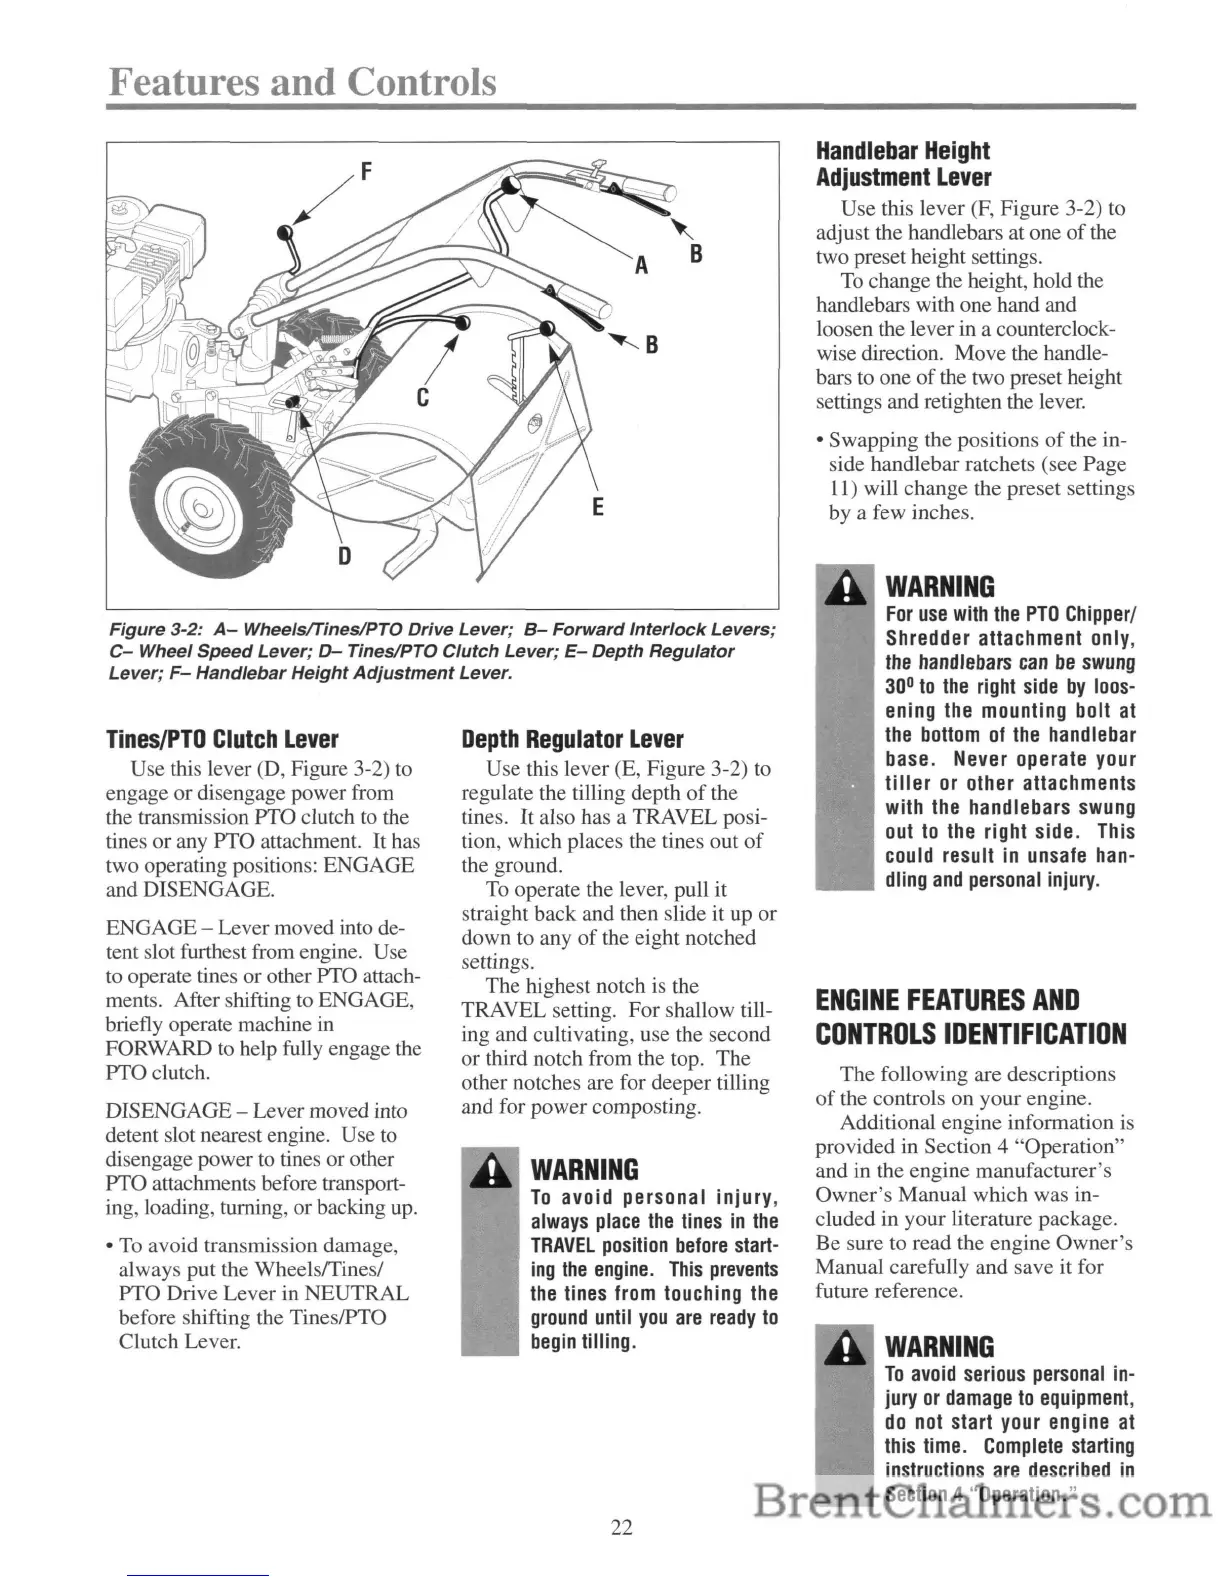
Figure 3-2:
A-
Wheelsflines/PTO
Drive Lever;
B-
Forward
Interlock
Levers;
C-
Wheel
Speed
Lever;
D-
Tines/PTO
Clutch
Lever;
E-
Depth
Regulator
Lever;
F-
Handlebar
Height
Adjustment
Lever.
WARNING
For
use
with
the
PTO
Chipper/
Shredder attachment only,
the
handlebars
can
be
swung
30
0
to
the
right
side
by
loos-
ening
the
mounting bolt
at
the
bottom
of
the
handlebar
base. Never operate your
tiller
or
other attachments
with
the
handlebars
swung
out
to
the
right side.
This
could result
in
unsafe
han-
dling
and
personal
injury.
Handlebar
Height
Adjustment
Lever
Use this lever
(F,
Figure 3-2) to
adjust the handlebars at one
of
the
two preset height settings.
To
change the height, hold the
handlebars with one hand and
loosen the lever in a counterclock-
wise direction. Move the handle-
bars
to
one
of
the two preset height
settings and retighten the lever.
• Swapping the positions
of
the in-
side handlebar ratchets (see Page
11) will change the preset settings
by a few inches.
The following are descriptions
of
the controls on your engine.
Additional engine information is
provided in Section 4 "Operation"
and in the engine manufacturer's
Owner's Manual which was in-
cluded in your literature package.
Be sure to read the engine
Owner's
Manual carefully and save it for
future reference.
ENGINE
FEATURES
AND
CONTROLS
IDENTIFICATION
WARNING
To
avoid
serious
personal
in-
jury
or
damage
to
equipment,
do
not
start your engine
at
this
time.
Complete
starting
instructions
are
described
in
""------'
Section
4 "Operation."
WARNING
To
avoid personal Inlury,
always
place
the
tines
in
the
TRAVEL
position
before
start-
ing
the
engine.
This
prevents
the
tines
from
touching
the
ground
until
you
are
ready
to
begin
tilling.
Depth
Regulator
Lever
Use this lever (E, Figure 3-2) to
regulate the tilling depth
of
the
tines. It also has a TRAVEL posi-
tion, which places the tines out
of
the ground.
To operate the lever, pull it
straight back and then slide it up or
down
to
any
of
the eight notched
settings.
The highest notch is the
TRAVEL setting. For shallow till-
ing and cultivating, use the second
or third notch from the top. The
other notches are for deeper tilling
and for power composting.
ENGAGE - Lever moved into de-
tent slot furthest from engine. Use
to
operate tines or other PTO attach-
ments. After shifting to ENGAGE,
briefly operate machine in
FORWARD
to
help fully engage the
PTO clutch.
DISENGAGE - Lever moved into
detent slot nearest engine. Use
to
disengage power to tines or other
PTO attachments before transport-
ing, loading, turning, or backing
up.
• To avoid transmission damage,
always put the Wheelsrrinesl
PTO Drive Lever in NEUTRAL
before shifting the Tines/PTO
Clutch Lever.
Tines/PTO
Clutch
Lever
Use this lever (D, Figure 3-2)
to
engage or disengage power from
the transmission PTO clutch
to
the
tines or any PTO attachment.
It
has
two operating positions: ENGAGE
and DISENGAGE.
22



 To Next Page