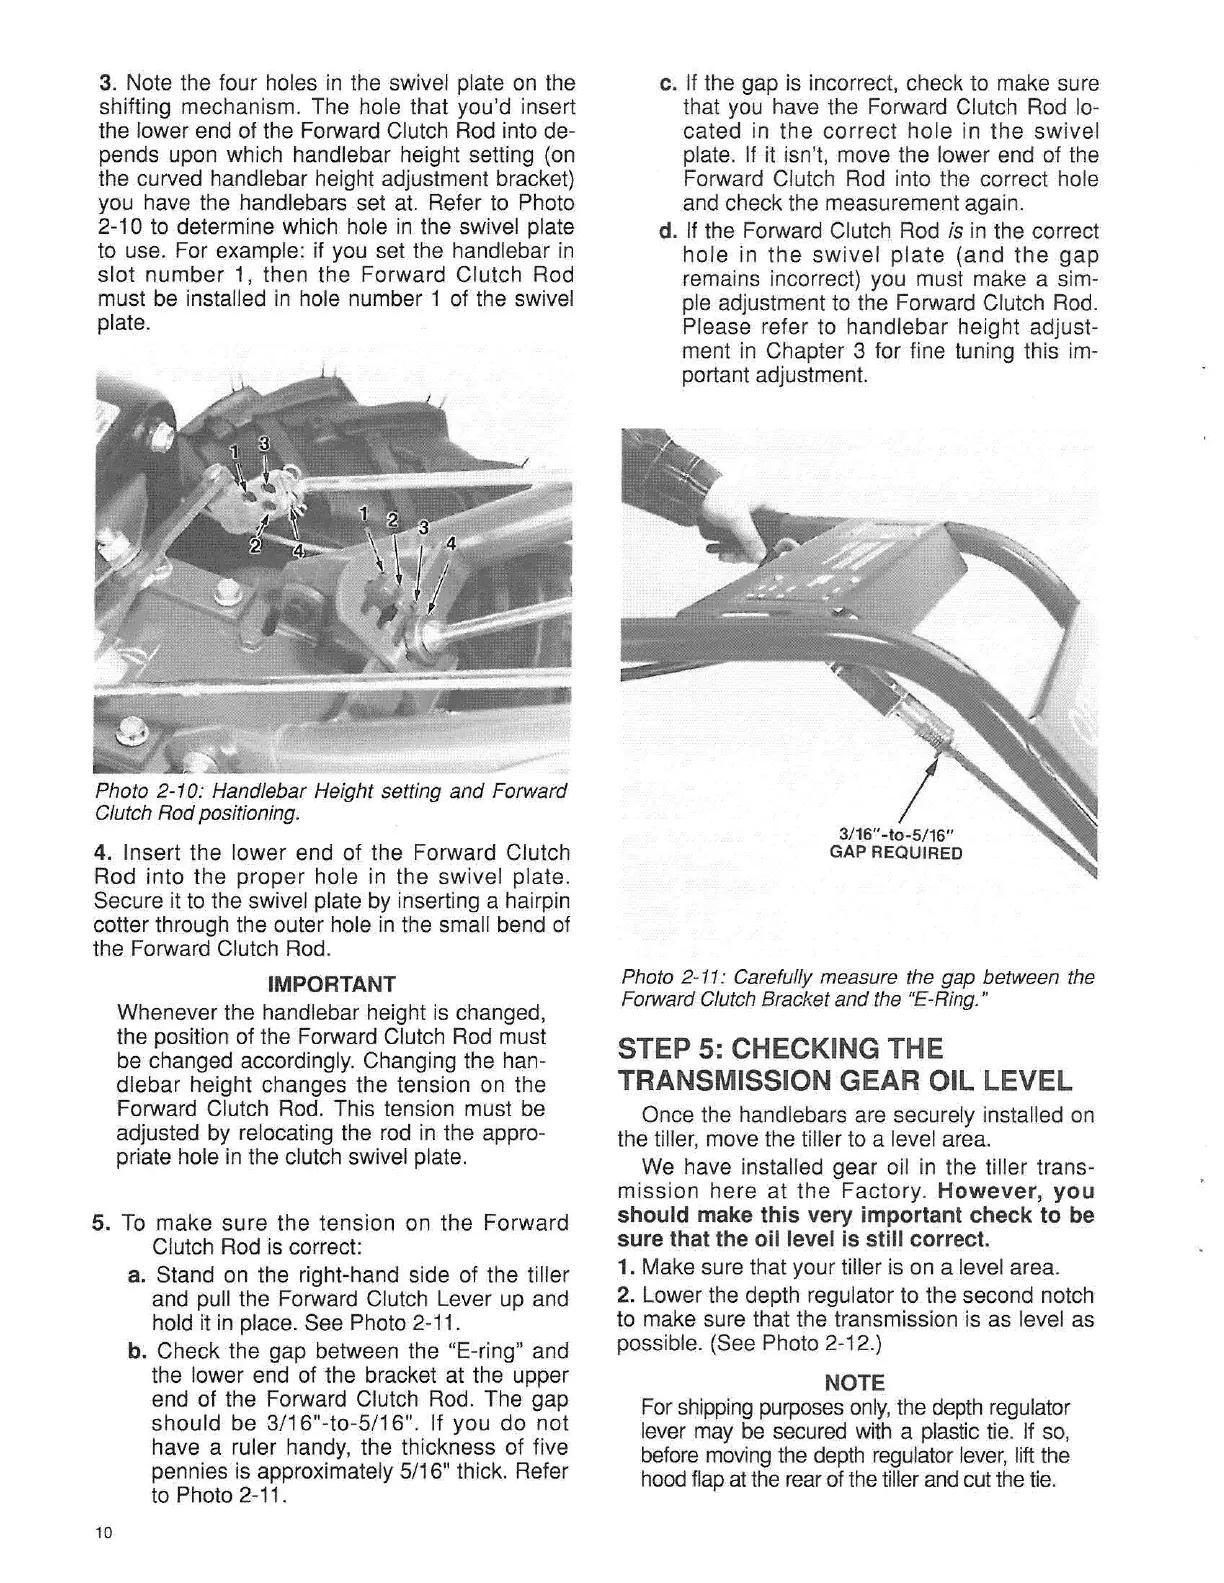
3. Note the four holes in the swivel plate on the
shifting mechanism. The hole that you'd insert
the lower end of the Forward Clutch Rod into de-
pends upon which handlebar height setting (on
the curved handlebar height adjustment bracket)
you have the handlebars set at. Refer to Photo
2-10 to determine which hole in the swivel plate
to use. For example: if you set the handlebar in
slot number 1, then the Forward Clutch Rod
must be installed in hole number 1 of the swivel
plate.
Photo 2-10: Handlebar Height setting
and
Forward
Clutch Rod positioning.
4. Insert the lower end of the Forward Clutch
Rod into the proper hole in the swivel plate.
Secure it to the swivel plate by inserting a hairpin
cotter through the outer hole in the small bend of
the Forward Clutch Rod.
IMPORTANT
Whenever the handlebar height is changed,
the position of the Forward Clutch Rod must
be changed accordingly. Changing the han-
dlebar height changes the tension on the
Forward Clutch Rod. This tension must be
adjusted by relocating the rod in the appro-
priate hole in the clutch swivel plate.
5. To make sure the tension on the Forward
Clutch Rod is correct:
a. Stand on the right-hand side of the tiller
and pull the Forward Clutch Lever up and
hold it in place. See Photo 2
-11.
b. Check the gap between the "E-ring" and
the lower end of the bracket at the upper
end of the Forward Clutch Rod. The gap
should be 3/16"-to-5/16". If you do not
have a ruler handy, the thickness of five
pennies is approximately 5/16" thick. Refer
to Photo 2-11.
10
c. If the gap is incorrect, check to make sure
that you have the Forward Clutch Rod lo-
cated in the correct hole in the swivel
plate. If it isn't, move the lower end of the
Forward Clutch Rod into the correct hole
and check the measurement again.
d. If the Forward Clutch Rod is in the correct
hole in
the
sw ivel
plate
(and
the
gap
remains incorrect) you must make a sim-
ple adjustment to the Forward Clutch Rod.
Please refer to handlebar height adjust-
ment in Chapter 3 for fine tuning this im-
portant adjustment.
3/16" -10-5/16"
GAP REQUIRED
Photo 2-11: Carefully measure the gap between the
Forward Clutch
Bracket and the "E-Ring."
STEP 5: CHECKING THE
TRANSMISSION GEAR OIL LEVEL
Once the handlebars are securely installed on
the tiller, move the tiller to a level area.
We have installed gear oil in the tiller trans-
mission here at the
Factory
. How ev
er
,
yo
u
shou
ld make t
his
very important che
ck
to be
sure that the oil level is still correct.
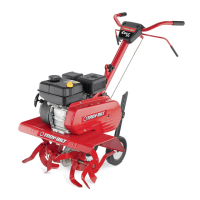
1. Make sure that your tiller is on a level area.
2. Lower the depth regulator to the second notch
to make sure that the transmission is as level as
possible. (See Photo 2-12.)
NOTE
For
shipping
purposes
only, the
depth
regulator
lever may be secured with a plastic tie. If so,
before
moving
the
depth
reguiator
lever,
liftthe
hoodflapatthe rearof thetillerandcut thetie.