It is best not to work the soil when it is too
soggy or wet. Doing so will make too many
clumps that won't break up very easily. If time
will permit, always wait a day or so after heavy
rains for the ground to dry.
In most soils, it's best to start out at the third
or fourth notch of the depth regulator to break
through the upper inch or two of soil. The fastest
method is to till as deep as you can without mak-
ing the tiller jump when it hits rocks, etc., but you
should wait until you are very familiar with the
tiller's operation before you use that procedure.
When you are cultivating your garden, the
tines should be adjusted to till to a depth of just
1
-1
/2" to 2" so they won't injure your plants '
roots, which grow close to the surface. If you no-
tice the tines are digging too deeply (even when
in the highest notch), then you may have to lift
up on the handlebars slightly. Also use the high
belt range when cultivating as the faster wheel
and tine speeds will help prevent the tiller from
digging too deeply.
Sketch 4-12. Again, overlap each pass to really
pulverize the entire garden area. (In very hard
ground. it might take three or four passes before
you make much headway.)
Sketch 4-12. Tilling pattern for unbroken ground.
If your garden is not wide enough to till length-
wise and then crosswise, then you should first
overlap by one-half a tiller width, followed by
successive passes at one-q uarter tiller width.
This overlapping method will assure you of thor-
oughly breaking up the ground
-See
Sketch 4-13.
Sketch 4-13: Tilling pattern for narrow strips.
Sketch
4-14: Cultivate between
pl
ants to uproot un-
wanted weeds.
If you plan your garden careful ly, you can
allow enough room between rows to cultivate, as
shown in Sketch 4-14. The Econo-Horse has a
tilling width of 18" (the Pony 16", and the Junior
14"), so leave that much distance between the
rows, plus enough extra plant growing room
above ground. Remember some crops take lots
of ro
om-
like beans, tomatoes, and peas.
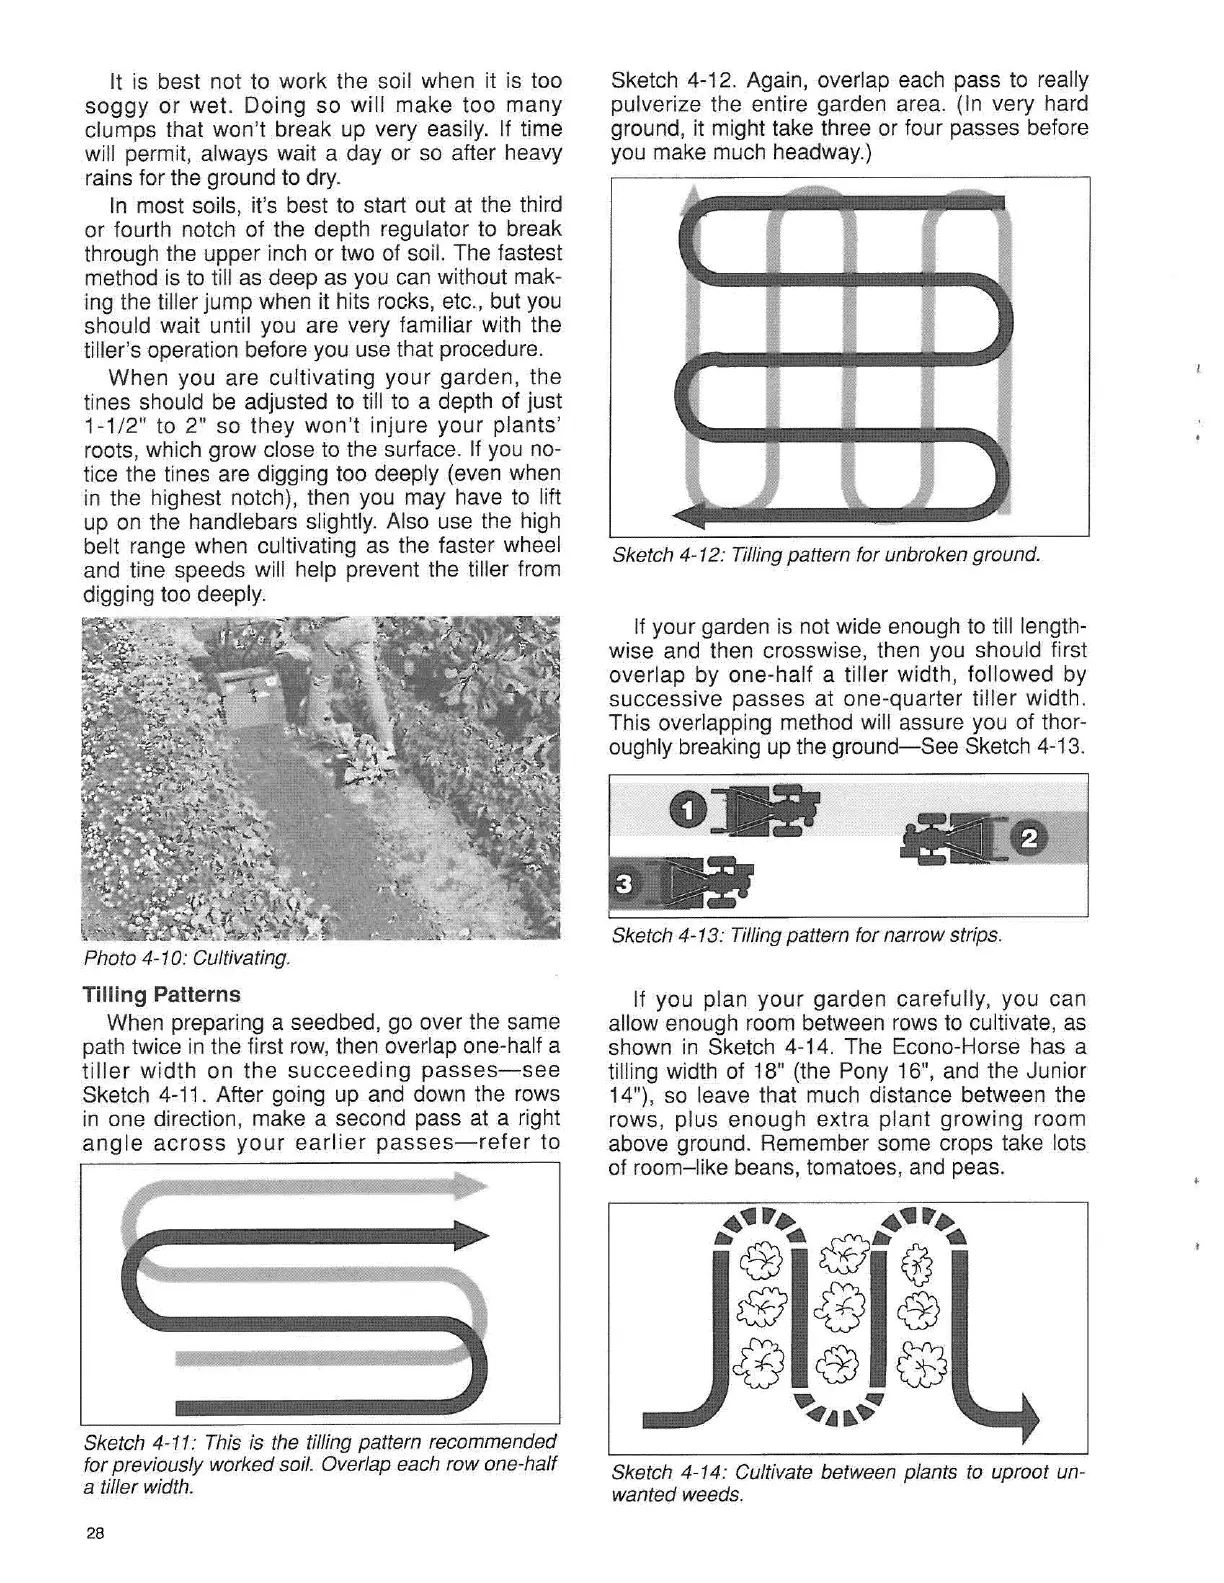
Sketch 4-11: This is the tilling pattern recommended
for previously worked soil. Overlap each row one-half
a tiller width.
~('
''
,,
'
'k
~~
,.
",
...
_. 1f..,
"'
--1
'\-
~"
..
",,""
Photo 4-10: Cultivating.
Tilling Patterns
When preparing a seedbed, go over the same
path twice in the first row, then overlap one-half a
tiller wid th on the s
ucceeding
passe
s-see
Sketch 4-11. After going up and down the rows
in one direction, make a second pass at a right
angle
across
your ea
rlier
pa
sses
- re
fer
to
28