EasyManua.ls Logo

Troy-Bilt TB516 User Manual

Troy-Bilt TB516
12 pages
To Next Page IconTo Next Page
Page #1 background imageLoading...
Page #1 background image
IMPORTANT: READ OPERATOR’S MANUAL THOROUGHLY AND FOLLOW THE SAFE OPERATION PRACTICES WHILE OPERATING THE UNIT.
R
emove Unit From Carton
S
tart The Unit
A
ssemble The Unit
Remove the oil plug from the
crankcase, and pour the
e
ntire bottle of oil into the fill
h
ole.
Place unit on a level surface
a
nd fill fuel tank. DO NOT
o
verfill.
For cold weather conditions
(below 40°F), push the red
c
old weather start lever
d
own to the closed position.
DO NOT push this lever
d
own if the temperature is
a
bove 40°F.
P
ress primer bulb 10 times,
or until fuel is visible
S
tand in the starting
position.
P
ull the starter rope in a
controlled motion until the
unit starts.
Wait 60 seconds.
F
or cold weather conditions
(below 40°F), pull the red
cold weather start lever
b
ack up to the open position
after the unit starts.
T
ip the unit back so the
blade does not touch the
ground. Squeeze the throttle
c
ontrol and allow the engine
to warm up for 30 to 60
seconds. The unit may be
u
sed during this time.
11
R
emove all contents from
the carton.
5 6 7
19 1
0
DO NOT squeeze the
t
hrottle.
8
Start The Unit
1
1
1
2
13
A
lign the holes on the upper
s
haft with the holes on the
m
iddle shaft. Insert bolts
into the two holes. Install a
w
asher and knob onto each
b
olt. Tighten the knobs
securely. Make sure the “V”
b
end in the handle is
p
ointing up.
3
S
lide the ends of the middle
s
haft over the ends of both
l
ower shafts and align the
holes. Insert bolts into the
t
wo holes. Install a washer
a
nd knob onto each bolt.
Tighten the knobs securely.
K
eep the cables to the front
o
f the unit.
2 4
Primer Bulb
10 X
Red Cold Weather
Start Lever
A
ssemble The Unit
P
ull the starter rope through
t
he eye hook.
Insert the cables into the cable
r
estraints on the lower and
u
pper shafts.
DIDN’T START?
I
F the engine does not start,
g
o back to step 9.
I
F the engine stops while
squeezing the throttle, go
back to step 10.
IF the engine is hot,
g
o back to step 9.
Starter
Rope Grip
F
uel Cap
T
hrottle
C
ontrol
O
n/Off
C
ontrol
Handle
A
ir Filter
C
over
P
rimer
B
ulb
O
il Fill
P
lug
S
park Plug
Edger Blade
B
lade Shield
Depth
Adjustment Lever
NO TOOLS REQUIRED!
Red
Cold Weather
Start Lever
R
ed Cold Weather
S
tart Lever
769-07491 P00 10/11
NEED HELP? CALL 1-800-828-5500 IN U.S. OR 1–800–668–1238 IN CANADA
TB516 EC
Electric Start Capable
4-Cycle Lawn Edger
English — Page 1
Español — Page 5
Operator’s Manual
Question and Answer IconNeed help?

Do you have a question about the Troy-Bilt TB516 and is the answer not in the manual?

Troy-Bilt TB516 Specifications

General IconGeneral
Engine Type4-Cycle
Cutting Width21 inches
Cutting Height1.25 - 3.75 inches
Drive TypeSelf-Propelled
Start TypeRecoil
Mulch CapableYes
Side DischargeYes
Rear BagYes
Mulching CapabilityYes
Bagging CapabilityYes
Side Discharge CapabilityYes
Wheel Size8 inches front
Warranty2 years limited
EngineBriggs & Stratton
Cutting Height AdjustmentSingle-lever

Summary

FASTGUIDE™

Remove Unit From Carton

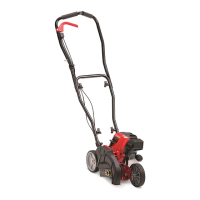
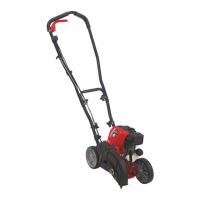
Instructions for removing the edger unit from its shipping carton.

Assemble The Unit

Steps involved in assembling the edger unit, connecting shafts and handles.

Start The Unit

Procedure for starting the edger engine, including primer and choke usage.

NO TOOLS REQUIRED!

DIDN'T START?

SERVICE INFORMATION

Contacting Customer Support

Provides contact numbers for customer support for assembly, control, or maintenance inquiries.

Authorized Service Dealers

Information on how to locate authorized service dealers for repairs and maintenance.

SAFETY INFORMATION

Safety Alert Symbols

Explanation of safety alert symbols and their meanings to prevent hazards.

California Proposition 65

Warning regarding chemicals known to the state of California to cause cancer or reproductive harm.

Important Safety Instructions

General safety rules to follow before and during unit operation to prevent injury.

While Operating Safety

Safety guidelines to adhere to while the unit is in operation, including personal protection.

Safety and International Symbols

Description of safety and international symbols used on the product and in the manual.

OIL AND FUEL INFORMATION

Recommended Oil Type

Specifies the correct type and weight of oil required for the engine crankcase.

Adding Oil to Crankcase

Instructions for filling the engine crankcase with the initial oil supply.

Recommended Fuel Type

Details on the type of fuel to use, emphasizing fresh, clean, unleaded gasoline.

STARTING AND STOPPING INSTRUCTIONS

Starting Instructions

Step-by-step guide for starting the engine, including cold weather considerations.

Stopping Instructions

Procedure for safely shutting down the engine and the unit.

OPERATING INSTRUCTIONS

Holding the Unit

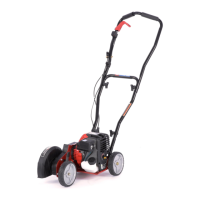
Guidance on the proper stance and grip for operating the edger safely.

Adjusting Edger Cutting Depth

Instructions on how to adjust the depth of the edger blade for desired cutting depth.

Tips for Best Edging Results

Advice on techniques to achieve optimal edging results with the unit.

MAINTENANCE AND REPAIR INSTRUCTIONS

Maintenance Schedule

Overview of recommended maintenance tasks and their frequency for the unit.

MAINTENANCE AND REPAIR INSTRUCTIONS

Blade Replacement

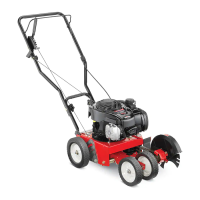
Steps for safely removing and installing a new edger blade.

Checking the Oil Level

Procedure for verifying the engine oil level before operation.

Changing the Oil

Instructions on how to drain and refill the engine oil.

Air Filter Maintenance

Guidance on cleaning and re-oiling the air filter for optimal engine performance.

Idle Speed Adjustment

Instructions for adjusting the engine's idle speed for proper operation.

Rocker Arm Clearance

Detailed procedure for checking and adjusting rocker arm clearance in the engine.

CLEANING AND STORAGE

Cleaning

Instructions for cleaning the unit after use to maintain its condition.

Storage

Guidelines for storing the unit properly to ensure its longevity.

Long Term Storage

Specific steps for preparing the unit for extended periods of storage.

OPTIONAL ACCESSORY

Electric Starter Features

Information about optional accessories like the Electric Starter and Power Start Bit™.

TROUBLESHOOTING

Engine Will Not Start

Solutions for common issues preventing the engine from starting.

Engine Will Not Idle

Troubleshooting steps for when the engine does not run smoothly at idle.

Engine Will Not Accelerate

Guidance on resolving issues where the engine hesitates or stalls during acceleration.

Engine Lacks Power or Stalls

Steps to diagnose and fix problems related to loss of engine power or stalling.

SPECIFICATIONS

MANUFACTURER'S LIMITED WARRANTY

How to Obtain Service

Instructions on how to get warranty service and where to find authorized dealers.

Warranty Exclusions

Details on parts and conditions not covered by the manufacturer's limited warranty.

How State Law Relates to this Warranty

Information on how state laws affect the warranty rights and limitations.
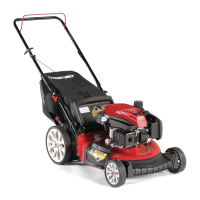
Related product manuals