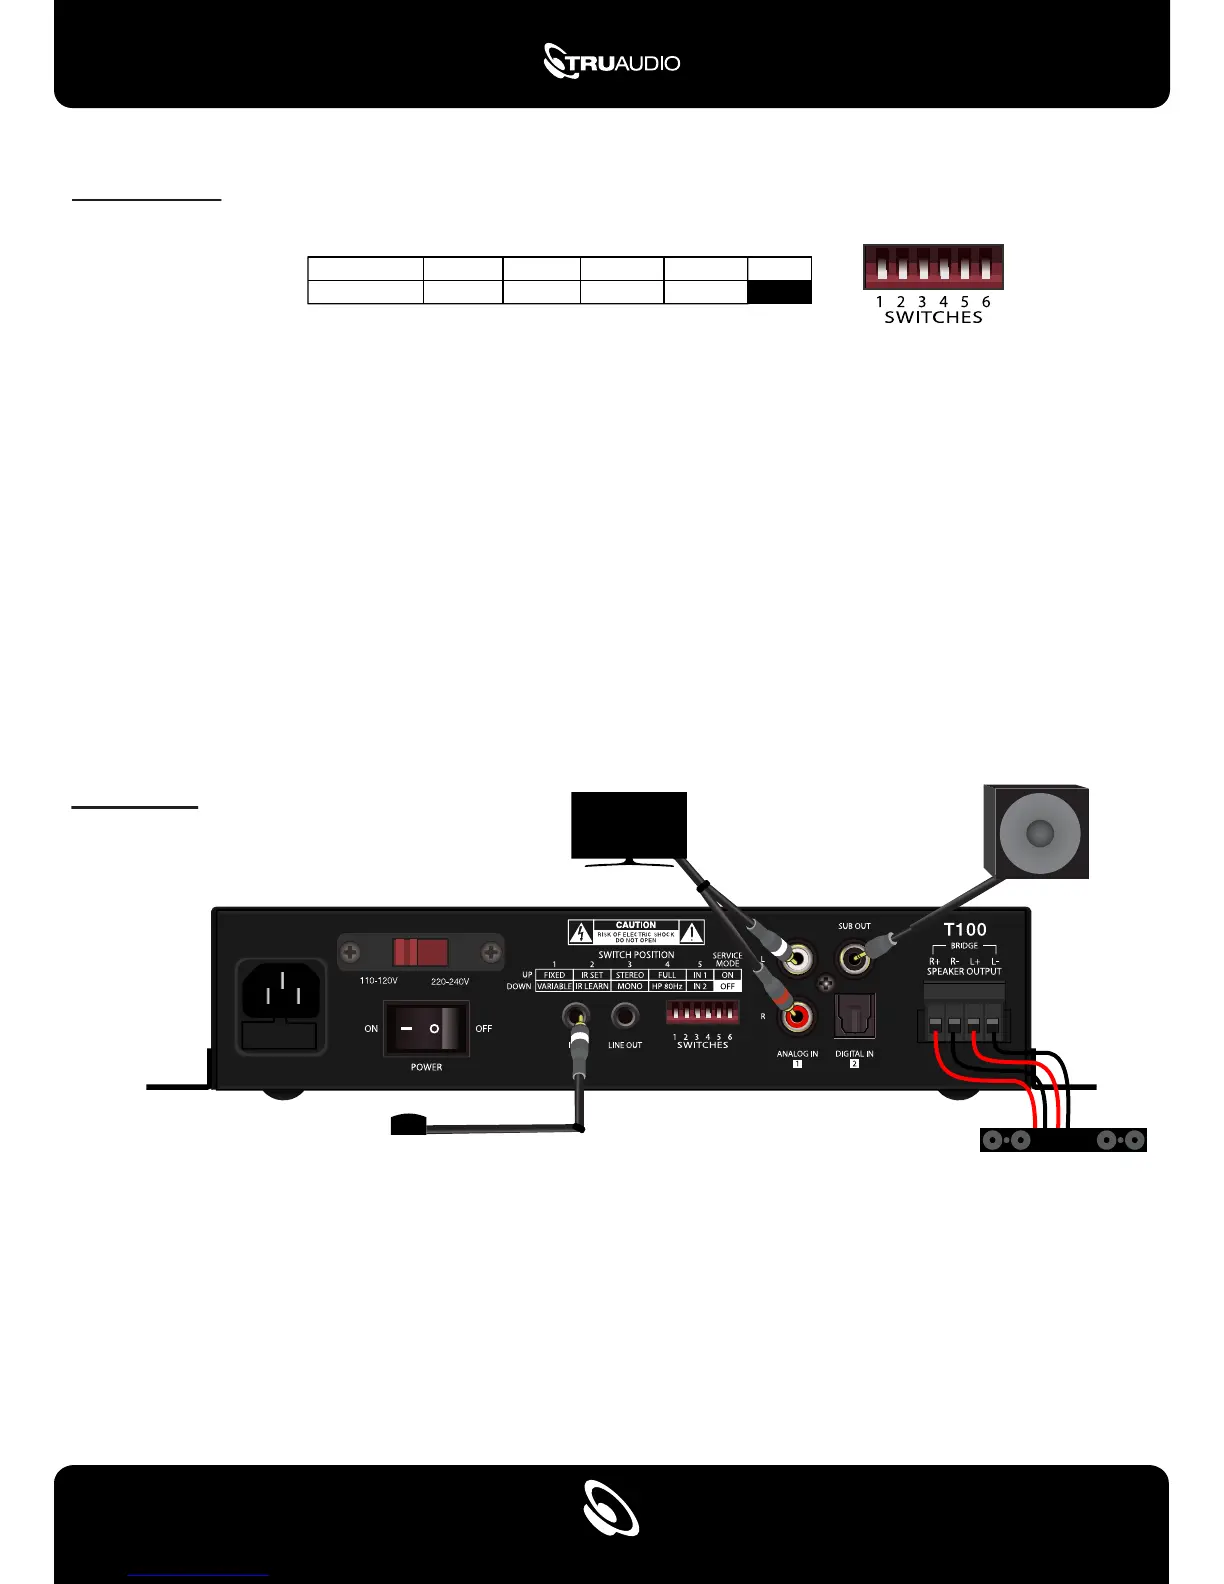
Dip Switches
1. Fixed - The amplifier output volume is fixed at 95%.
Variable - The amplifier output volume can be adjusted via IR remote.
2. IR Set - This will allow you to use the remote (through the IR receiver) to control the T100.
IR Learn - For learning IR commands from your remote (off, on, mute, volume down & volume up).
3. Mono - All speakers play both left & right channels of audio (full range).
Stereo - each speaker will play its own left or right channel of audio.
4. FULL - The full range of audio frequencies will be outputted through the speakers (20 Hz - 20 kHz).
HP 80 Hz - The internal crossover limits all frequencies below 80Hz, going to the speakers.
5. IN 1, IN 2 - If the T100 loses power or if the hard power switch is turned off, the amplifier will default to the
input set by the dip switch when power is restored.
6. SERVICE MODE - Service mode is not used. Leave dip switch set to “off”
SWITCH POSITION
UP
FIXED IR SET
IR LEARN
STEREO
MONO
FULL
HP 80Hz
IN 1 ON
OFF
IN 2 VARIABLE
1 2 3 4 5
SERVICE
MODE
DOWN
Installation
Connecting the T100 to a TV with Subwoofer
1. Connect the TV audio to the T100 using analog RCA cables or Toslink
2. Set dip switch 5 according to the audio source
3. Set dip switch 1 to the down position (variable) for volume to be controlled by the T100 remote
or set dip switch 1 to the up position (fixed) for volume to be controlled by the TV
4. Connect an RCA cable from the powered subwoofer to the T100 “Sub out”
a. Set the subwoofer crossover and volume on the subwoofer
5. Connect the speakers
SUBWOOFER
IR RECEIVER
TELEVISION
SOUNDBAR
2