32
7
8
9
4
STEP 3—ATTACH WEIGHT STACK TO UPRIGHT ASSEMBLY CONTINUED
13
14
15
13
14
15
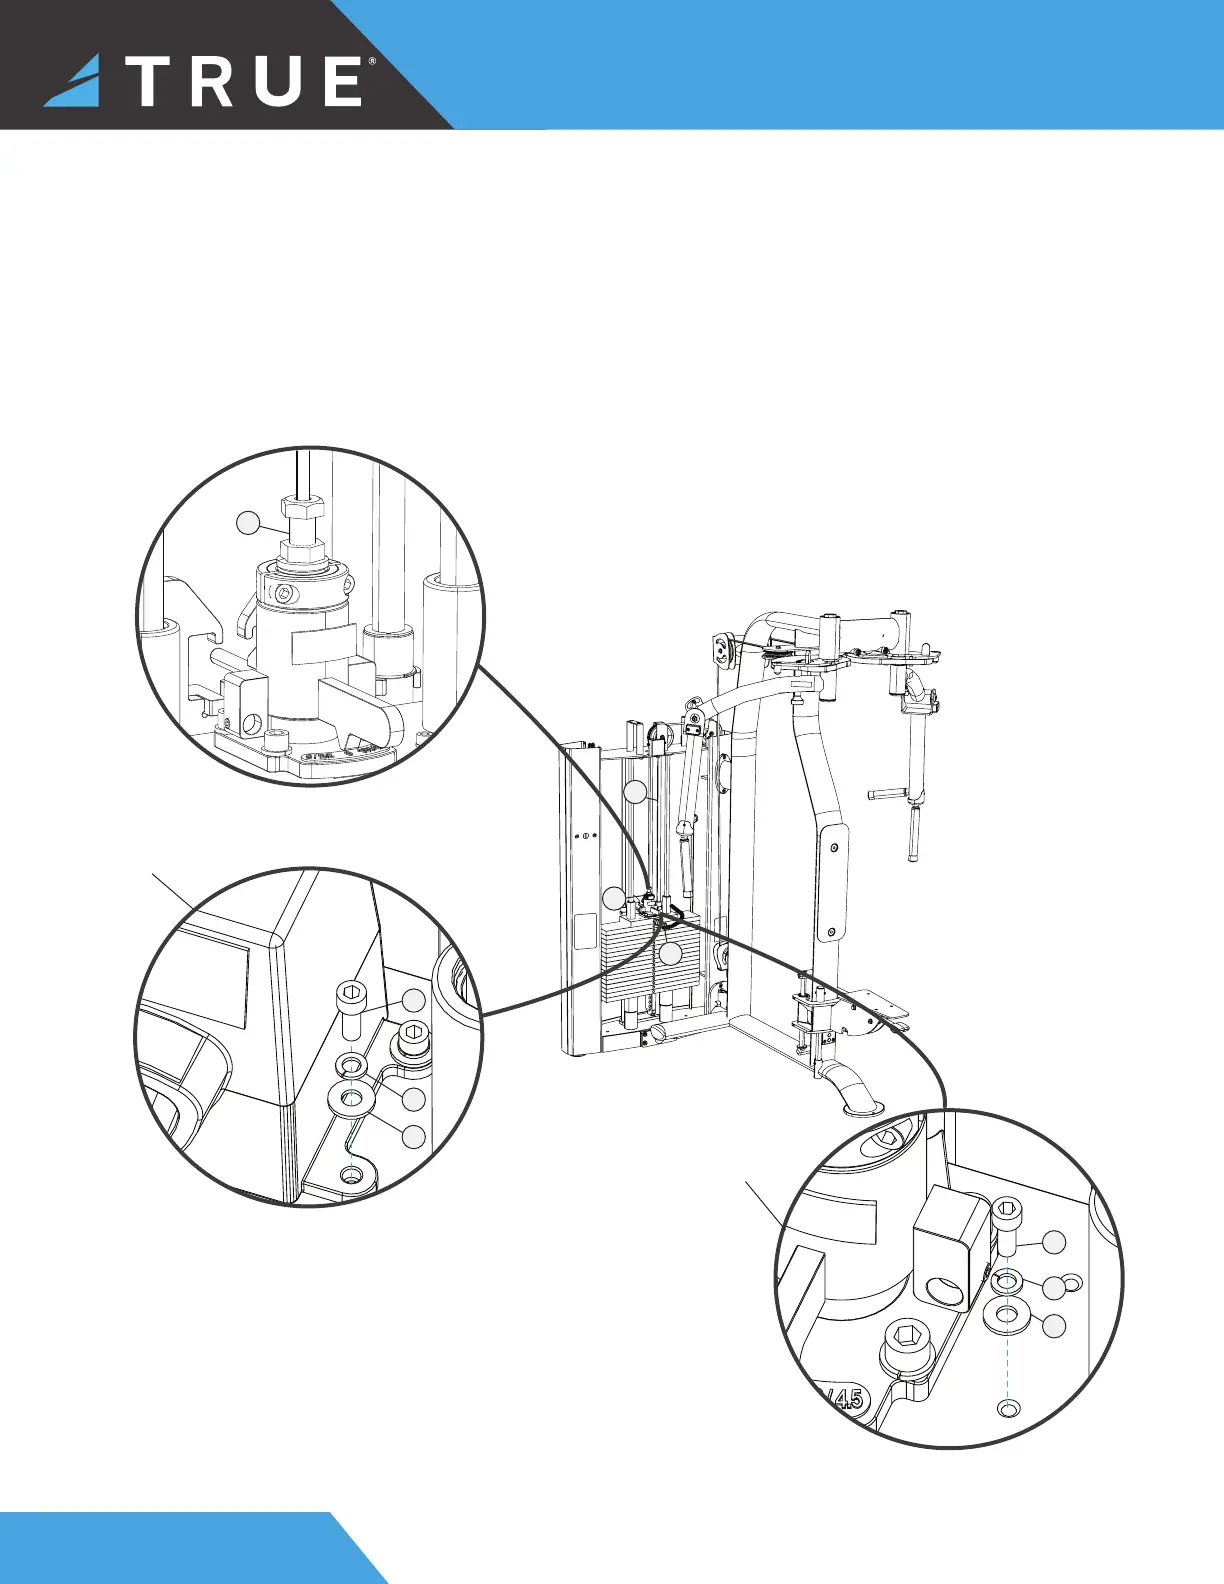
f. Insert the selector pin and route the upright cable down through the hole on the upright assembly. Using an open end
wrench, attach the cable bolt to the top weight assembly.
IMPORTANT! A minimum of 1/2" (12.7 mm) of the threaded portion of the cable bolt must be threaded into the top
weight assembly.
NOTE: Verify the selector pin slides in and out of each weight plate.
g. Using an allen wrench, remove the 1 hex screw, 1 lock washer, and 1 fl at washer from the top right side of the
Generation 1 top weight assembly. Using an allen wrench, remove the 1 hex screw, 1 lock washer, and 1 fl at washer
from the top right attachment point of the Generation 2 top weight assembly.
Generation
1
Generation
2