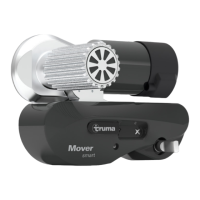
11
Connecting the drive motors
Cut motor cable of drive motor that is furthest away from
control unit to length. Shorten the motor cable of the nearest
drive motor to the same length. The two drive motor cables
must be of the same length to ensure that the drive output of
the Mover is uniform! Excess cable must be routed in wavy
lines without looping.
Crimp the provided flat plugs onto the drive motor cables.
Release flap at control unit terminal strip by pressing and
connect cables as shown in wiring diagram (red = positive,
black = negative). Please ensure that the connections are
made properly!
Connecting the battery
Route battery connecting cables (10 mm²) to control unit and
securely attach using the provided clips and screws.
The battery connecting cables must not be extended.
They must be routed separately from the motor cables,
and must not run over the control unit.
Route battery connecting cables so that they do not chafe
(particularly at leadthroughs through metal panels). Use suit-
able leadthrough grommets for protection in order to prevent
damage to cables. Connect battery connecting cables to the
existing battery terminals (red = positive, black = negative).
The connection to the control unit (as per the connecting dia-
gram) must take place in the order – nut, battery connection
ring, nut (torque 10 Nm ± 1).
Commissioning the Mover
Check whether the battery is fully charged for operating the
Mover and that the isolating switch is in the “ON” position.
Park the caravan outside on an open, level surface and apply
the handbrake. Ensure that the rollers are disengaged from
the road tyres and the corner steadies are raised.
Connect battery terminals to battery, check that all cables are
secure and not hot or indicating signs of short circuits, etc.
Move slide switch on remote hand set to the “On” I position.
This switches the remote hand set on – green LED flashes for
5 seconds in combination with the acoustic alarm until the
control unit is ready for operation. If LED does not illuminate,
check polarity and condition of batteries in remote hand set.
The remote hand set switches itself off after about 2 minutes
if no buttons are pressed.
Check whether both drive motors are stationary. With the
remote hand set switched on, and no more than 2 m away
from the control unit, press the “Forwards” button. Both drive
motors must now move in the forwards direction.
Move slide switch on remote control to the “Off”
o position
to switch the remote control and therefore the Mover off.
Move drive rollers against the tyres using the provided swivel-
ling lever. Turn the swivelling lever until it mechanically engag-
es and cannot be turned any further without using excessive
force (end position approximately horizontal).
Ensure that there no obstacles around the caravan, release the
handbrake and switch the remote control on. Now check all
functions several times according the operating instructions.
Move slide switch on remote hand set to the “Off”
o position
to switch the remote hand set and the Mover off. Apply cara-
van brake. Release drive rollers using swivelling lever and
re-check distance between roller and tyre. Adjust if necessary.
The distance between the swivelled-out drive rollers and
the tyres is 20 mm.
Warning information
The yellow sticker with the warning information, which is
enclosed with the appliance, must be affixed by the installer
or vehicle owner to a place in the vehicle where it is clearly
visible to all users (e.g. on the wardrobe door)! Ask Truma to
send you a sticker, if necessary.
Technical data
Designation Mover S
Area of operation Single axle caravans with a
total weight up to 1800 kg
Operational voltage 12 V DC
Current consumption Average approx. 20 A
Maximum 120 A
Stand by consumption < 20 mA
Remote hand set
frequency Class 1, 868 MHz
Speed Approx. 16 cm per second (de-
pending on weight and incline)
Weights Approx. 35 kg (including cross
actuation device)
Right to effect technical modifications reserved!