Page 44
A Line is a simple horizontal line (single amplitude level) that can be set to any value.
A Pattern can have multiple levels and can include vertical steps and angled lines. Patterns are
contained within files that are lists of up to 40 frequency/amplitude points. When a file is used
by the instrument, linear interpolation is employed between the points.
Lines or patterns may be used as simple visual aids to determine whether a signal is within a
specific level range, or they may be used in conjunction with the Limits Comparator to create an
automatic action.
7.6.1 Setting Limits
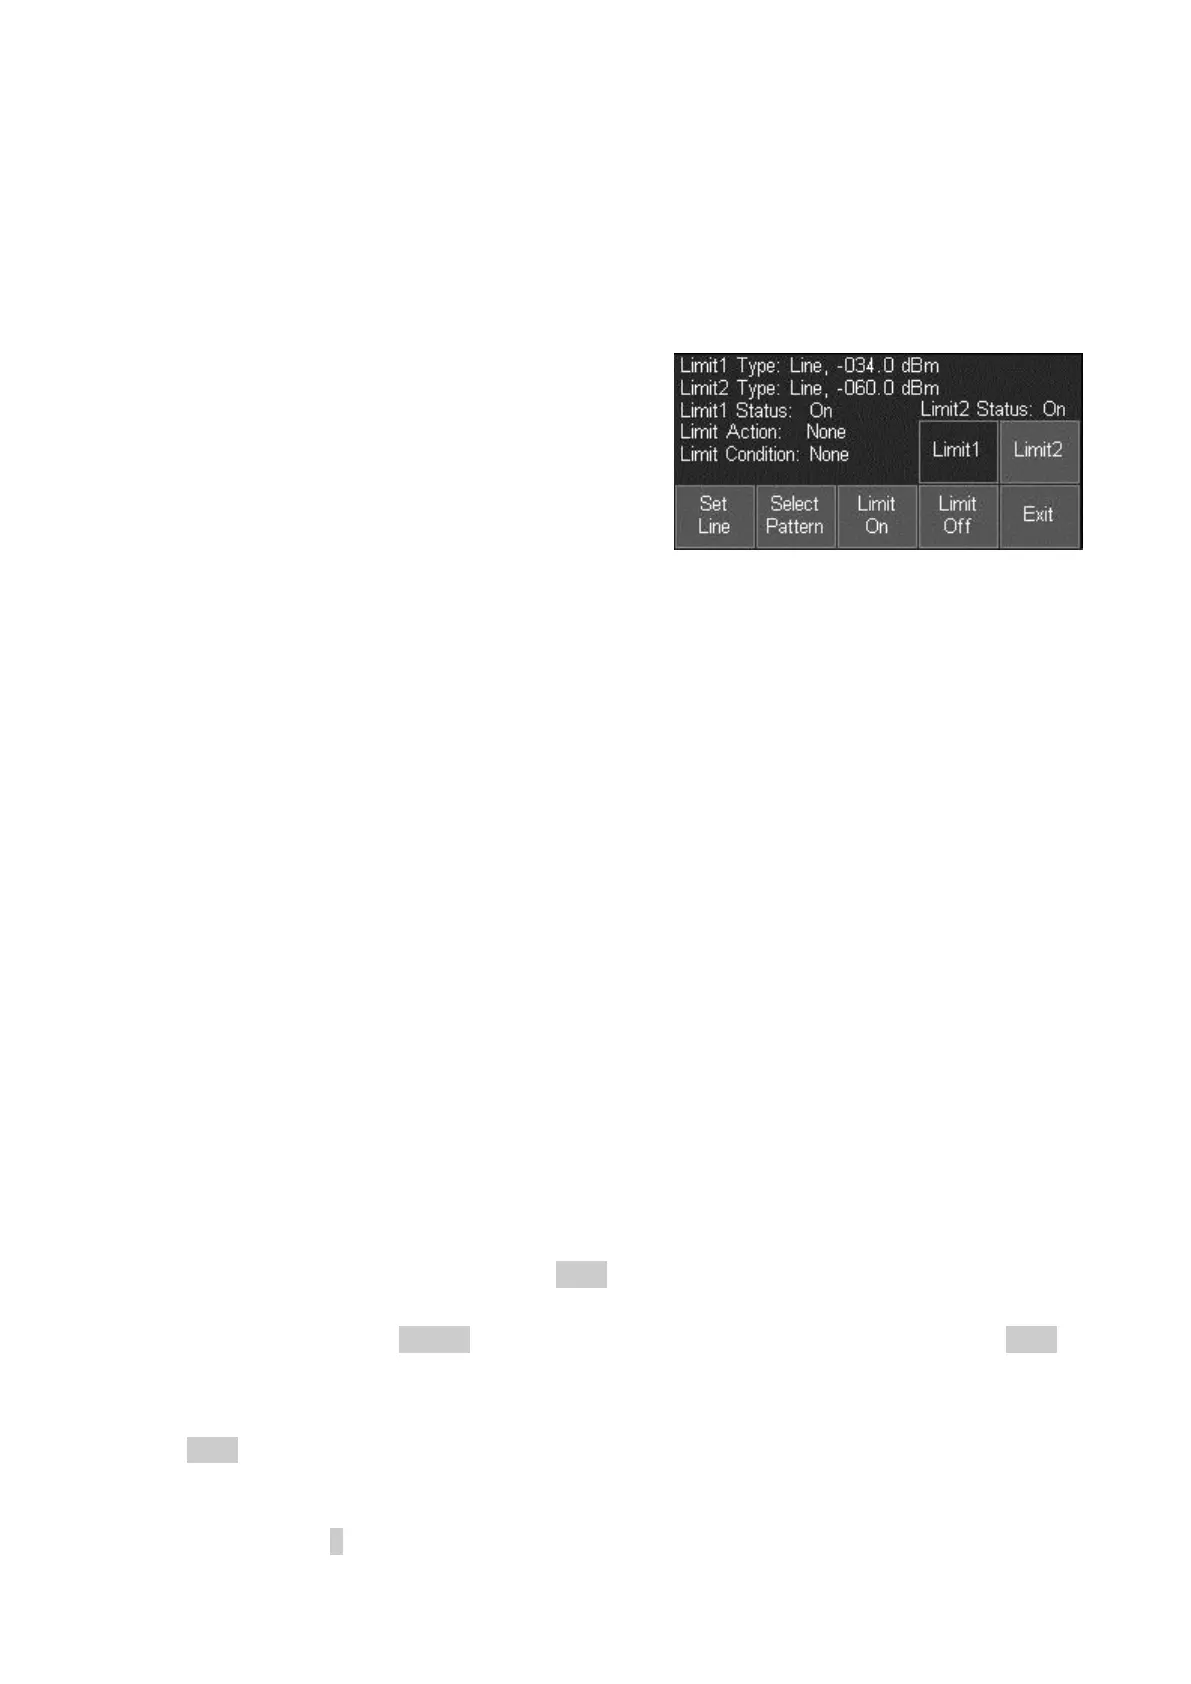
Pressing the Set Limits key (Level/Limits > Limits >
Set Limits) brings up a control screen as shown.
The keys on the top line select which limit is to be
controlled by the bottom row keys. Where a limit line
or pattern has already been set, it can be turned on or
off using Limit On/Limit Off.
The status of the two limits is displayed within the
area directly above the keys.
Pressing Set Line defines the currently selected limit as a line (if it was previously a pattern)
and brings up a numeric entry keypad or tab/jog system by which the level of the line can be set
numerically in graticule units.
Pressing Select Pattern brings up a list of files from which a limit pattern can be loaded. Limit
pattern files have the default prefix PTN and are placed in the Tables folder. Pressing Recall
from the Recall Limits files screen will load the pattern as the selected limit.
7.6.2 The Limit Comparator
The limits comparator enables automated actions to be selected in response to specified limit
conditions. The actions include audible warning, pulse output from the trigger socket, stopping
of the sweep, or entry into a logging file.
The limit condition is created from the trace being either above or below the limit line/pattern. If
the measurement markers are turned off, or if only M1 is turned on, any part of the swept trace
being above or below the line will create the condition. If both M1 and M2 are turned on, the
limits comparison takes place only on the part of the trace between the markers.
The Limit Condition options are None, Above, Below, Outside or Inside. Where two limits are
being displayed, the limit conditions of Inside or Outside can be used. Note that there is no
concept of an upper or lower limit line. Above means above the higher point of the two limit
lines, Below means below the lower point of the two limit lines, Outside means either above the
higher point or below the lower point of the two limit lines, while Inside means between the
higher and lower points.
The Limit Action can be set to None, Beep, Pulse Out, Beep and Pulse Out together, or
Message. The action only takes places when the sweep has completed. The Pulse Out is
provided at the Trigger socket - see section 7.4.2.
Regardless of the setting of the Trigger Action, it is also possible to use the limit condition to
stop the sweep (see section 4.4.3.3) or to create an entry into a logging file (see section 7.7.5).
7.6.3 Creating and Loading Limit Patterns
Limit Patterns must be created outside of the instrument using PSA-Manager software - see
section 6.1.8.
Limit Patterns files have the extension .CSV and are located in the folder named TABLES.
Files can be transferred using either a USB Flash drive, or by direct connection to the USB port
of a PC. See section 5 for an explanation of copying and transferring files.