ID-Lock Smart Installation guide - Ver. 1.3
23
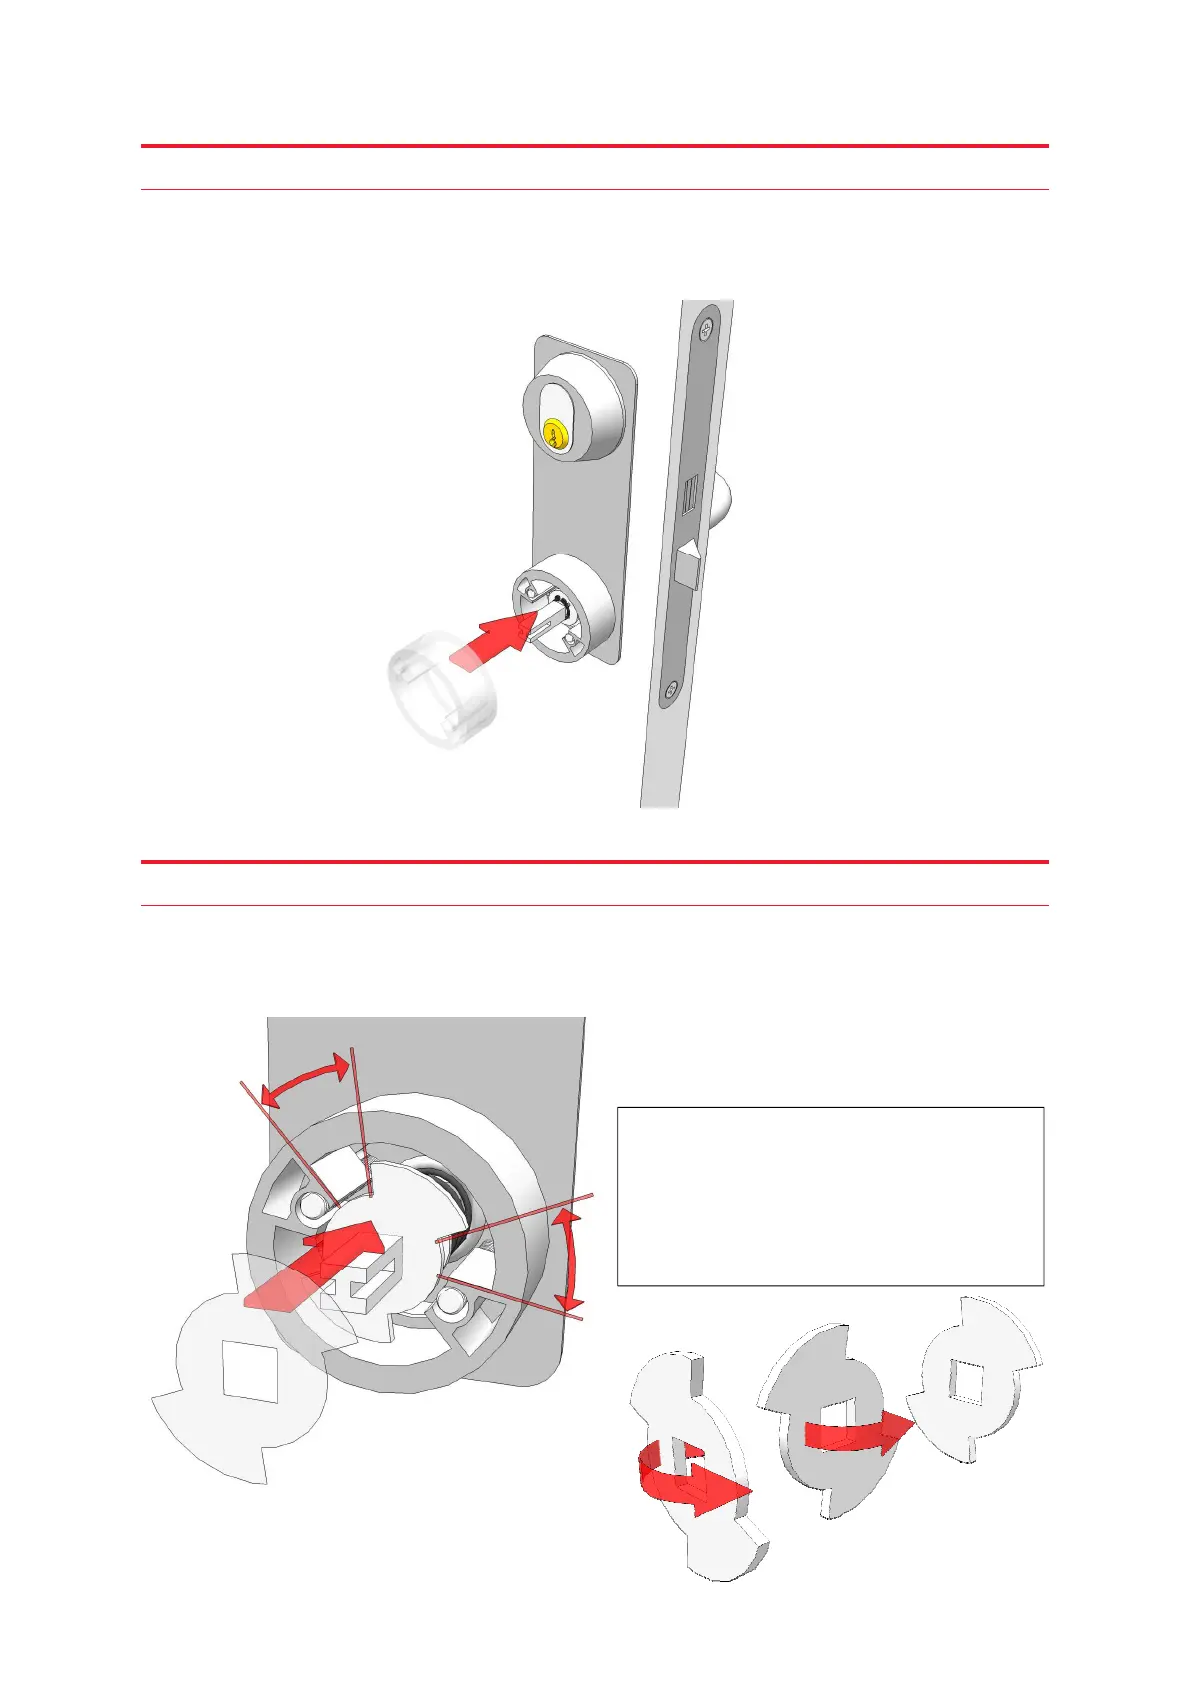
Step 21
Mount the outer spacer after both screws are through the door. This is when you determine
if you need to cut the screws to the right length; the screws should not protrude beyond the
outer spacer more than 4 mm.
Step 22
Now mount the limiting bracket so that the spindle can rotate equally in both directions
before the limiting bracket hits the outer spacer. It is easy to fail in this step, so please pay
attention to this picture.
If the limiting bracket doesn’t fit
according to the picture to the left, turn
it around as illustrated here, so that its
back face now is facing you.