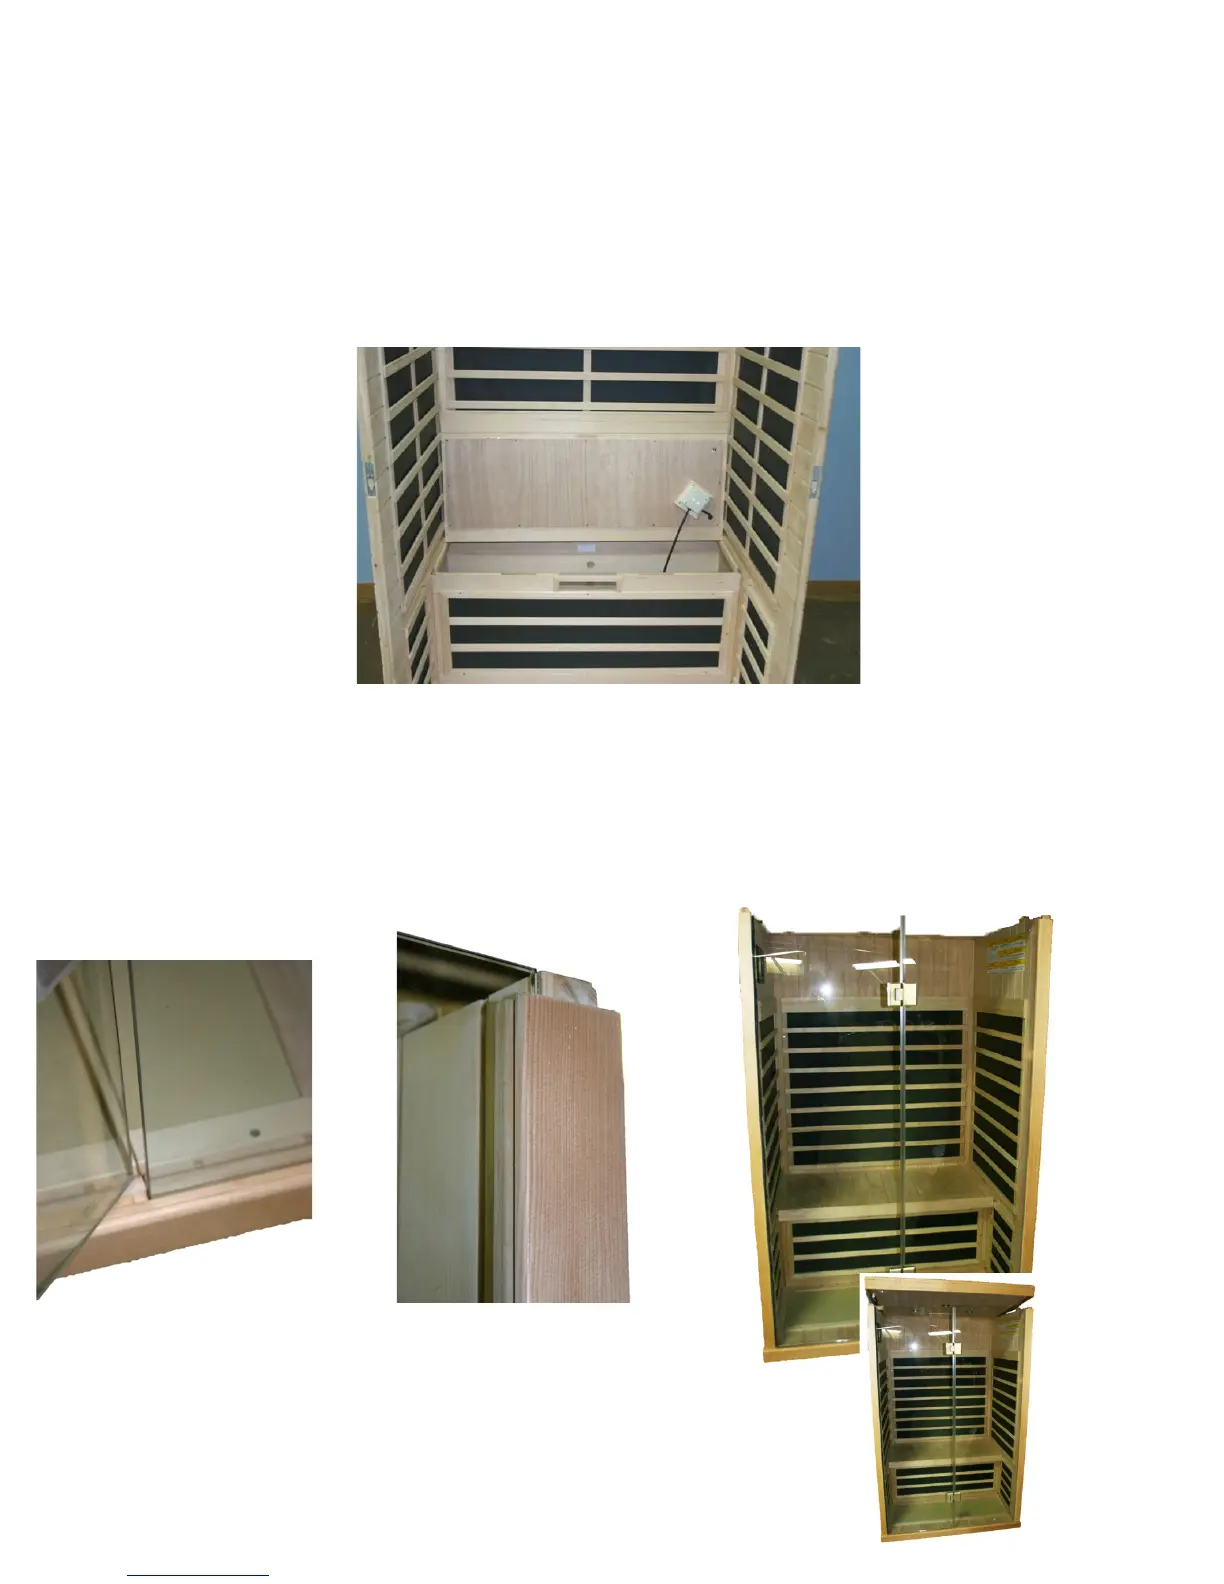
Bench (Box 1):
• Push the bench seat downwards into the back panel with the junction box
pointing towards you.
• Tilt the bench against the back panel as shown below.
• Connect the S-1 electrical connector to the S-1 junction box.
• Fix the cover of the S-1 junction box with 2 Phillips screws.
• Connect the bench valance strip lights to the strip light connection in the connector
(Note: two connections may come out of the floor with some models. You only
need to connect one with this model.)
• Lay the bench down and push it into the right place.
Front panel (Box 2):
• Push the front and glass sections into the corresponding slot in the floor.
Note: Only the right glass section will be fitted into the floor slot at this time. Push both side
panels to help secure the front wall panel.
Note: All panel parts are now connected but not secured.
Note: The ceiling is the final connection to secure the top end of the front panel.
Page 7