24 25
e. Once the wheel is installed, re-install the two
torque arm plates and fasten the plates to the
dropouts with the provided M14 nuts.
Step 9: cont'd
d. Slide the wheel into the dropouts ensuring the
flat faces on the axles match the flat faces on the
dropout and the cable from the motor is exiting
towards the front of the bike.
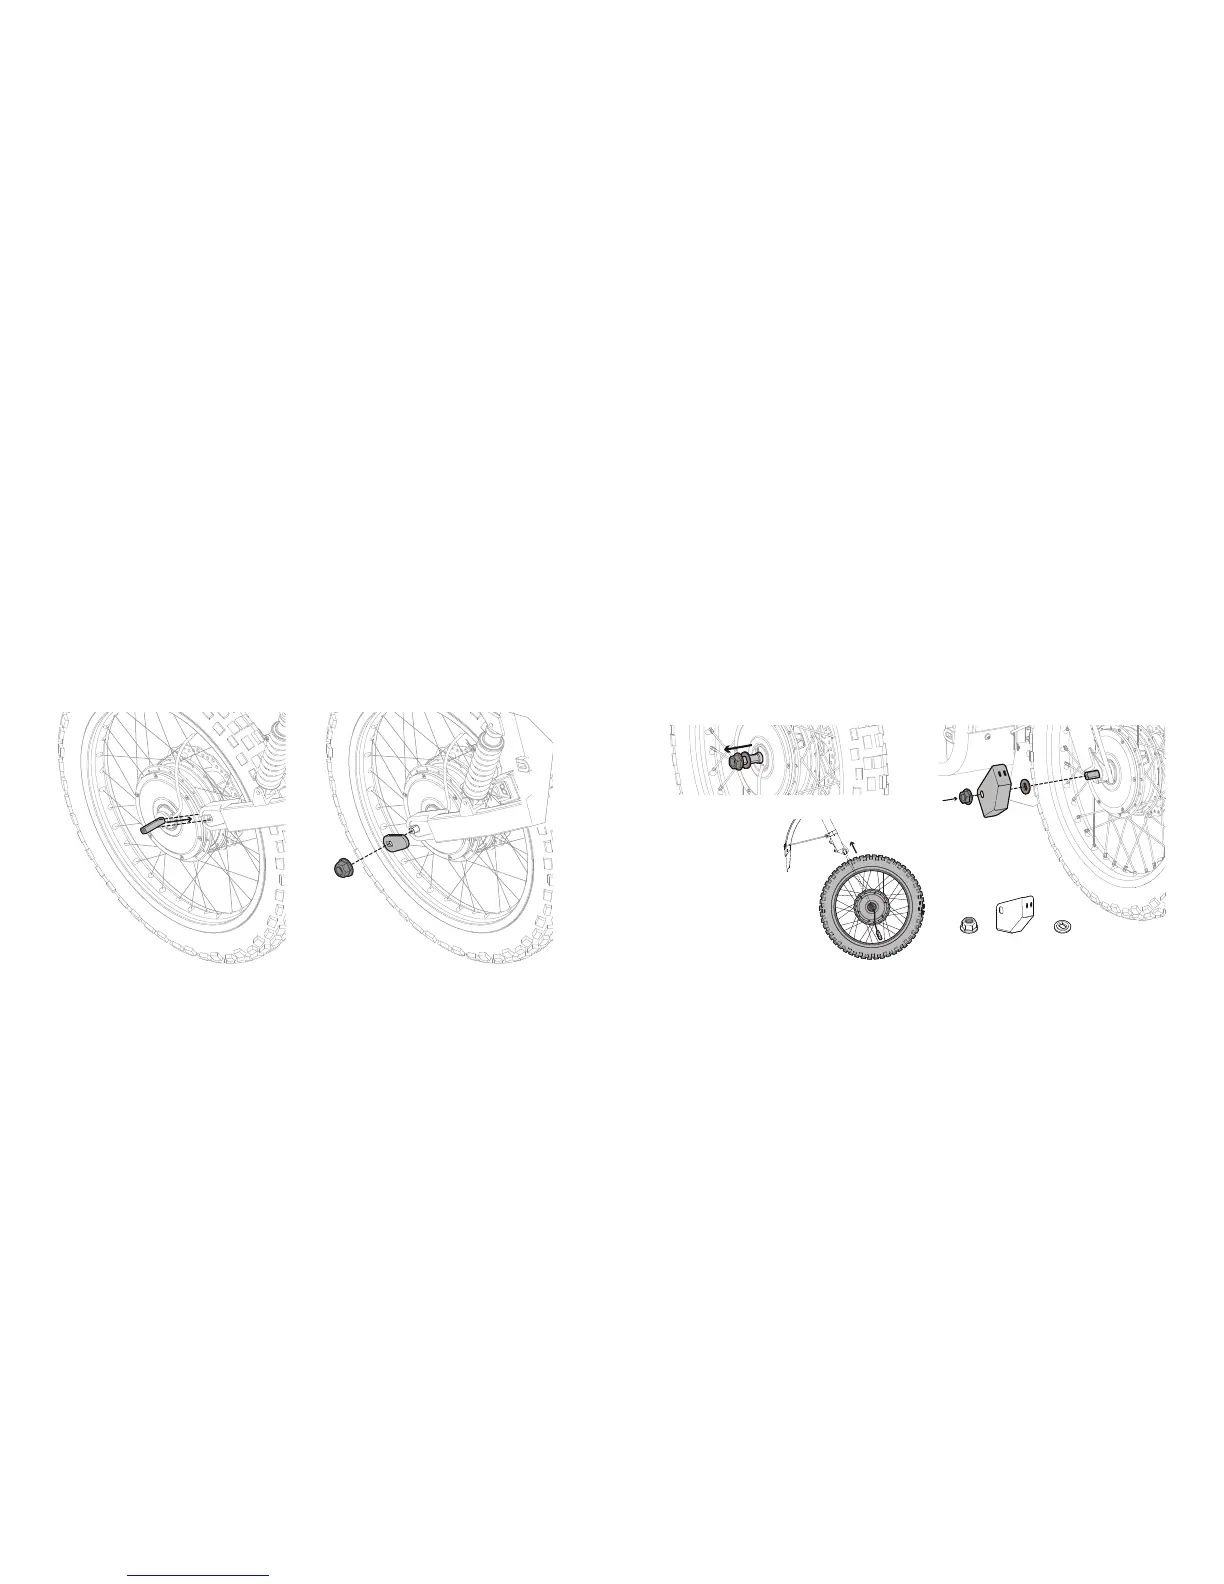
Step 10: Front Wheel
TIP: It is helpful to have a 10mm spanner on hand
to help with aligning the motor axle with the
dropout during installation.
a. Remove the nut and hat washer from the axle on
either side.
c. Re-install the hat washer onto the axle,
ensuring the flat face is facing outwards. Bend
the motor cable up towards the front of the
fork. Fix the cable guard onto the right-hand
axle and reinstall the nut on the axle. Tighten
the axle nuts with a torque wrench to 80Nm.
M8 FLANGE NUT
HAT WASHER
b. Slide the wheel into
the fork ensuring
the flat faces on the
axle line up with the
flat faces of the slot.
Ensure the cable
from the motor
is exiting to the
bottom of the wheel.
CABLE GUARD