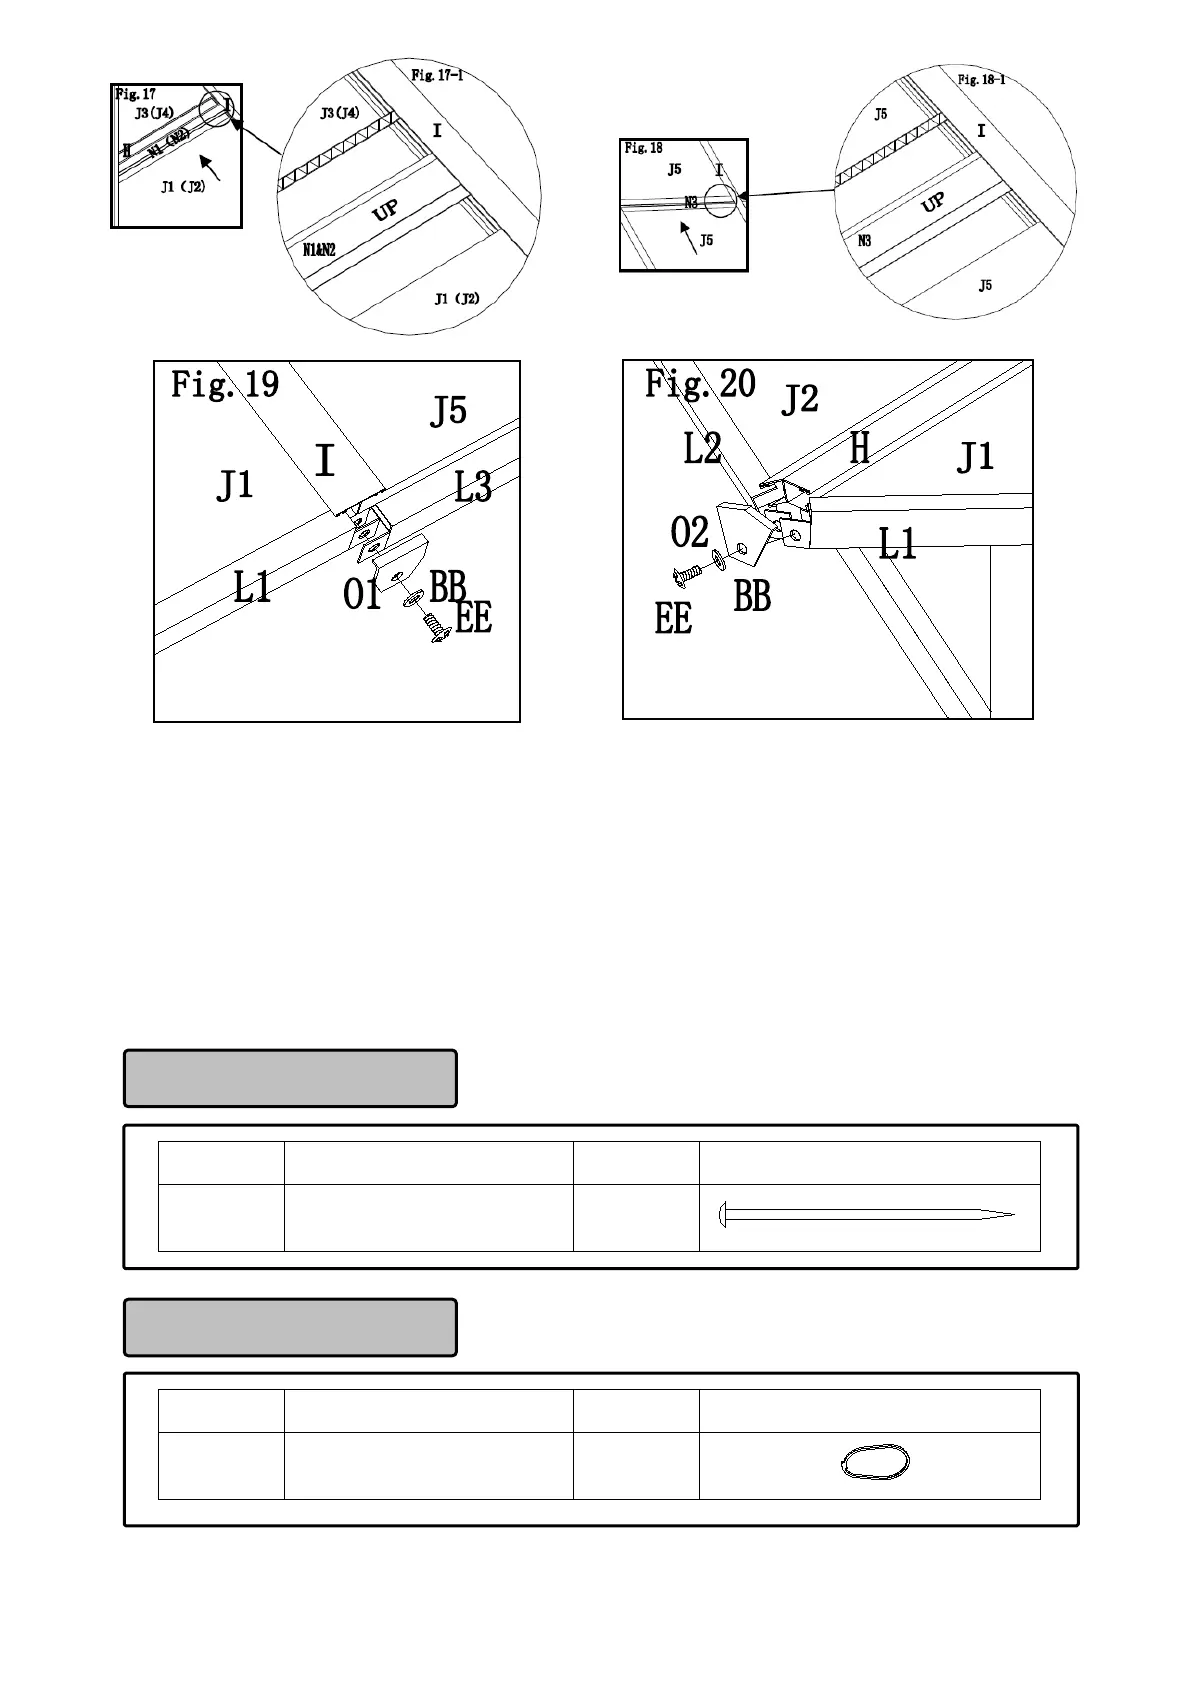
Fig.17: Insert the short roof piece 1 (J3) and short roof piece 2 (J4) into the middle beam (I) and slanted beam (H), then
insert the rails (N1 and N2) into it. Insert the long roof piece (J1) into the middle beam (I) and slanted beam (H). Repeat this
step to install the right roof pieces.
Fig.18: Insert the middle roof piece (J5) into the middle beam (I); then insert the middle rail (N3) into it. Insert the middle roof
piece (J5) into the middle beam (I).
Fig.19: Insert the braces (L1, L2 and L3) into the lower roof pieces; then secure the center plate (O1) to the middle beam (I)
through three holes with screws (EE) and flat washers (BB).
Fig.20: Fig.20: Secure the corner plate (O2) to the slanted beam (H) through three holes with screws (EE) and flat washers
(BB).
Part Description Quantity Image
GG Ring 52 PCS
Hardware Pack 4
Part Description Quantity Image
HH
Φ8X180mm Stake
16 PCS
Hardware Pack 5