\
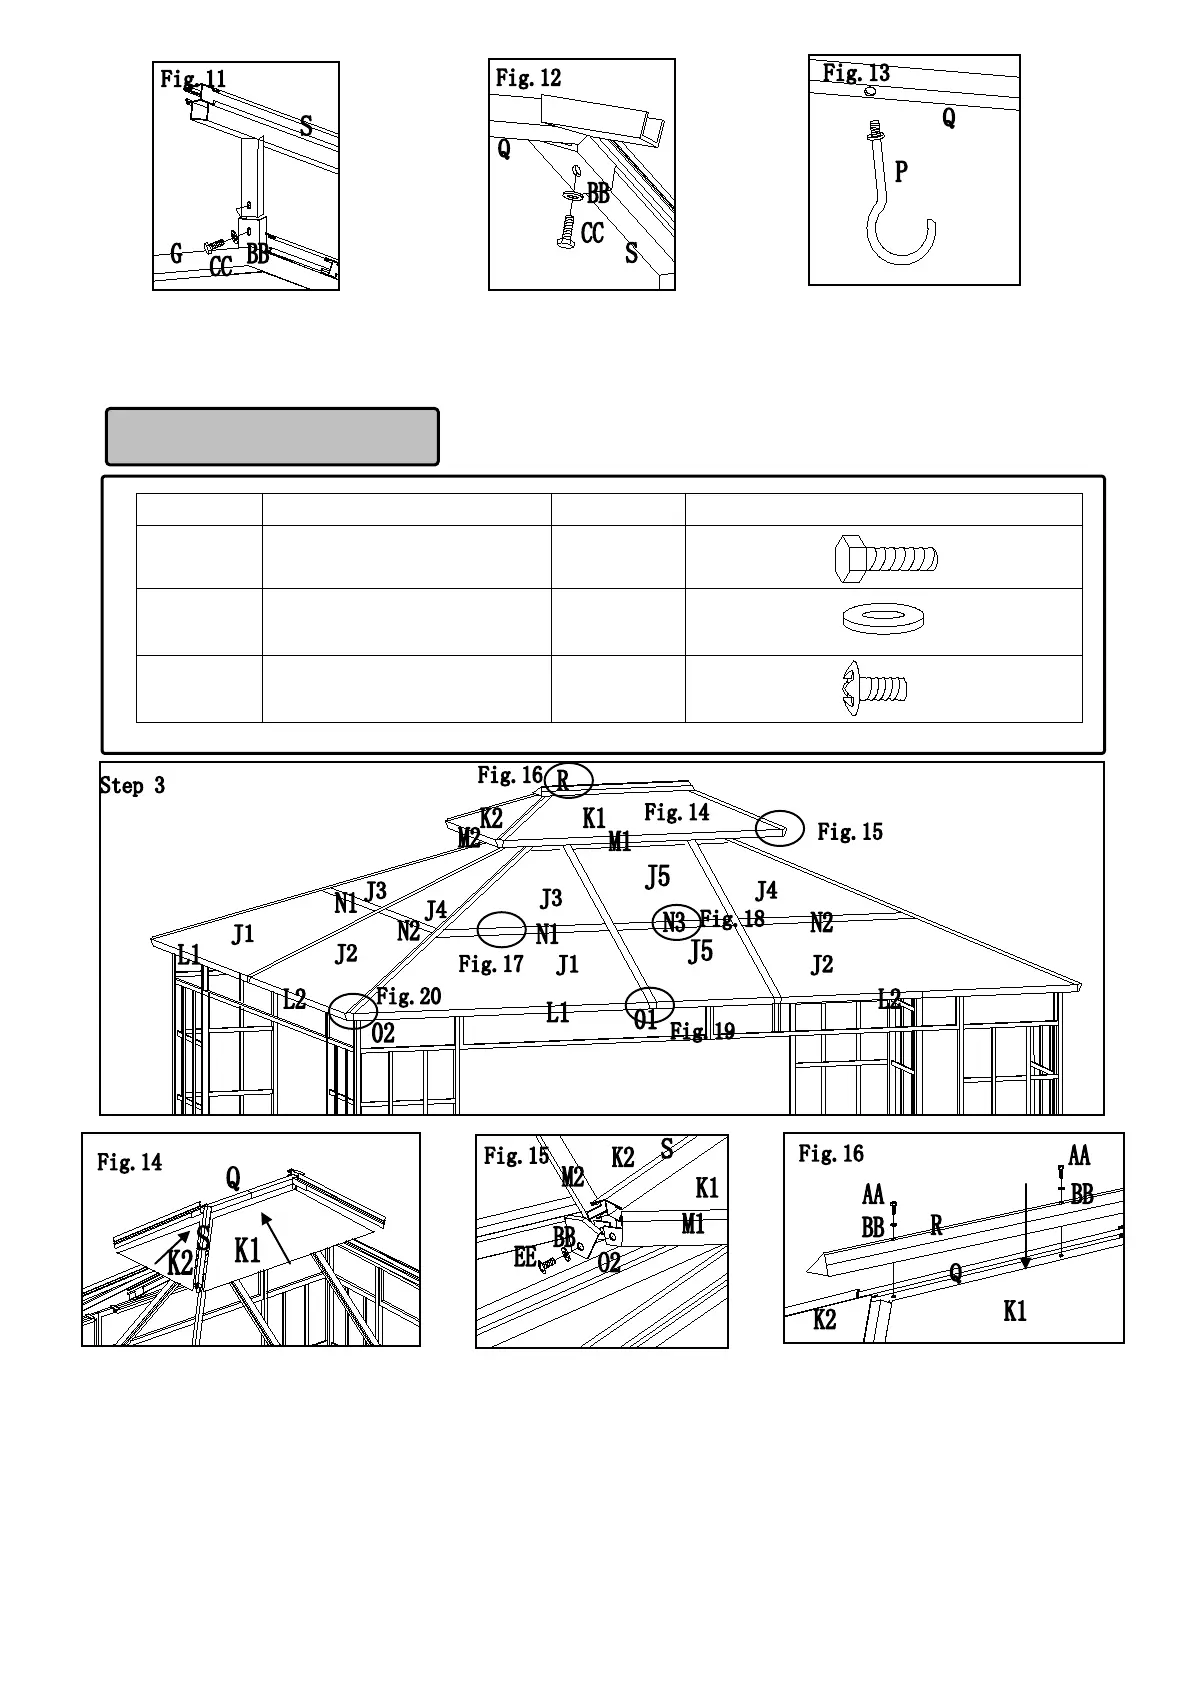
Fig.11: Secure the small slanted beam (S) to the top frame (G) with bolts (CC) and flat washers (BB).
Fig.12: Secure the small slanted beam (S) to the small top connector (Q) with bolts (CC) and flat washers (BB).
Fig.13: Attach the hook (P) to the small top connector (Q).
Part Description Quantity Image
AA M6X35 Bolt 2PCS
BB M6 Flat washer 16 PCS
EE M6X15 Screw 14 PCS
Hardware Pack 3
Fig.14: Insert the small roof pieces (K1 and K2) into the rail on the small slanted beam (S).
Fig.15: Insert the brace (M1 and M2) into the lower of the small roof piece (K1 and K2), then secure the corner
plate (O2) to the small slanted beam (S) through three holes with screws (EE) and flat washers (BB).
Fig.16: Secure the cover (R) to the small top connector (Q) with bolts (AA) and flat washers (BB).