7
3.0 ASSEMBLY INSTRUCTIONS
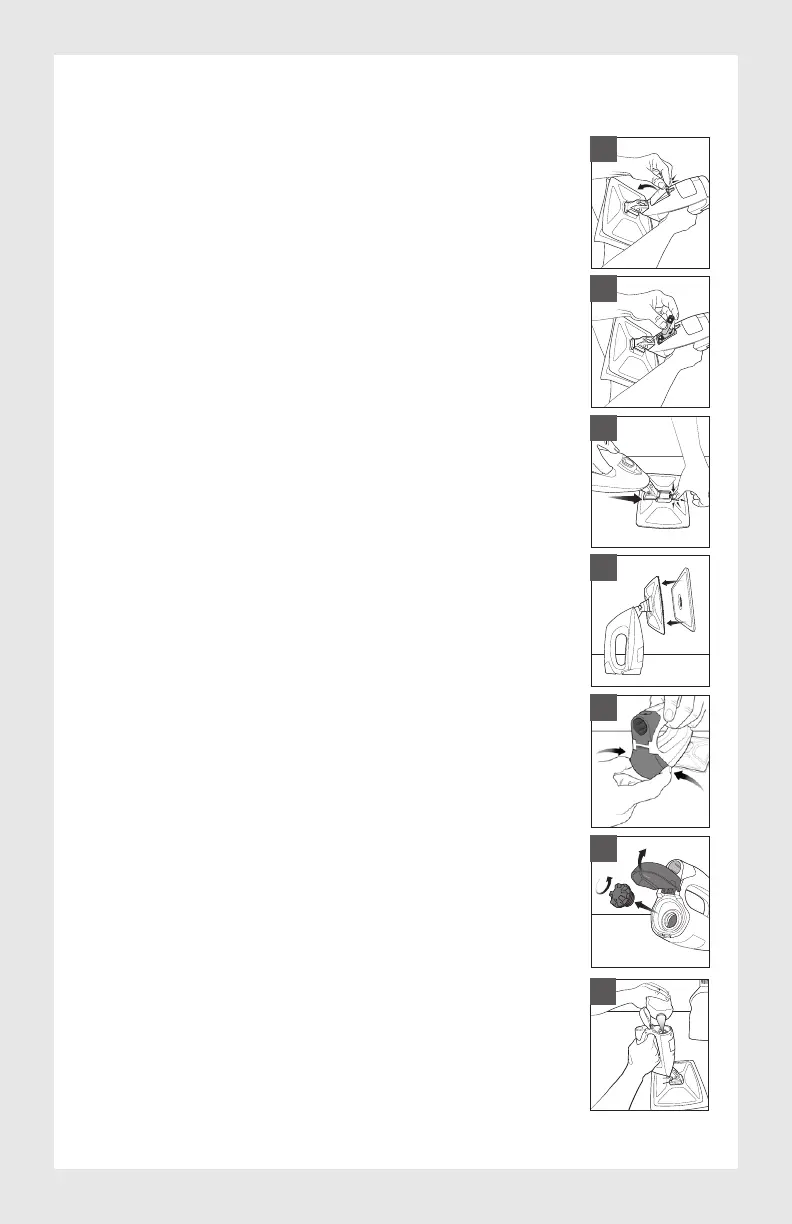
3.1 Installing the batteries
• Two AA alkaline batteries are required.
• The battery compartment is located above the cleaning uid tank.
• Open the battery compartment (picture 1) and insert
2 AA alkaline batteries in orientation shown. (picture 2).
• Close the door until you hear it click.
• When removing old batteries, always dispose of them in
accordance with applicable federal, state/provincial and local
laws and regulations.
3.2 Attaching the pad
• Attach the pad holder by sliding it around the sides of the the
pivoting spray nozzle (picture 3). Pad holder will lock in place.
• Continue to push the pad holder into place until it is locked.
• Attach the microber pad with the white side facing the device
head (picture 4).
• Once the microber pad is dirty, take it off and wash it in
accordance with the care label.
• The area that can be cleaned with one pad will vary depending
on the condition of the surface being cleaned.
3.3 Adding cleaning solution
• Access the tank to add your cleaning liquid by holding the
product upside down and squeezing the sides of the bottom to
ip open tank cover (picture 5).
• Unscrew the cap by turning counter clockwise (picture 5a).
• Fill tank with your favorite cleaning solution. Do not overll
tank. DO NOT USE with creams, gels, abrasive formulas or
chemicals containing bleach. (picture 6).
• Screw the cap on by turning clockwise. Cap should have a tight seal.
• Close the tank cover.
1
2
3
4
5a
6
5