Series
Advanced air conditioning systems
7.4 Unit Location and Installation
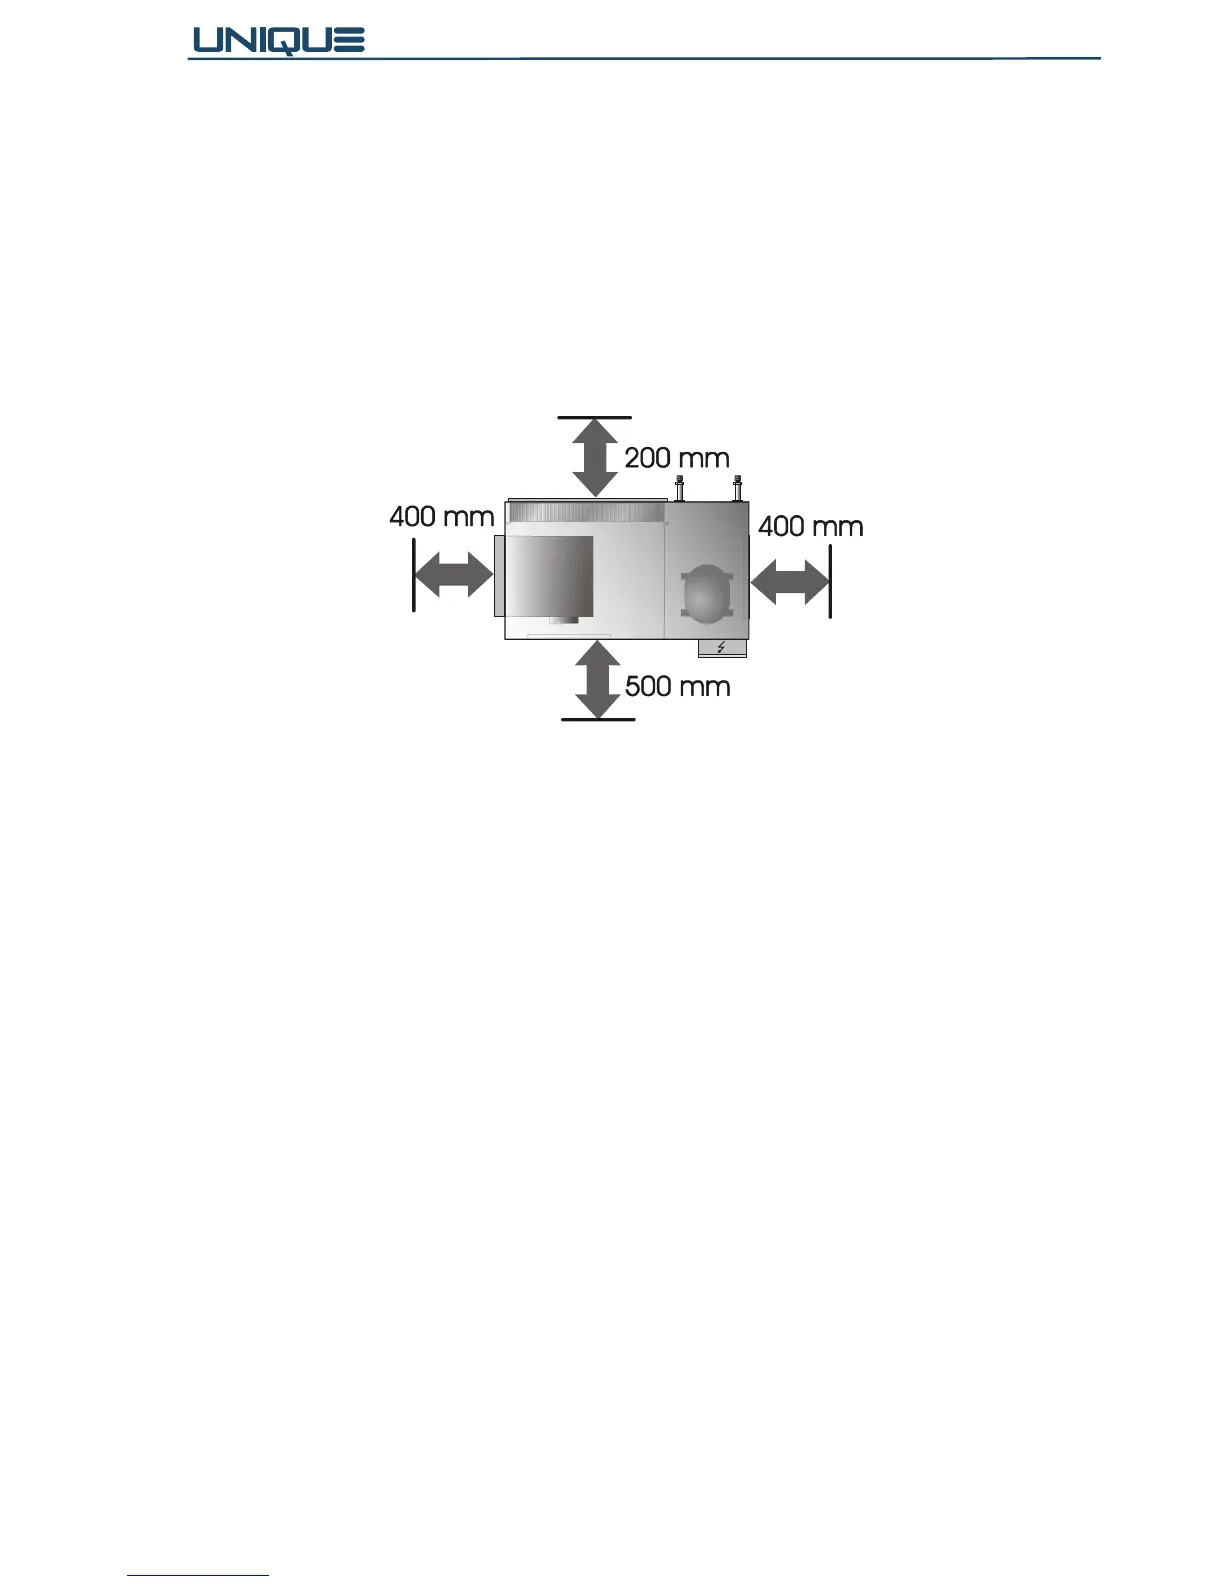
• Install the unit in a location with convenient access to the service panels, air filter and
control box. See Fig. 7-2 for minimum permissible distances to adjacent structures.
• Protect the unit from any heat source.
• Make sure that the unit is level.
• For all models, hanging installation is commonly used. Installing the unit resting on a
rigid surface is allowed.
• Carefully plan the drainage hose path at a minimum slope of 2%, avoiding sharp
bends or water traps.
Fig. 7-2
7.4.1 Installing the Unit Directly On the Ceiling (Fig. 7-1)
• Select the installation location according to the above mentioned considerations and
guidelines.
• Mark 4 holes on the ceiling, according to the unit's mounting bracket holes (10).
• Drill adequate holes and fix the long ceiling anchors (11) in position.
• Lift up the unit onto the hanger anchors through the mounting brackets. Insert four
rubber shock absorbers on the four anchors, as shown in Fig. 7-1. Lock the assembly
with the lock nut.
• Should the unit be installed on a rigid surface, stick four rubber absorbtion cushions
on the four corners of the base.
• In any mode of installation it is recommended to place under the unit an acoustic
insulation sheet (9).
7.5 Connecting the Water Piping
• Clearly identify the water supply piping.
• An external safeguard device shall be connected to the water source to limit its output
pressure (in excess of atmospheric pressure) to 6 bar.
• Use flexible hoses (4) to connect the water piping according to Fig. 7-3. For piping
size see technical data tables. Use only premium quality flexible hoses and make sure
it withstands the system water pressure. (Note: Ample pressure hoses must be installed
in tall buildings.)