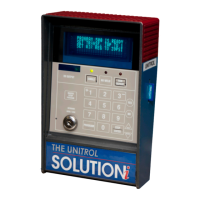
FIRST TIME CONTROL SETUP
SECTION B, PAGE 23
6. Measure the incoming line voltage inside the welding control cabinet and enter
that number here. Then press
7. The display will now show:
8. As directed
a. Place two pieces of metal that represent the middle thickness combination
that you will be welding on this welder
b. Put the metal approximately ½ way into the throat of the welder. This
will “teach” the control results of the average welding conditions and get the
control to the requested welding current quickly and accurately.
c.
9. Close the initiation foot switch or hand switches and KEEP THEM CLOSED.
The electrodes will close on the metal and the display will show:
The SOLUTIONi control will make a series of pulses, open the electrodes,
and then display.
Open the footswitch or hand switches.
Since this LEARN CURVE will be used for a long time, try to use the
correct metal combination and location as shown above. A little extra time
now will pay off in the coming years!
Set TRANSF.TAP to #1
Place metal between
ELECTRODES and then
close INITIATION SW.
Set TRANSF.TAP to #1
Keep INIT. SW closed
Reading LINE VOLTAGE
 Loading...