I/O Expansion Modules and Adapters Installation Guide
Use crimp terminals for wiring;
- Controllers offering a terminal block with pitch of 5mm: 26-12 AWG wire (0.13 mm
2
–3.31 mm
2
).
- Controllers offering a terminal block with pitch of 3.81mm: 26-16 AWG wire (0.13 mm
2
– 1.31 mm
2
).
1. Strip the wire to a length of 7±0.5mm (0.270–0.300“).
2. Unscrew the terminal to its widest position before inserting a wire.
3. Insert the wire completely into the terminal to ensure a proper connection.
4. Tighten enough to keep the wire from pulling free.
Use separate wiring ducts for each of the following groups:
o Group 1: Low voltage I/O and supply lines, communication lines.
o Group 2: High voltage Lines, Low voltage noisy lines like motor driver outputs.
Separate these groups by at least 10cm (4"). If this is not possible, cross the ducts at a 90˚angle.
For proper system operation, all 0V points in the system should be connected to the system 0V
supply rail.
Product-specific documentation must be fully read and understood before performing any wiring.
Allow for voltage drop and noise interference with input lines used over an extended distance.
Use wire that is properly sized for the load.
To maximize system performance, avoid electromagnetic interference as follows:
Use a metal cabinet.
Connect the 0V and functional ground points (if exist) directly to the earth ground of the system.
Use the shortest, less than 1m (3.3 ft.) and thickest, 2.08mm² (14AWG) min, wires possible.
The following section is relevant to Unitronics’ products that are listed with the UL.
The following models: IO-AI4-AO2, IO-AO6X, IO-ATC8, IO-DI16, IO-DI16-L, IO-DI8-RO4,
IO-DI8-RO4-L, IO-DI8-TO8, IO-DI8-TO8-L, IO-RO16, IO-RO16-L, IO-RO8, IO-RO8L, IO-TO16,
EX-A2X are UL listed for Hazardous Locations.
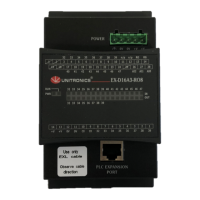
The following models: EX-D16A3-RO8, EX-D16A3-RO8L, EX-D16A3-TO16, EX-D16A3-TO16L,
IO-AI1X-AO3X, IO-AI4-AO2, IO-AI4-AO2-B, IO-AI8, IO-AI8Y, IO-AO6X, IO-ATC8, IO-D16A3-RO16,
IO-D16A3-RO16L, IO-D16A3-TO16, IO-D16A3-TO16L, IO-DI16, IO-DI16-L, IO-DI8-RO4,
IO-DI8-RO4-L, IO-DI8-RO8, IO-DI8-RO8-L, IO-DI8-TO8, IO-DI8-TO8-L, IO-DI8ACH, IO-LC1, IO-LC3,
IO-PT4, IO-PT400, IO-PT4K, IO-RO16, IO-RO16-L, IO-RO8, IO-RO8L, IO-TO16, EX-A2X, EX-RC1 are
UL listed for Ordinary Location.
UL Ratings, Programmable Controllers for Use in Hazardous Locations,
Class I, Division 2, Groups A, B, C and D
These Release Notes relate to all Unitronics products that bear the UL symbols used to mark products
that have been approved for use in hazardous locations, Class I, Division 2, Groups A, B, C and D.
 Loading...