6
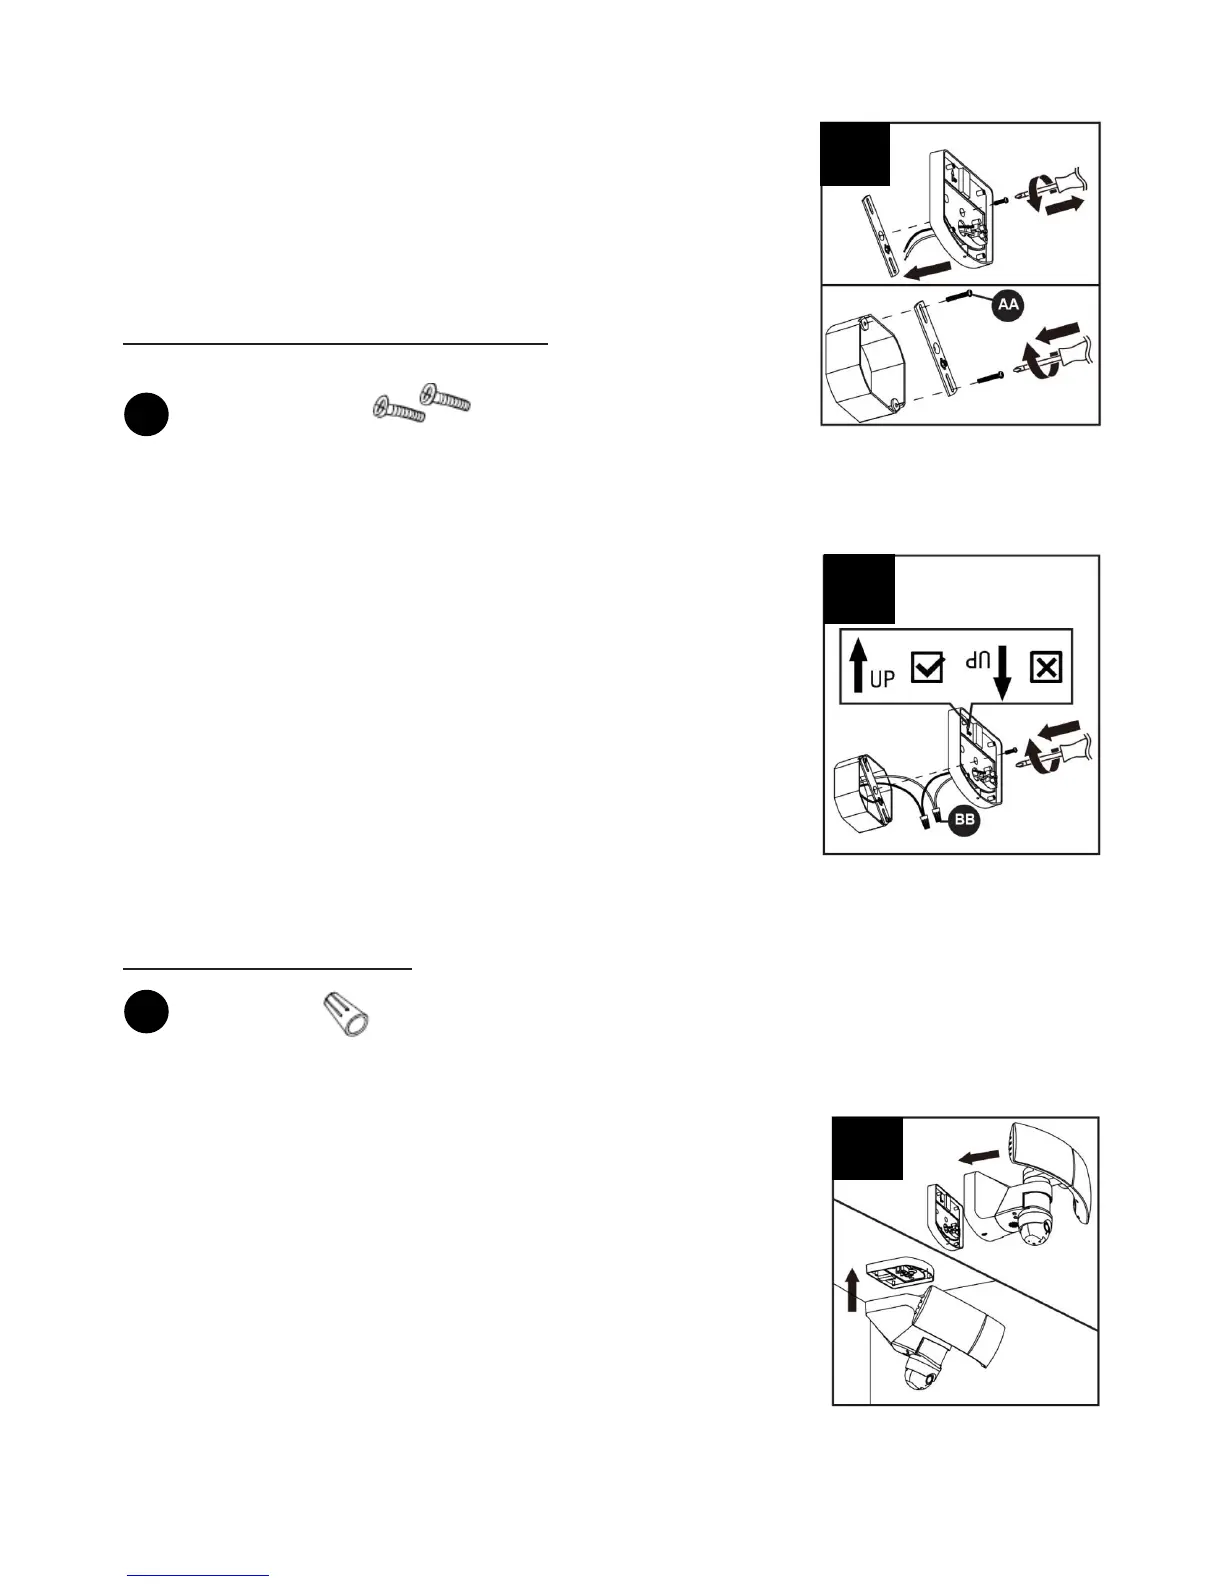
4. Remove the crossbar from the fixture mounting plate by
unscrewing the screw pre-assembled in the mounting plate.
Then attach the crossbar to the junction box (not included) with
the two crossbar screws (AA).
Note: The outlet box can be on the wall or ceiling.
s
5. Connect ground wire from the outlet box to the ground screw on
the crossbar. Connect white wire from the outlet box to the white
wire from the fixture by twisting a wire nut (BB) onto bare ends of
the wires. Connect the black wire from the outlet box to the black
wire from the fixture by twisting a wire nut (BB) onto
the bare
ends of the wires.
Make sure wire connections are secure. Carefully place wires
into junction box. Position the fixture base over the crossbar. Put
the screw removed in Step 4 through the center hole and into
the crossbar and tighten the screw until secure. DO NOT
overtighten.
If wall mounted, ensure the fixture base is mounted correctly
6. Attach the fixture body to the mounting plate. If eave mounted,
rotate the fixture to the right position.