INSTALLATION INSTRUCTIONS
WWW.UTOPIAGROUP.COM
page 6
Base Units
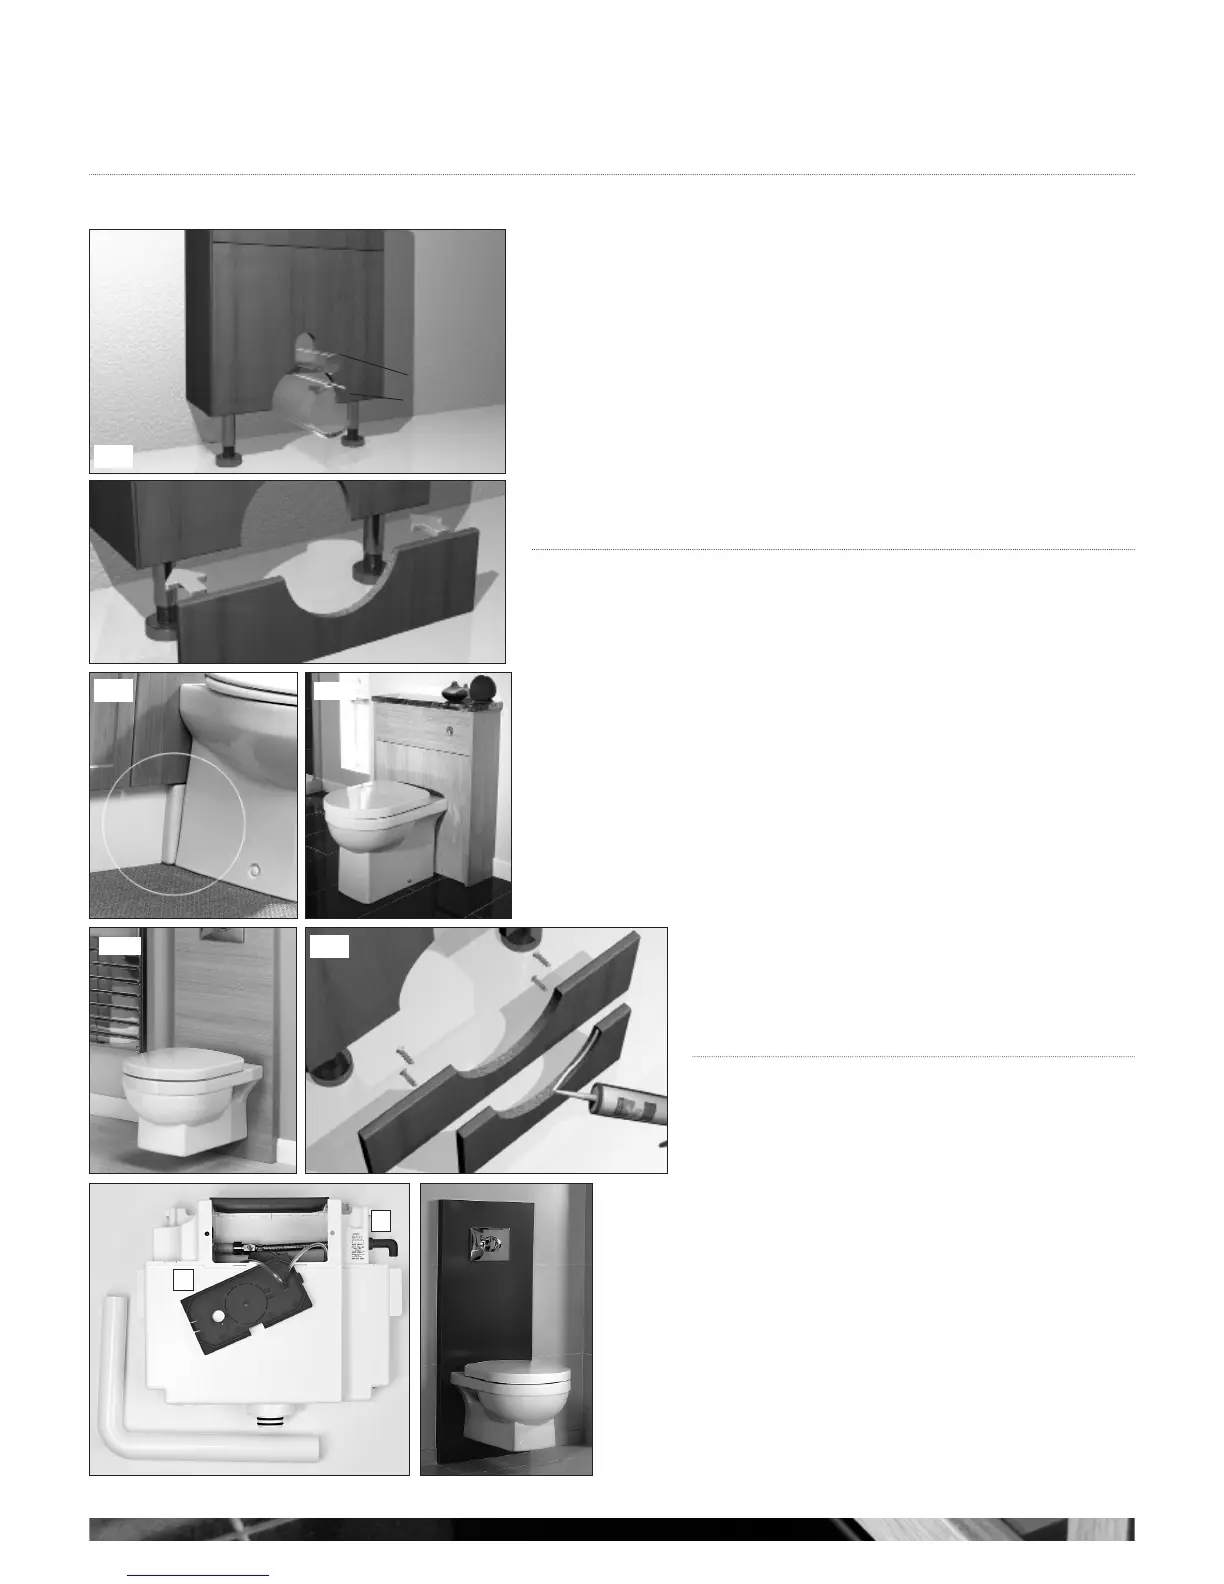
WC FASCIA CUT OUTS
When fitting a WC it may be necessary to cut the bottom fascia to accommodate both the
soil pipe and flush pipe. Use the pottery as a template (see g 1, 4 and 5).
NOTE: Wall-hung WC pottery should not be screwed directly to the fascias as the WC
units are not load carrying.
Wall-hung pottery needs a steel supporting frame which has two large bolts that need to
be accommodated within the fascia panel. The plinth must also be cut to accommodate
the soil pipe (see g 2) if applicable.
You may have to remove one of the rear legs of this unit to accommodate the waste pipe.
For aesthetic looks a pan return should be used to act as a filler between the front of the
plinth (if applicable) and the back of the WC pan (see g 3). To ensure a good fit, screw
through the back of the plinth into the pan return (see g 6).
Re-seal all cut edges.
g 2
g 3
g 6
g 1
Flush Pipe
Waste Pipe
g 4
g 5
UTOPIA PUSH BUTTON CONCEALED CISTERNS
The concealed cistern for use in Utopia Furniture is pneumatically operated by a small push
button which is both aesthetically pleasing and functional.
The cistern unit complies with the new regulations, maximum 6 litres flush volume, and is
totally installer and user friendly.
DUAL FLUSH PUSH BUTTON CISTERN FEATURES
1. 190 x 100mm clip-off service panel.
2. Complete with push-fit water inlet pipe and internal isolation valve (see g 7).
1
2
g 7
WC PANELS
These panels are held in place by your wall-hung or back-to-wall
toilet pan.
Additional fixings can be hidden behind the push button plate if
required (see g 8).
g 8