11Installation instructions for VED electric instantaneous water heater 0020149586_00
b
Caution.
Risk of damage to the unit resulting from
improper use and/or unsuitable tools.
Improper use and/or the use of unsuitable
tools may result in material damage (e.g.
water leaks).
> Always use a suitable open-end spanner to
tighten or undo threaded connections.
> Do not use pipe wrenches, extensions, etc.
b
Caution.
Possible damage caused by leaking water
connections.
Leaks may occur due to strains in the line
material.
> Take care not to strain the lines as you
tighten the water connections.
b
Caution.
Possible damage caused by unsuitable
plastic pipes.
Damage may be caused by unsuitable plastic
pipes.
> Note that when plastic pipes are used, a
pressure monitor (article no. 300768) must
be fitted. The pressure monitor is not
included in the scope of delivery.
> When using plastic pipes, ensure that they
withstand a maximum temperature of
95 °C and maximum pressure of 1 MPa
(10 bar) for at least one hour (check manu-
facturer's specifications).
> When using plastic pipes, ensure that they
conform with DIN 16893 and DIN 16892
(check manufacturer's specifications).
1
2
3
4
5
6
7
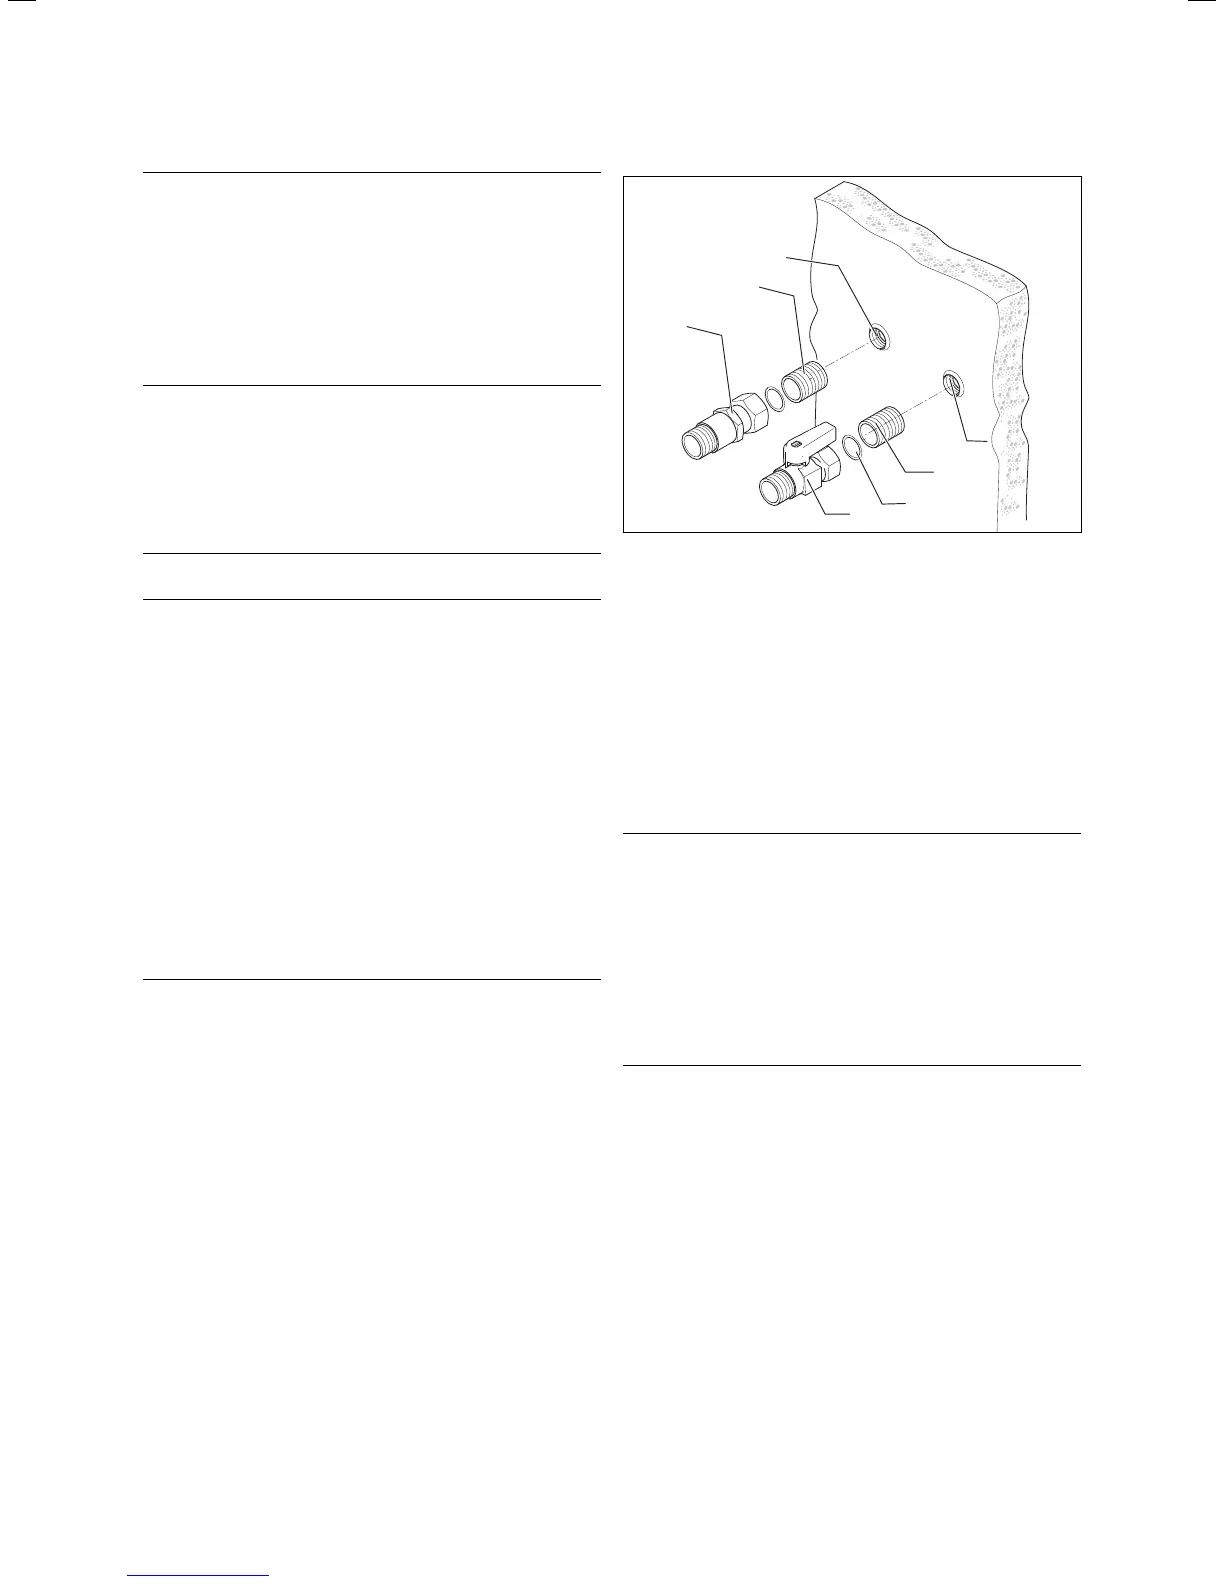
Fig. 4.9 Water connections
> Put hemp on the two double nipples (2 and 6) and
use the connections to screw the double nipples to
the wall (1 and 7).
> Insert the seals (3) in the cap nuts of the cold (4) and
hot water connections (5).
> Screw the cold water connection piece (4) to the cold
water connection double nipple (2) in the wall (1).
> Screw the hot water connection piece (5) to the hot
water connection double nipple (6) in the wall (7).
> Insert a seal in the cap nut of the unit-side hot water
connection.
b
Caution.
Risk of damage due to pipes being blocked
by foreign bodies in the water.
A water filter that stops foreign bodies enter-
ing the unit must be fitted to the cold water
flow. The unit must not be used without a
water filter. A water filter has been fitted
inside the cold water pipe at the factory.
> During installation, check that the water fil-
ter is present.
> Check that the cold water filter fitted at the factory is
in the correct position in the unit-side cold water con-
nection. The cold water filter is an additional seal on
the cold water side.
Installation 4