©2015 Toni Clark practical scale GmbH Zeiss-Str.10 D-32312 Lübbecke Tel. 0049 5741/5035 Fax. 05741/40338 www.toni-clark.com
Instructions Valach VM 120 B2-4T
18
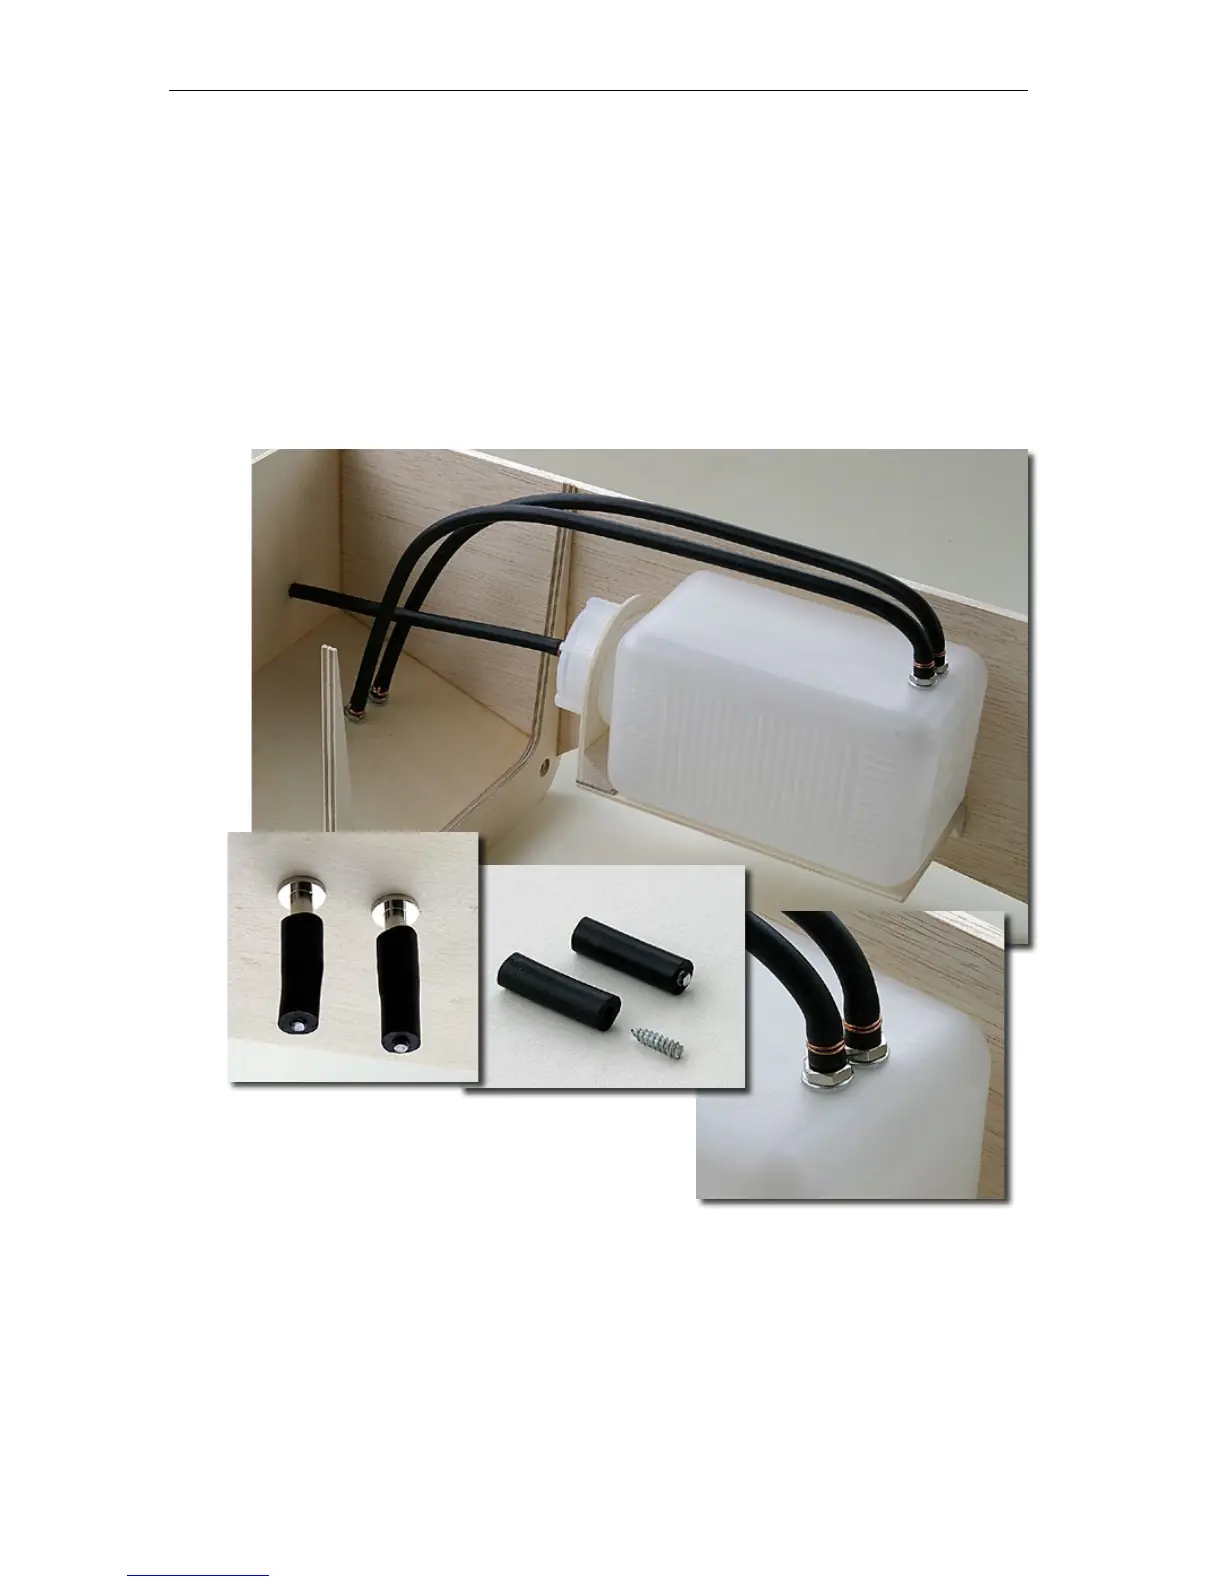
Fuel tank connections
Make two air vents made with fuel tubing, tted to two single sided nipples in the tanks
topside, central at the rear end. These two air vent lines must be led forward over the tank
and then down into the fuselage oor at the cooling air outlet of the engine cowling. One
of these vent lines (does not matter which) is used to ll the tank.
These two lines are always shut o, with two 3.5 mm self tapping screws 15 mm long with
heads removed, while the model is ying or otherwise parked.
Because the threads are so coarse, enough air can enter the tank, but even during violent
stunting no fuel will be lost. The saving in fuel is considerable! This system is simple and
100% reliable, also during lling the tank, you will
not spill fuel over your model. The double sided
tank nipple from the clunk lter is best placed in
the middle of the tank cap.
Note: Because of the better visibility on the pictures I used the black tubing.
In my models, the
lighter Tygon tubing is used. I use the heat resistent black tubing for the smoke nipple on the header.
 Loading...