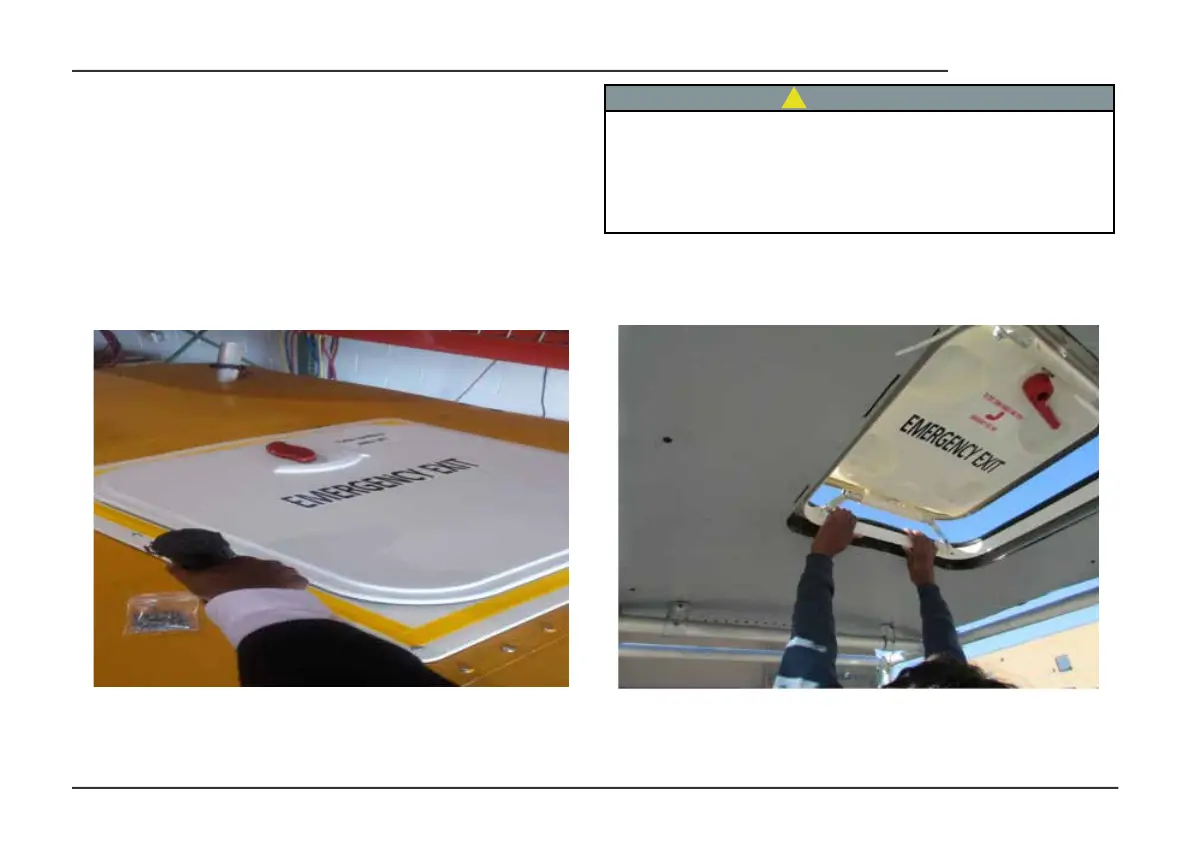
SMART HATCH
18
3.2.6. From the exterior of the vehicle,
screw in (20) #10 x 1 hex head self-drill-
ing screws into frame of the hatch. The
frame has dimples molded into the sur-
face to use as a target for the screw loca-
tion. Make sure the screws are secured
tightly to properly seal the butyl tape.
3. 2 .7. Push up on hatch to make sure
it is firmly attached to bus roof.
The roof hatch must be installed onto a smooth surface
to allow proper sealing of butyl tape between frame and
outer roof material. Any variations or deviations can result in
water intrusion, proper roof preparation is the responsibility
of the installer.
CAUTION
(Photo 20: SMART Hatch Assembly) (Photo 21: SMART Hatch Assembly)