Page 10
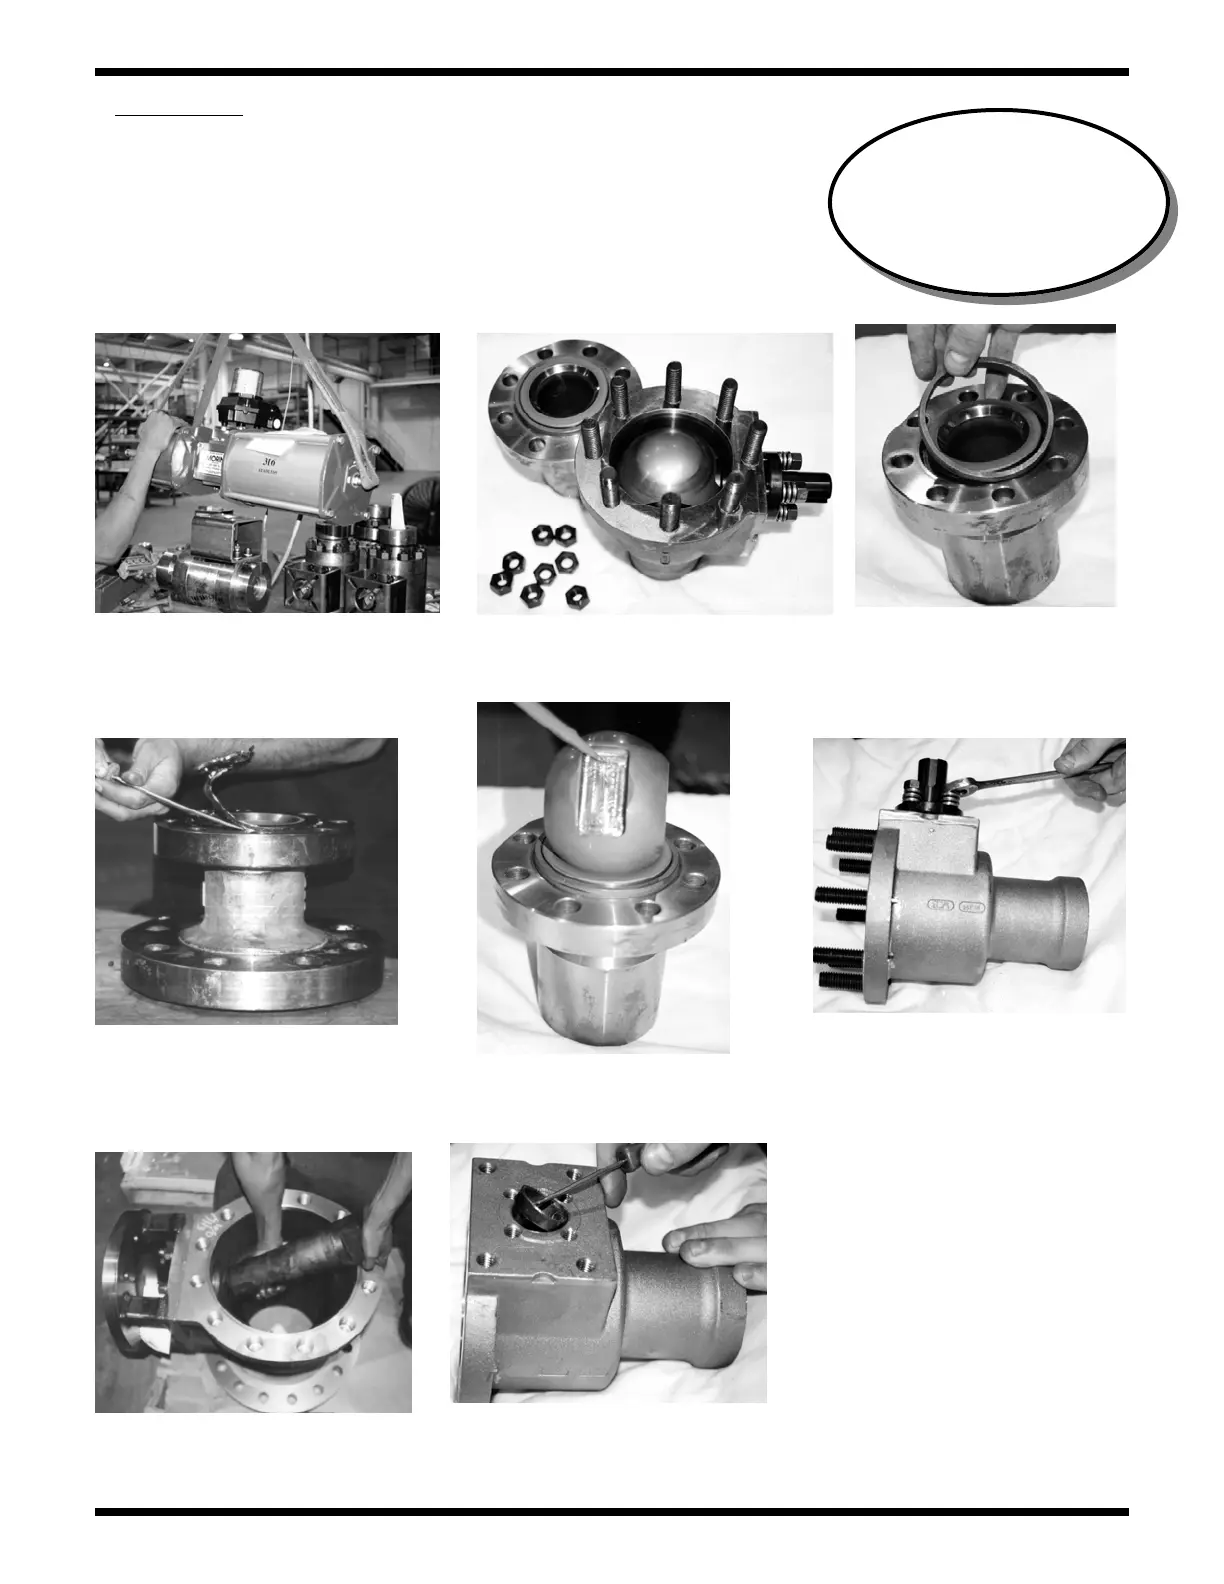
DISASSEMBLY (CONTINUED)
1) Valve shall be cycled closed.
2) Orientation and position shall be marked on valve components, par-
ticularly the side of the ball matched to the seat, prior to removal.
3) Marking should be indelible to the valve cleaning process, but should
not damage the parts (i.e. NO STAMPING).
5) Remove body nuts and sepa-
rate body and end cap.
4) Avoiding excessive force,
remove the entire actuator
assembly.
6) Remove body seal or
gasket, depending upon
valve design
7) Remove body gasket.
(if applicable)
8) Remove ball, after mark-
ing orientation and protect
from possible damage.
9) Remove gland nuts, gland
spring and gland.
10) Remove Stem.
11) Remove packing, using
packing pick or equivalent.
CAUTION!
Balls are matched to end
caps – these matched pairs
should never be separated
or interchanged.
12) Inspect ALL components,
note defects and replace if re-
quired, then de-grease using a
solvent in preparation for
re-assembly.