8 9
4.2. Wireless Wi‑Fi6E network enabler
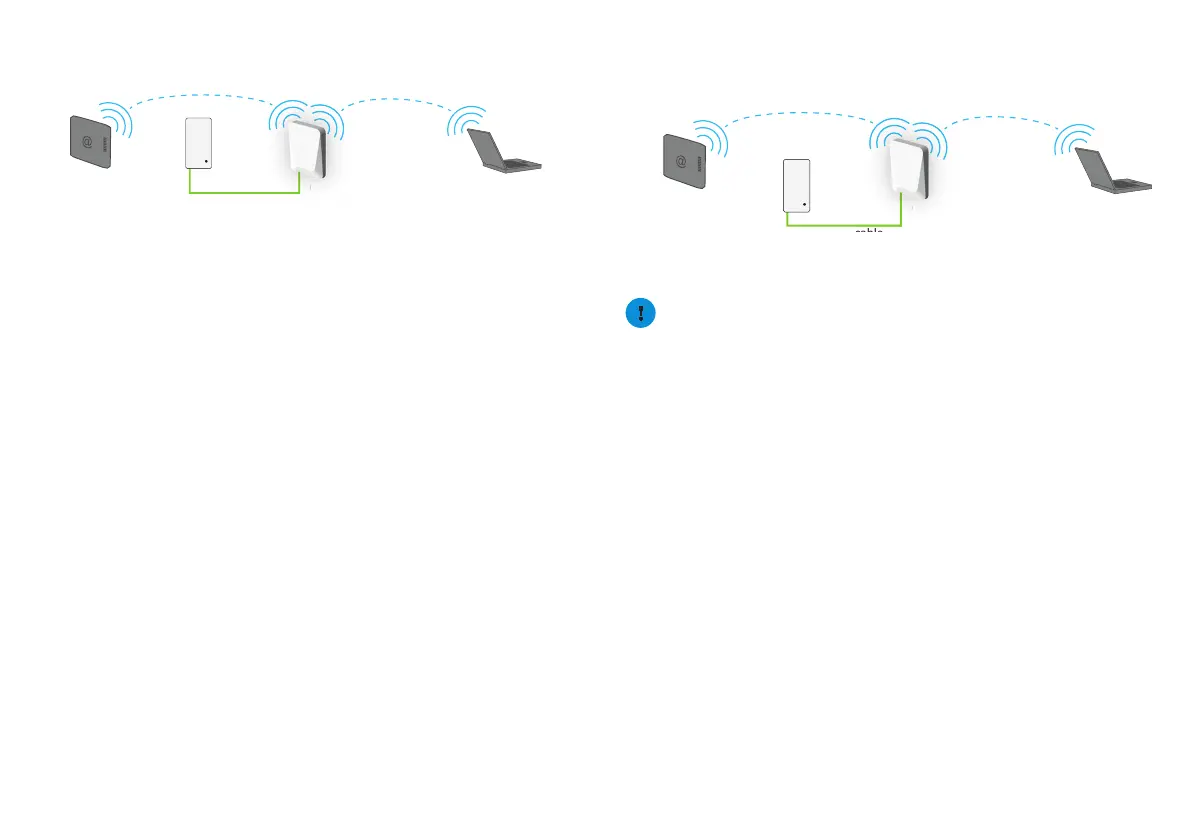
This scenario allows you to add (extra) Wi-Fi 6 coverage using the OWM7111.
OWM7111IOT
ernet gateway
Wi-Fi device
Wi-Fi 6E
Ethernet cable
WM71
a
e
POE
POE
LAN
PoE
adapter
Wi-Fi 6E
Step 1: Set up the OWM7111
1 Posion your OWM7111 half-way between your Internet gateway (or extend-
er) and your Wi-Fi devices.
2 Plug the PoE adapter into an electrical socket.
3 Use an ethernet cable to connect the adapter’s PoE port to the OWM7111’s
WAN port. This provides power to the OWM7111.
4 Wait unl the Power LED is white and the WiFi LED is solid green
5 Pair the OWM7111 with your Internet gateway (or extender) using WPS. For
detailed instrucons, see “5.2. Pairing the OWM7111 with your Internet
gateway”.
Step 2: Connect your Wi‑Fi devices
If your Wi-Fi device:
• Supports WPS, use WPS to pair it with the OWM7111. For more informaon,
see “5.4. Pairing Wi-Fi devices to your OWM7111”
• Does not support WPS, congure it with the Wi-Fi network name (SSID) and
wireless key retrieved from the OWM7111 QR code present on the label.
Step 3: Connect an Ethernet device (optional)
You can use the OWM7111’s Ethernet LAN port to connect Ethernet devices (for
example, a Set-Top Box, a NAS drive or computer) to your network.
4.3. EasyMesh network extender
This scenario allows you to extend Wi-Fi coverage in your space by
retransming Wi-Fi messages from your exisng Wi-Fi EasyMesh network.
OWM7111IOT
ernet gateway
Wi-Fi device
Wi-Fi 6E
EasyMesh
Ethernet cable
(not included)
WM71
POE
POE
LAN
PoE
adapter
Wi-Fi 6E
EasyMesh
Requirements
Your Internet gateway or another EasyMesh-capable Wi-Fi device must be
enabled and congured as the EasyMesh controller.
Step 1: Set up the repeater and onboard to the EasyMesh network
1 Posion your OWM7111 half-way between your Internet gateway (or extend-
er) and your Wi-Fi devices.
2 Plug the PoE adapter into an electrical socket.
3 Use an ethernet cable to connect the adapter’s PoE port to the OWM7111’s
WAN port. This provides power to the OWM7111.
4 Wait unl the Power LED is white and the WiFi LED is solid green (turns o
aer 3 minutes).
5 Enable EasyMesh on your OWM7111 if not done yet. For more informaon,
see “5.7. Congure your OWM7111 to your needs”.
6 Onboard the OWM7111 to the EasyMesh network using WPS. For detailed
instrucons, see “5.3. Joining your OWM7111 with an exisng EasyMesh
network”.
Step 2: Connect your Wi‑Fi devices
Because the OWM7111 now uses the same Wi-Fi sengs as the EasyMesh
network, Wi-Fi devices that were already connected to the network will also be
able to connect to the OWM7111, and vice versa.
Step 3: Connect your Ethernet devices (optional)
You can use the OWM7111’s Ethernet LAN port to connect Ethernet devices (for
example, a Set-Top Box, a NAS drive or computer) to your network.
 Loading...