www.vax.co.uk
4
assembly
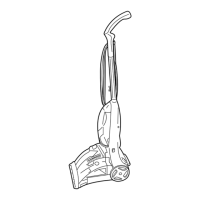
3. Assembly
Attach upper handle
Stand the base in the upright position. Assemble the mid
section onto the base, taking care not to trap internal
mains wire. (Fig.3/1).
Insert the two nuts into the recesses located on the left
and right sides of the base. While holding the nuts in place,
insert the two medium length screws through the front of
the mid section and tighten. (Fig.3/2).
Slide the upper handle down onto the unit. Insert the nut
into the recess in the back of the upper handle. While
holding the nut in place, insert the long screw through the
front of the upper handle and tighten.
Run the mains wire above the upper cord hook and secure
with the cord clip (Fig.3/3).
Align tabs on tool caddy with slots on midsection and snap
into place (Fig.3/4).
Place nut into recess on tool caddy and hold into place.
Press handle release with your other hand to tilt the
midsection backwards (Fig.3/5).
Place screw through centre of lower midsection and
tighten (Fig.3/6).
Tool Caddy Use
Wrap the cord around the upper and lower cord clips.
Fig.3/1
Fig.3/4
Fig.3/5
Fig.3/2
Fig.3/6
 Loading...