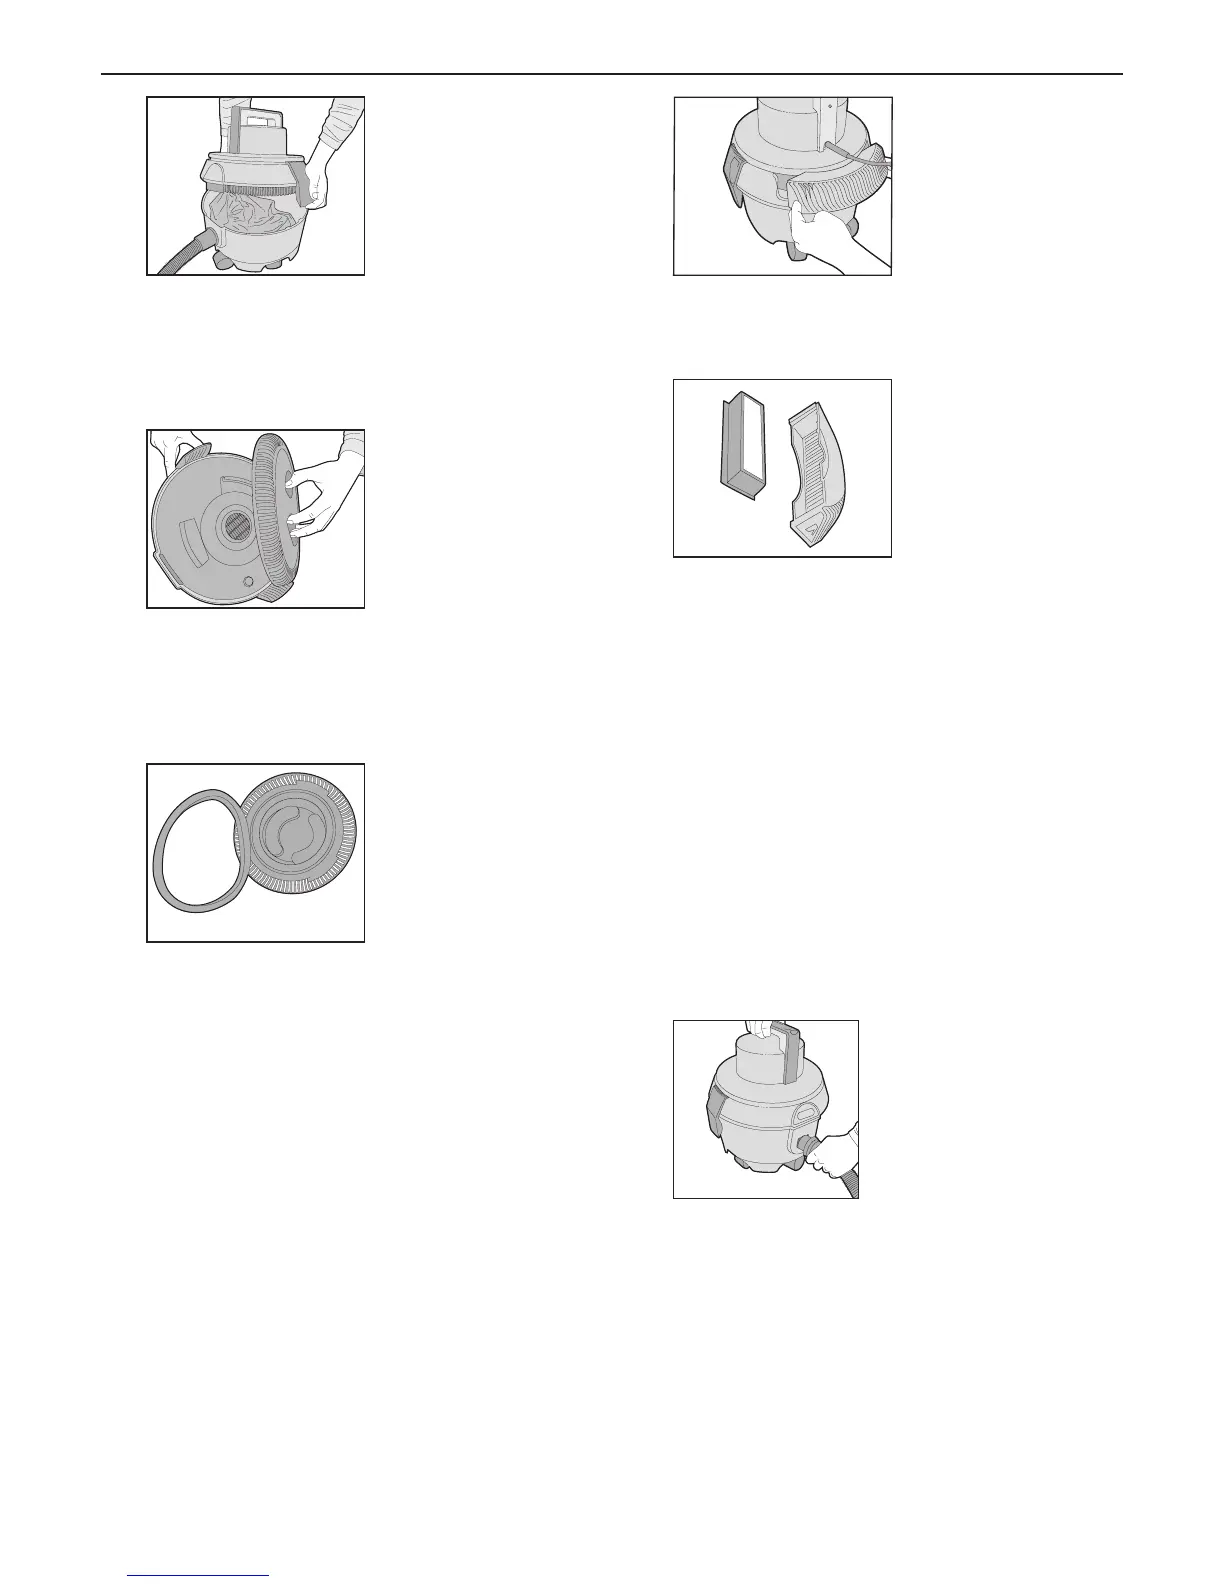
Fig.7/7
3. Remove the post-motor filter (Fig.7/8).
Fig.7/8)
4. The post-motor filter should be replaced every
9-12 months.
8. Clearing Blockages
1. Switch the vacuum cleaner off and disconnect the
power plug from the electrical outlet.
2. The flexible hose can be disconnected from the
vacuum cleaner by rotating anti-clockwise and
pulling away from the machine (Fig.8/1). Remove
any blockages found then reconnect the hose
securely.
Fig.8/1
7
Dust Bag & Filters: Removal & Replacement/Clearing Blockages
Fig.7/4
2. The pre-motor filter is found on the underside of
the top cover. To release the filter turn the cover
anti-clockwise and lift away (Fig.7/5).
Fig.7/5
3. The pre-motor filter is protected by a foam filter
sleeve. This can be washed using cold water,
leaving it to fully air dry before replacing (Fig.7/6).
Fig.7/6
4. The pre-motor filter should be replaced every
9-12 months.
Post-motor Filter
1. Located at the rear of the vacuum cleaner is a
post-motor filter which can also be removed and
replaced.
2. Push in on the latches on both sides of the filter
cover to release to post-motor filter (Fig.7/7).