16
HARD FLOOR SWIPE*
FAN TOOL*
ABOVE FLOOR TOOL*
ARTICULATING HAND*
14
THE TOOLS INCLUDED WITH YOUR
VACUUM MAY VARY BY MODEL.*
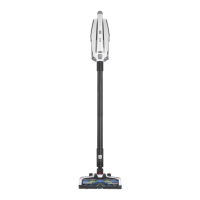
1. THE SUPPORT BRACKET SHOULD BE INSTALLED NEAR A PLUG WHERE THE CHARGER
CORD CAN EXTEND FROM THE SUPPORT BRACKET DOWN TO THE PLUG IN THE WALL.
2. PLACE SUPPORT BRACKET ON THE UNIT AND USE PROVIDED DOUBLE SIDED TAPE
TO ADHERE THE SUPPORT BRACKET TO THE WALL AT THE HEIGHT OF THE CORDLESS
STICK VAC. APPLY EVEN PRESSURE WHEN ADHERING THE SUPPORT BRACKET TO
THE WALL.
SUPPORT BRACKET*
SUPPORT BRACKET*
1. The support bracket should be installed near a plug where the charger cord can extend from the
support bracket down to the plug in the wall.
2. Place support bracket on the unit and use provided double sided tape to adhere the support bracket to
the wall at the height of the cordless stick vac. Apply even pressure when adhering the support bracket
to the wall.
TOOLS
THE TOOLS INCLUDED WITH YOUR
VACUUM MAY VARY BY MODEL.*
 Loading...


