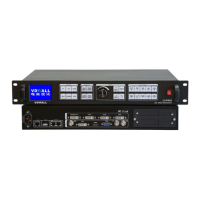
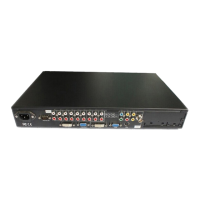
LVP603
LVP603
LVP603
LVP603 User
User
User
User
’
’
’
’
s
s
s
s Manual
Manual
Manual
Manual
---------------------------------------------------------------------------------------------------
---------------------------------------------------------------------------------------------------
---------------------------------------------------------------------------------------------------
---------------------------------------------------------------------------------------------------
LED
LED
LED
LED VIDEO
VIDEO
VIDEO
VIDEO PROCESSOR
PROCESSOR
PROCESSOR
PROCESSOR
20
the four sets of LVP603
LVP603
LVP603
LVP603 are set as below respectively:
1# LVP603
LVP603
LVP603
LVP603
Vert_In_Str
Vert_In_Str
Vert_In_Str
Vert_In_Str
=
=
=
= 0
0
0
0
2# LVP603
LVP603
LVP603
LVP603
Vert_In_Str
Vert_In_Str
Vert_In_Str
Vert_In_Str
=
=
=
= 0
0
0
0
3# LVP603
LVP603
LVP603
LVP603
Vert_In_Str
Vert_In_Str
Vert_In_Str
Vert_In_Str
=
=
=
= 540
540
540
540
4# LVP603
LVP603
LVP603
LVP603
Vert_In_Str
Vert_In_Str
Vert_In_Str
Vert_In_Str
=
=
=
= 540
540
540
540
8.
8.
8.
8. Audio
Audio
Audio
Audio configurations
configurations
configurations
configurations
LVP603
LVP603
LVP603
LVP603 supports 4 -channel stereo audio switch. Of which, 2
channels are DP and HDMI audios, the other 2 channels are AD1,
AD2 external input audio. AD1 and AD2 can be mapped to the
anyone of all video inputs, and will be switched synchronous to the
selection of video input signals.
If HDMI
HDMI
HDMI
HDMI (
(
(
( DP)
DP)
DP)
DP) is external input audio, when switched to another
signals, you should choose the external audio signal input or HDMI
HDMI
HDMI
HDMI
(
(
(
( DP)
DP)
DP)
DP) itself audio signal.
Item 25: “
Audio1
Audio1
Audio1
Audio1 Config
Config
Config
Config
”
Press “ ← ” or “ → ” to select 1 channel signal from all video input
signals ,
,
,
, map AD1
AD1
AD1
AD1 external input as audio input signals to the video
signals in this channel, then press “ Enter
Enter
Enter
Enter ” to save the settings.
Item 26: “
Audio
Audio
Audio
Audio 2
2
2
2 Config
Config
Config
Config
”
Press “
←
” or “
→
” to select 1 channel signal from all video input
signals ,
,
,
, map AD
AD
AD
AD 2
2
2
2 external input as audio input signals to the video
signals in this channel, then press “ Enter
Enter
Enter
Enter ” to save the settings.
Notes:
Notes:
Notes:
Notes: AD1,
AD1,
AD1,
AD1, AD2
AD2
AD2
AD2 can
can
can
can ’
’
’
’ t
t
t
t be
be
be
be mapped
mapped
mapped
mapped to
to
to
to the
the
the
the video
video
video
video input
input
input
input signals
signals
signals
signals in
in
in
in
the
the
the
the same
same
same
same channel.
channel.
channel.
channel.
9.
9.
9.
9. Exit
Exit
Exit
Exit setup
setup
setup
setup
Item 27: “
Exit
Exit
Exit
Exit Setup
Setup
Setup
Setup
”
Press “
↑
” to move to the last item: “
Exit
Exit
Exit
Exit setup
setup
setup
setup
” , then press “
←
”
or “
→
” to select “ YES
YES
YES
YES ” , then press “ Enter
Enter
Enter
Enter ” to exit setup mode.
If you press “ Set
Set
Set
Set up
up
up
up ” key while in any setup mode, the system will
skip to the No.27 item.