EasyManua.ls Logo

VECELO KHD-BTJ-RT02 - User Manual

VECELO KHD-BTJ-RT02
2 pages
Print Icon
To Next Page IconTo Next Page
Loading...
Bed Frame Installation Manual
2
1
3
3
3
4
4
T
Recommended
eam
Assembly
H
I
G
G
1
9a
KHD-BTJ-RT&RF&RQ02
Lot No.: CY-No.1
SKU:
1
4
D
D
B
I
B
3
I
1
3
5
6
10
9
7
7 x2
8
8
8
4
4
3
2
12
11
Tips:
Must Keep the Brackets
Lay Toward the Ground
Color:Blue /Beige/Gray
Componets
Screws &Tools
Return Policy
We control manufacturing and distribution ourselves, ensure the quality.
Send email with your question to
support@vecelo.com
Resend within 24 hours
Issue resolved
Send email with your issue to
support@vecelo.com
Respond within 24 hours
Issue resolved
Missing parts Other issues
Trouble shooting:
Check all the components & screws before assembly. Do not install in case part is missing,
contact us to get.Send email with your question to support@vecelo.com. We will resend
within 24 hours.
1
2
3
4
5
6
7
8
9
10
A
D E
B
11
12
1pc 1pc
2pcs 1pc
2pcs
3pcs
1pc
1pc
4pcs
1pc
1pc
1pc
2pcs 4pcs 5pcs 4pcs 2pcs
2pcs
1pc
1pc 1pc 2pcs
C
F
I J
G
H
We believe you will absolutely love your new item. But if for some reason you want to return,
please contact us directly before you decide to return your product. Our customer service
organization can answer most concerns and assist you with any questions you may have about
your new item, please email us first at: support@vecelo.com.
The item must be returned within 30 days of delivery for a full refund. The item must be
returned in good condition, in original box, with all original proof of purchase, parts and
3
3
Question and Answer IconNeed help?

Do you have a question about the VECELO KHD-BTJ-RT02 and is the answer not in the manual?

Summary

Product Components

Component Identification

Lists and identifies all 12 main structural components of the bed frame with their quantities.

Hardware and Tools

Screws and Fasteners

Details all screws, bolts, and fasteners (A-H) required for assembly, along with their quantities.

Assembly Tools

Lists the included Allen Key (M5) and any other necessary tools for assembly.

Assembly Instructions

Step 1: Foot Assembly

Instructions for assembling the feet of the bed frame using specified components and hardware.

Step 2: Frame Base Setup

Guidance on setting up the base structure, likely involving connecting side rails to head/foot boards.

Step 3: Central Support Assembly

Details on attaching the central support beams and cross slats to the bed frame structure.

Step 4: Attaching Headboard

Instructions for securely attaching the headboard to the main bed frame assembly.

Step 5: Installing Legs

Steps for installing the support legs, including a tip to adjust pre-installed screws.

Step 6: Final Tightening

Guidance on the final tightening of all screws and components for structural integrity.

Step 7: Adding Slats

Instructions for placing and securing the bed slats onto the frame for mattress support.

Step 8: Securing Slats

Instructions on how to secure the bed slats to prevent movement, possibly using specific hardware.

Step 9: Final Check

Final assembly step to ensure all parts are correctly installed and secured.

Troubleshooting and Support

Troubleshooting Common Issues

Guides users on how to resolve common problems like missing parts or other assembly issues.

Customer Support Contact

Provides contact information (email) for customer support and guidance on reporting issues.

Important Precautions

Assembly Cautions

Highlights critical safety and handling precautions during the assembly and use of the bed frame.

Overview

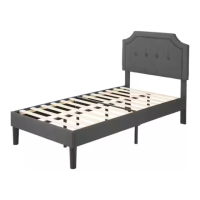
This document provides an installation manual for a bed frame, identified by SKU: KHD-BTJ-RT&RF&RQ02, available in Blue/Beige/Gray, and with Lot No.: CY-No.1. The manual outlines the assembly process, lists all components, and provides troubleshooting and return policy information.

Function Description:

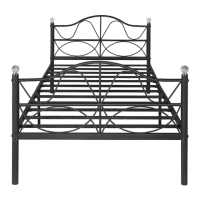
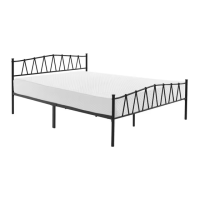
The device is a bed frame designed to support a mattress and provide a stable sleeping surface. It is intended for home use and requires assembly by the user. The frame appears to be constructed from metal and features a padded headboard, suggesting a blend of durability and comfort. The design incorporates multiple support slats to ensure even weight distribution for the mattress.

Important Technical Specifications:

While specific dimensions are not provided, the components list indicates the use of various bolts: M8 x 25, M8 x 45, and M4 x 25 screws. This suggests a robust construction. The assembly process involves attaching side rails, crossbars, and support legs, which are typical for a sturdy bed frame. The inclusion of an Allen Key M5 indicates that standard metric fasteners are used. The frame is designed for self-assembly, with clear visual instructions provided. The "Team Assembly Recommended" icon suggests that two people might be needed for easier and safer installation, especially when handling larger components like the headboard and side rails.

Usage Features:

The bed frame is designed for straightforward assembly. The manual breaks down the installation into nine main steps, each with detailed diagrams.

  • Step 1: Involves attaching the side rails to the headboard and footboard using bolts. The "Tips" section in this step emphasizes the correct orientation of brackets, stating, "Must Keep the Brackets Lay Toward the Ground," which is crucial for proper alignment and stability.
  • Step 2: Focuses on attaching the central support beam, which is vital for preventing mattress sag.
  • Step 3: Details the installation of the crossbars that connect the side rails and support the slats.
  • Step 4: Shows the attachment of the support legs to the central beam and side rails.
  • Step 5: Illustrates the assembly of the central support legs, which often involves adjusting their height to ensure even support.
  • Step 6: Guides the user on attaching the remaining support legs to the side rails. A "Tips" section here advises, "Loose the Preinstalled 4 Screws for leg Installation, and Then Tighten Them Again," indicating that some parts may come pre-assembled but require loosening for final positioning.
  • Step 7: Details the installation of the mattress support slats. This step is divided into two parts (7-1 and 7-2), suggesting a systematic approach to ensure all slats are correctly placed and secured.
  • Step 8: Involves securing the slats to the frame. This step includes instructions to "Unscrew the original screw" (8-1) and then "Tighten the original screw" (8-2), implying that some screws might be pre-inserted for packaging or initial alignment and need to be fully tightened during assembly.
  • Step 9: Shows the final placement of the mattress support slats and their securement to the frame, completing the assembly.

The manual also includes a "CAUTIONS!" section with visual icons, providing important usage guidelines:

  • "With mattress" vs. "No mattress": This likely indicates that the frame is designed to be used with a mattress and may not be stable or intended for use without one.
  • "Lift first Move second": This suggests the proper way to move the assembled bed frame to prevent damage or injury. It implies lifting the frame before dragging it.
  • "Push Or Pull": An "X" over this icon indicates that pushing or pulling the frame directly on the floor is not recommended, reinforcing the "Lift first Move second" caution.

Maintenance Features:

The manual does not explicitly detail maintenance features but provides crucial information for troubleshooting and customer support, which indirectly contributes to the longevity and proper functioning of the device.

  • Troubleshooting: The manual offers clear guidance for common issues:
    • Missing parts: Users are instructed to "Send email with your question to support@vecelo.com" and expect a "Resend within 24 hours." This proactive approach ensures that users can quickly obtain any missing components.
    • Other issues: For any other problems, users should "Send email with your issue to support@vecelo.com" and expect a "Respond within 24 hours." Both scenarios aim for an "Issue resolved" outcome.
  • Quality Control: The statement "We control manufacturing and distribution ourselves, ensure the quality" highlights the company's commitment to product standards, which should reduce the need for frequent maintenance due to manufacturing defects.
  • Pre-assembly Check: The instruction "Check all the components & screws before assembly. Do not install in case part is missing, contact us to get. Send email with your question to support@vecelo.com. We will resend within 24 hours" is a critical maintenance-prevention step, ensuring that assembly begins with all necessary parts, thereby avoiding potential issues later.

Return Policy:

The return policy is clearly stated:

  • Users should contact customer service directly via email (support@vecelo.com) before returning a product.
  • Returns are accepted within 30 days of delivery for a full refund.
  • The item must be returned in good condition, in its original box, with all original proof of purchase, parts, and accessories. This policy ensures that customers can address any significant issues or dissatisfaction with the product.

VECELO KHD-BTJ-RT02 Specifications

General IconGeneral
BrandVECELO
ModelKHD-BTJ-RT02
CategoryIndoor Furnishing
LanguageEnglish

Related product manuals