Do you have a question about the VELOWAVE PRADO S and is the answer not in the manual?
Step-by-step guide for correctly installing the e-bike handlebars and ensuring proper alignment and tightness.
Detailed instructions for mounting the front wheel, including spacer placement and securing the axle for safe operation.
Instructions for attaching the front fender and connecting the headlight, ensuring correct alignment and wiring.
Guidance on correctly identifying and securely installing the left and right pedals onto the crank arms.
Procedure for safely inserting and locking the battery into the bike's frame receptacle for power.
Instructions for safely unlocking and detaching the battery from the e-bike frame for charging or storage.
Important guidelines for safe battery charging practices and proper storage to ensure longevity and performance.
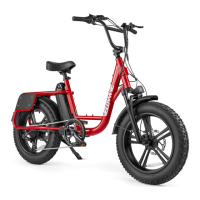
The VELOWAVE PRADO S is an e-bike designed for personal transportation, offering a blend of traditional cycling with electric assistance. Its setup and operation are detailed in the provided manual, covering assembly, display usage, battery management, and troubleshooting.
The assembly process for the VELOWAVE PRADO S is designed to be straightforward, though some mechanical skills are recommended. Before the first ride, it's crucial to reseat and charge the battery, ensure pedals are tight, and confirm the front wheel is properly installed and tight. Tire inflation, proper torqueing of all screws, and fine adjustment of gears and brakes are also essential steps. Learning how to use the LCD display and wearing a helmet are advised for safety and optimal experience. The manual emphasizes that the bike may require further adjustments after initial assembly. For assistance, users can contact support via email, including their order ID.
The assembly begins with reading all instructions carefully to become familiar with the proper operation of all items. The bike is pre-assembled and tested by QA mechanics. It's recommended to work on a clean area with sufficient space. If installed, the battery should be removed before starting assembly. A complete inspection for shipping damage is also advised. The kickstand is designed to support the bicycle only, not the rider. Saddle position and handlebar tilt can be adjusted for comfort. Finally, all screws and parts should be checked for tightness and proper fixation, with a pre-trip inspection recommended before the first rides.
Installing the handlebars involves several steps to ensure proper alignment and security. First, the headset should be pointed towards the front of the bike. The handlebar is then placed in the handlebar mount, with care taken to avoid damaging wires. The mounting brackets should face the front end of the mount with their round edges facing outward. The handlebar angle can be adjusted for a comfortable riding posture. Four screws are used to secure the mounting brackets. After securing, the front tire alignment with the headset should be verified, and all headset items checked for tightness.
The front wheel installation is a critical step for safe operation. The axle is inserted into the wheel hub, with a slim spacer on the left side (brake disk) and a wide spacer on the right side. The front wheel, with spacers, is then inserted between the front fork, ensuring the disk aligns with the brake caliper. The axle length should be balanced on both sides of the fork to accommodate washers and nuts. On the outside, a hooked washer is added first, with the hook facing the fork and secured in the fork end gap. A flat washer and nut are then added to the axle end and hand-tightened. Using a wrench, each side is tightened alternatively until snug, possibly requiring the opposite nut to be secured slightly to prevent the axle from turning. Finally, each nut is tightened firmly, with the user's weight applied to the wrench. The adjustment nut needs to be very tight and should be re-tightened after the first few rides. The brake caliper and brake disk are located on the left side of the bike.
The front fender is installed first by aligning its clamps on the left and right legs of the fork with the fender stay, ensuring the fender is in line with the wheel. The stay is then fixed with the provided screws on the clamp. The headlight, with its bracket, is placed in front of the fork gantry, and the lifting lug of the fender is positioned behind it. These three pieces are linked and secured with the screw provided on the headlight, potentially requiring the opposite nut to be secured slightly. Finally, the headlight cable is connected to the wire coming from the downtube.
Correct pedal installation is crucial to prevent damage. Users are warned to read instructions and watch videos if needed. Pedals are marked "L" for Left and "R" for Right and must be installed on their respective crank arms: "L" on the Left Crank Arm and "R" on the Right Crank Arm (chain side). When sitting on the bike, pedals go on the left and right sides. The pedal should be kept horizontal while hand-screwing to start the thread, then tightened with a 15mm wrench. Both pedals tighten towards the front of the bike; the left pedal is reverse-threaded to allow this. Pedals must be very tight and re-tightened after the first few rides.
To install the battery, the seat post clamp is released, and the seat is removed to create space. The battery must be turned off before sliding it into the frame mount receptacle. The battery should not be forced; instead, the slots on the battery and receptacle should be aligned, and the battery slowly pushed down. The key is then pushed and rotated to the "LOCK" position, and removed. Before each use, the battery's security should be tested by gently pulling upwards with both hands.
To remove the battery, the LCD display and battery switch must be turned off. The key is used to unlock the battery, which is then carefully slid upwards and lifted off the frame. The battery weighs approximately 8 lbs and should be handled with care. When the battery is removed, users are advised not to touch the "+" and "-" terminal contacts, to avoid dropping or damaging the battery, and to keep exposed connector terminals clear of debris.
Before riding, all instructions should be read carefully to ensure familiarity with the proper operation of all items. Detailed information and guidance are available on the product page. Basic electric precautions should always be followed to prevent issues or malfunctions.
The display provides essential information and control over the e-bike's functions. To power on/off, the button is pressed to turn the display on or off. The display automatically shuts down after 5 minutes of no operation or riding. Assist level adjustment is done by short-pressing the "+" or "-" buttons to change the level from 0 (no assist) to 5 (max assist). If a headlight is installed, pressing and holding the "+" button for 1 second switches it on or off. Walking mode is activated by pressing and holding the "-" button for 2 seconds; the display shows "P," and the bike propels at walking pace. Releasing the button exits walking mode. The information menu, showing TRIP, ODO, and TIME, is accessed by pressing the button for 1 second. The parameter setting menu is accessed by quickly pressing the button twice when the display is powered on. Users are not supposed to change factory default settings. Exiting this menu is done by quickly pressing the button twice again or leaving it without operation for 30 seconds.
The battery can be charged while locked on the bike or removed. To charge, the battery's power button is switched to OFF. The rubber cover on the charging port is removed, and the charger is inserted. The charger is then plugged into a power outlet; a red light on the charger indicates charging. The battery should not be charged for more than 12 hours. The LED turns green when fully charged, and charging stops. The charger is designed to automatically stop charging, but prolonged attachment can cause unnecessary wear. Once charged, the charger is unplugged from the power outlet and then from the battery, and stored safely.
The battery capacity indicator on the left side of the battery shows its status: GREEN light indicates voltage higher than 48V (over 60% charge); YELLOW light indicates voltage between 48V and 41.5V (20% to 60% charge); RED light indicates voltage less than 41.5V (under 20% charge). It's recommended to charge the battery when it shows a yellow light.
It is critical not to leave a charging battery unattended and never to charge it for more than 12 hours. Failure to follow best practices can lead to unnecessary wear of components and potential under-performance or non-functionality, which may not be covered under warranty.
During charging, attention should be paid to the surface temperature of the battery case; covering the battery during charging is forbidden. In summer, it's not advisable to charge immediately after riding due to high temperatures. In winter, charging below 0℃ is forbidden; charging at room temperature is recommended. For long-term storage, the battery should be removed from the bike, discharged to 60%-80% capacity, disconnected from the charger, and placed in a dry, ventilated area away from direct sunlight. To maintain a long lifecycle, charging the battery every two months is recommended.
The manual includes a basic troubleshooting guide for common issues.
The manual also lists error codes to help diagnose specific problems:
| Top Speed | 28 MPH |
|---|---|
| Frame Material | 6061 Aluminum Alloy |
| Brakes | Hydraulic Disc Brakes |
| Weight | 75 lbs |
| Max Load Capacity | 330 lbs |
| Category | Electric Bike |
| Motor | 750W Brushless Geared Hub Motor |
| Battery | 48V 15Ah Lithium-Ion Battery |
| Tires | 26" x 4" Fat Tires |
| Gears | Shimano 7-Speed |
| Suspension | Front Suspension Fork |
| Display | LCD Display |
| Assist Levels | 5 Levels |
| Throttle | Half-Twist Throttle |
| Headlight | Integrated Headlight |
| Taillight | Integrated Taillight |