This document provides instructions for setting up and maintaining the VELOWAVE RANGER/GHOST e-bike. It covers assembly, battery handling, display usage, charging, and troubleshooting.
Function Description
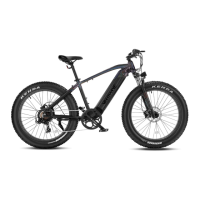
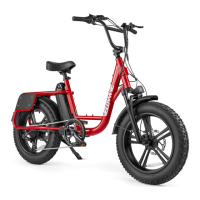
The VELOWAVE RANGER/GHOST is an e-bike designed for various riding conditions. It features a motor for pedal assist, a display to monitor riding data, and a removable battery for charging. The bike includes standard components such as a seat, handlebars, front and rear wheels, disc brakes, and a kickstand. The electrical system comprises a battery, motor, display, and various sensors to control the bike's functions.
Usage Features
Assembly:
The manual outlines the steps for assembling the e-bike. It emphasizes reading all instructions carefully and being familiar with the proper operation of all items. Key assembly steps include:
- Handlebar Installation: Point the headset forward, place the handlebar in the mount, face mounting brackets outward, insert and tighten screws, and verify the front tire aligns with the headset. Ensure all headset items are tight.
- Front Wheel Installation: Insert the front wheel between the front fork, ensuring the fork rests on the outside of the axle. Align the disk between the brake caliper. Insert the skewer into the wheel axle, keeping the spring, cam follower, and lever on the LEFT side (nearest the disk brake) and the adjustment nut and spring on the RIGHT side. Screw the skewer into the end nut until almost tight, then lift the lever until parallel with the front fork to secure the axle.
- Headlight Installation: Place the headlight with its bracket in front of the fork gantry, push the screw through the installing hole, and tighten the fixing nut. Connect the headlight cable to the wire from the downtube.
- Pedal Installation: Identify the Left (L) and Right (R) markings on the pedals. The L pedal goes on the Left Crank Arm, and the R pedal goes on the Right Crank Arm (chain side). Keep the pedal horizontal while hand-screwing to start the thread, then use a 15mm wrench to tighten. Both pedals tighten towards the front of the bike; the left pedal is reverse-threaded. Pedals need to be very tight and should be re-tightened after the first few rides.
Battery Handling:
- Installation: Turn the key counterclockwise to release the lock. Seat the bottom of the battery into the receptacle first, then push the upper side into the frame until it locks with a "clatter" sound. Turn the key clockwise to lock the battery and remove it before each use.
- Removal: Turn off the LCD display. Use the key to release the first lock (double-lock mechanism). Push and slide the plastic tab under the tube to release the second lock. Hold the battery tightly with one hand as it will drop off when the lock is released.
Display Usage:
The e-bike features an LCD display with several functions:
- Power On/Off: Press the power button to turn the display on or off. The display automatically shuts down after 5 minutes of inactivity.
- Adjust Assist Level: Short press the "+" or "-" buttons to change the assist level from 0 (no assist) to 5 (max assist).
- Headlight Mode: If a headlight is installed, press and hold the "+" button for 1 second to switch it on or off.
- Walking Mode: Press and hold the "-" button for 2 seconds to enter walking mode (display shows "P"). Release the button to exit.
- Information Menu: Press the power button for 1 second to cycle through TRIP, ODO (odometer), and TIME.
- Parameter Setting Menu: Quickly press the power button twice to enter the parameter setting menu. Users are advised not to change factory default settings. Exit by quickly pressing the power button twice again or by leaving it idle for 30 seconds.
Charging:
The battery can be charged either on or off the bike.
- Charging ON the bike: Locate the charge port at the bottom of the downtube, pull out the cover, insert the charger output plug, and connect the input plug to the power supply.
- Charging OFF the bike: Remove the battery, place it in a clean, flat, room-temperature area. Insert the charger output plug into the charge port, then connect the input plug to the power supply.
- Capacity Indicator: The battery has a capacity indicator at the top. Press the button next to it to check the charge status: Green means sufficient charge, Yellow means less than 30%, and Red means less than 10%.
Maintenance Features
Pre-Ride Inspection:
Before your first ride, and regularly thereafter, perform a pre-trip inspection. This includes:
- Reseating and charging the battery.
- Ensuring pedals are tight.
- Verifying the front wheel is installed properly and tight.
- Inflating tires properly.
- Checking that all screws are properly torqued.
- Carrying out a fine adjustment of gears and brakes.
- Learning how to use the LCD display.
- Wearing a helmet.
- Note that the bike may need further adjustments after assembly.
Battery Charging Notes:
- Safety: Do not leave a charging battery unattended. Never charge for more than 12 hours. Failure to follow best practices can lead to wear on components and non-functional batteries, which may not be covered under warranty.
- Charging Time: Charging typically takes 8 to 10 hours.
- Charger Indicator: A RED LED on the charger indicates charging, while a GREEN LED indicates a full charge.
- Lifecycle: Insufficient charging does not affect battery lifecycle, but avoiding deep discharge helps protect and extend its life.
- Temperature: Monitor the battery case temperature during charging; it should not rise too high. Do not cover the battery. Avoid charging immediately after riding in high temperatures. Do not charge below 0°C; charge in room temperature.
- Long-Term Storage: If the battery will not be used for a long period, remove it from the bike and discharge it to 60%-80% capacity. Store it in a dry, ventilated place away from direct sunlight. Charge the battery every two months to maintain its lifecycle.
Troubleshooting:
The manual provides a basic troubleshooting guide for common issues:
- Throttle and pedal assist not working: Check if the battery is off, battery installation, LCD display is on, battery is discharged, or if brake sensors are engaged. Solutions include turning on/reseating the battery, turning on the LCD, charging the battery, or inspecting the brake lever.
- Reduced speed: Could be due to low battery power or low tire pressure. Solutions involve charging the battery or inspecting the tire.
- Reduced battery range: Possible causes include heavy load on the bike, driving on rough terrain, or using the throttle only. Solutions are to adjust bike load, adjust route, or include pedal assist.
- Battery does not charge: Check if the charger is properly connected, battery temperature, damaged charger, or an issue with the battery itself. Solutions include inspecting connections, reading the user manual for best practices, replacing the charger, or contacting support.
- E-bike making strange noises: Could be loose hardware, an issue with the drivetrain, or an issue with the motor. Solutions include a tune-up and inspection, maintenance, or contacting support.
Error Codes:
The manual lists various error codes and their meanings, along with suggested actions:
- Error 4 (Open Throttle Fault): Throttle not returned to start position. Check if the throttle can return to start or if something is blocking it.
- Error 5 (Throttle Fault): Throttle may be damaged. Check the throttle or cable.
- Error 6 (Low Voltage Protection): Battery voltage too low, incorrect battery used, or battery in sleep mode/not functioning.
- Error 7 (Over Voltage Protection): Battery voltage too high or incorrect battery used.
- Error 8 (Motor Hall Signal Fault): Motor's hall sensor wires disconnected or damaged. Disconnect and reconnect the motor cable.
- Error 9 (Motor Phase Line Fault): Motor's phase wires disconnected or damaged.
- Error 10 (High Temperature Fault): Controller reached highest allowable temperature. Allow the controller to cool.
- Error 12 (Current Sensor Fault): Controller's current sensor disconnected or damaged. Contact technical support.
- Error 14 (Temperature Sensor Fault): Controller's temperature sensor disconnected or damaged. Contact technical support.
- Error 21 (Speed Sensor Fault): Speed sensor disconnected or damaged. Contact technical support.
- Error 30 (Communication Fault): Poor connection between controller and display. Check all cable connectors for corrosion.
The document emphasizes the importance of contacting support with your order ID if you encounter any setup issues.