3 6 0 5 • 3 60 6 7 4225 1 3 3 R e v C
UNPACKING
This vendor was thoroughly inspected before leaving the factory and the delivering carrier has accepted this vendor as their
responsibility. Please note any damage to packaging and/or machine at the time of delivery and report them to the carrier. Request
a written inspection report from the claims inspector to file any claim for damage. File the claim with the carrier within 7 days after
receipt of the vending vendor.
Carefully remove the outside packing material so as not to damage the finish or exterior of the vending vendor. Inspect the vending
vendor for concealed shipping damage. Immediately report any damage hidden by the shipping material directly to the delivering
carrier on a hidden damage report.
Record the model number and serial number of the vendor for your records. These numbers can be found on the serial plates on
the rear of the cabinet and/or inside the vendor. Refer
to these numbers in all correspondence and inquiries
pertaining to this vendor.
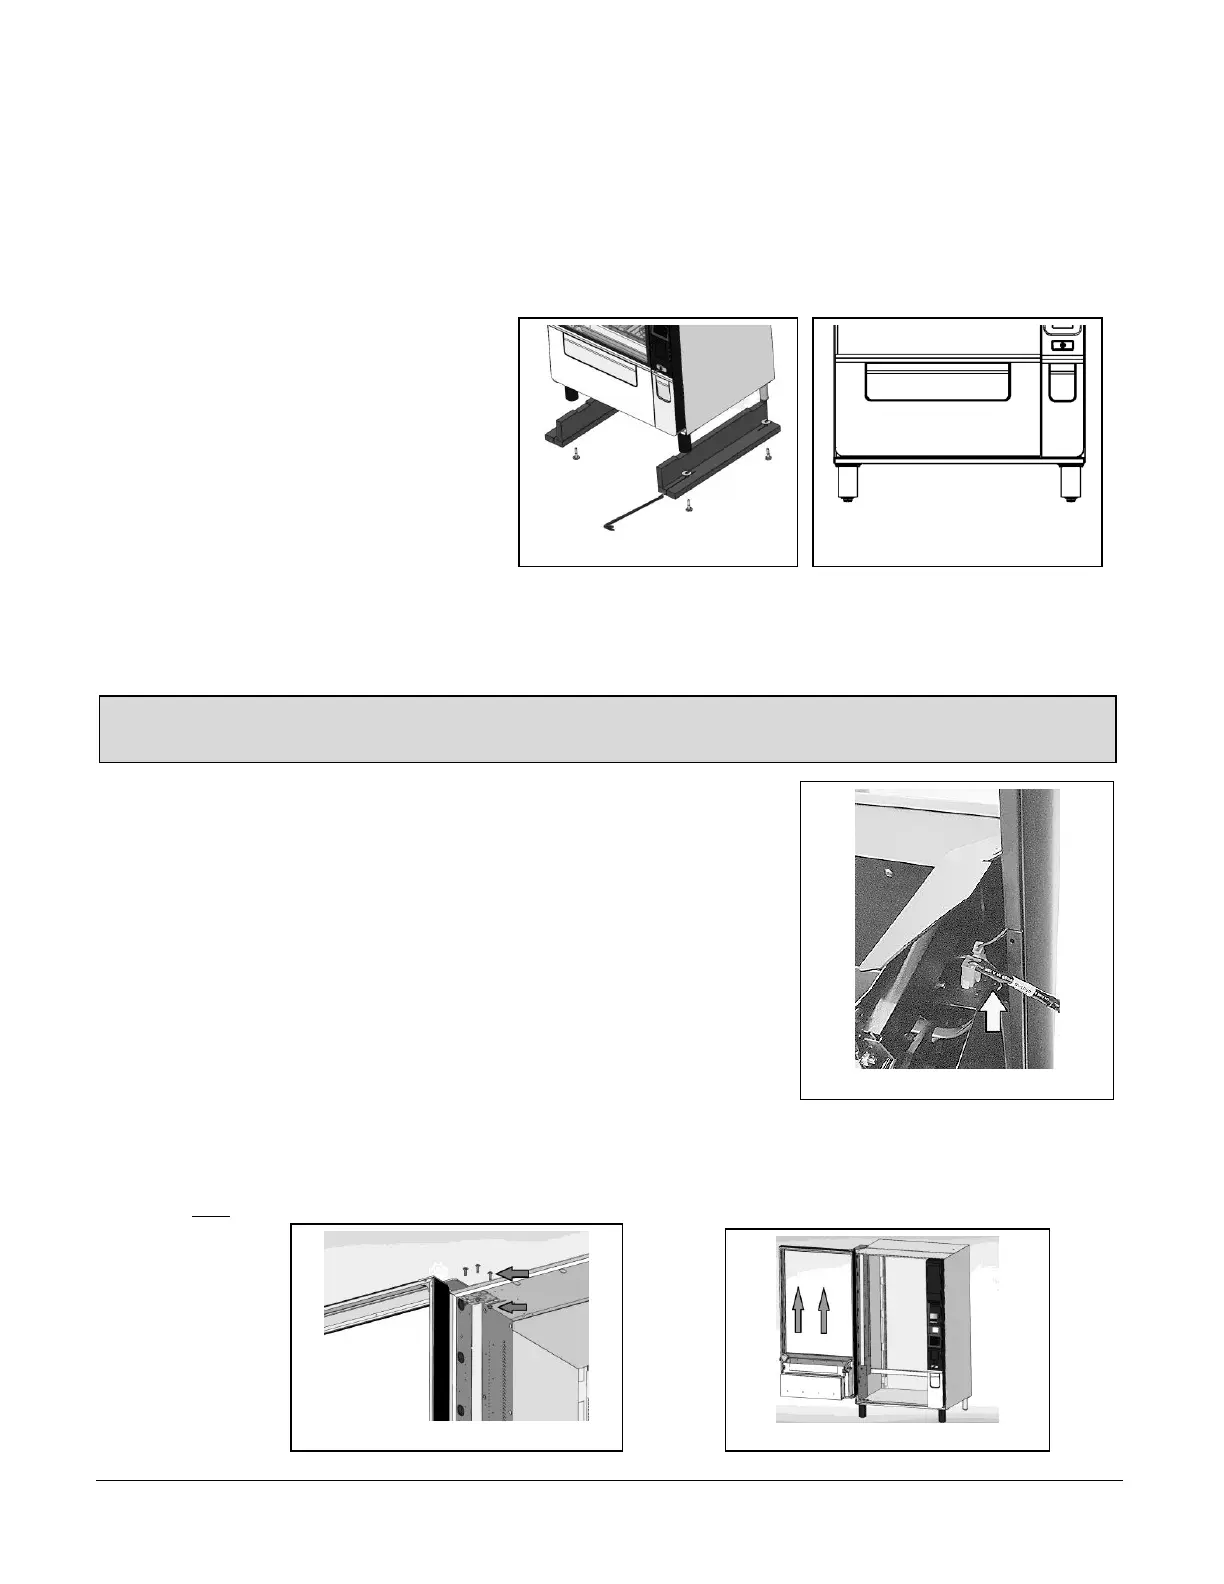
To remove the 2-wooden skid boards use a chisel or
small crow bar to split the partly cut boards at the
front/Rear, see Fig 1a. Then turn the leveling screws in
as far as possible prior to final placement.
The leg covers can be found in the delivery bin. Install
these once the vendor has been placed on location and
leveled, see Fig 1b).
INSTALLATION
Consult local, state and federal codes and regulations before installing the vendor.
Retrieve the keys to the vendor from the coin return cup.
Open the ‘pull-out door’ and then the ‘swing door’ and remove all internal packing material.
REMOVING THE SWING DOOR
The vendor will fit through most doorways (34"+) by opening the ‘swing door’ and carefully
walking the vendor door or cabinet through first and then moving the remaining portion of
the vendor through.
The vendor ‘swing door’ may be removed to permit easier movement through a narrower door
openings or hallways. To remove the ‘swing door’:
1. Disconnect Cabinet to Door harness:
Cut the nylon tie strain relieving the harness to side of delivery bin
Unplug the connector as shown in Fig 2.
2. Remove the ‘Swing Door’:
CAUTION: This requires two people.
First mark an outline around the top hinge plate with a pencil to be sure the hinge is set
back into the same position. Open the door at least 90 degrees and remove the (3)
Carriage Bolts by undoing the nuts with a deep 1/2” socket, these fasten the top hinge plate to the cabinet top as shown in
Fig 3.
Once the bolts are removed the door needs to be lifted vertically off the bottom hinge, see Fig 4.
NOTE: The bottom hinge pin rests on top of (2) nylon washers to provide proper door height and smooth operation; these
washers must be retained for reassembly.