3 6 0 5 • 3 60 6 9 4225 1 3 3 R e v C
REMOVING THE PULL-OUT DOOR . . . Contd.
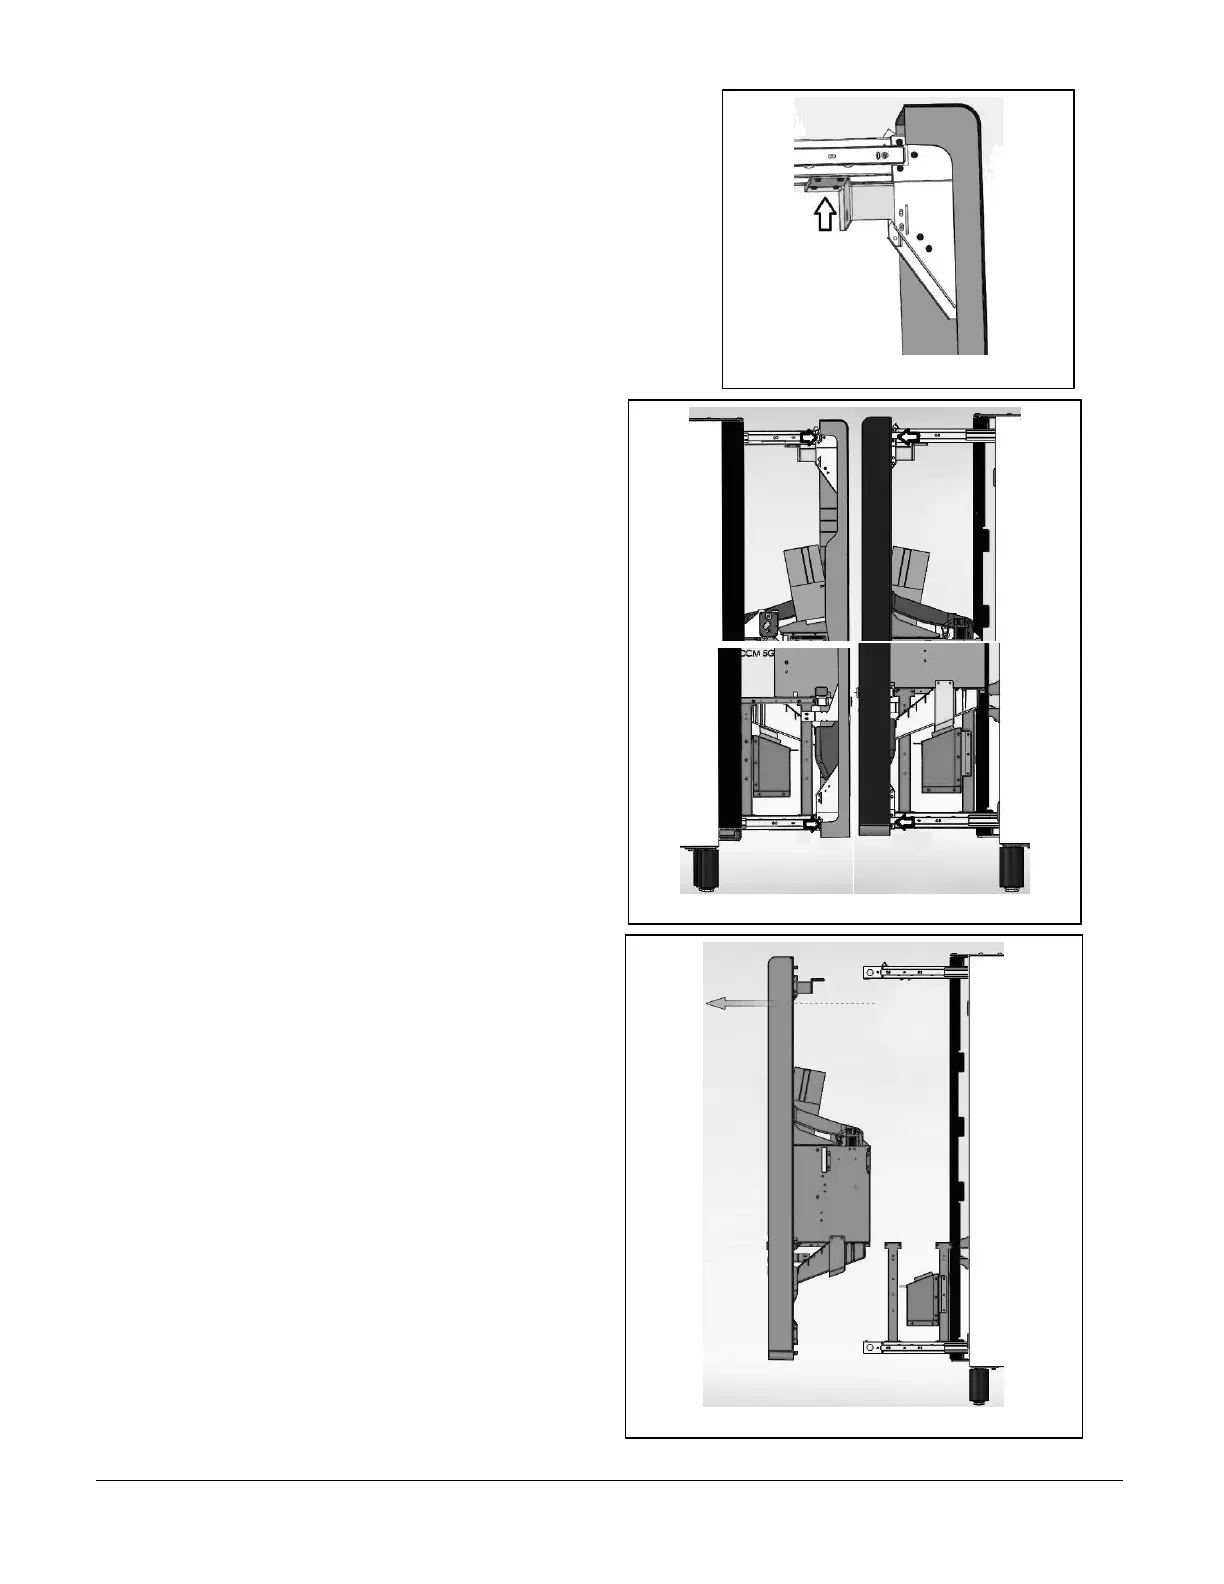
5. Remove the (4) screws from the top brace as shown in Fig 8
6. Starting at the bottom, remove and retain the (3) screws from
each of the (4) top & bottom slide rail both sides of the pull-out
door, see Fig 9.
7. The Pull-Out Door can now be dismounted from the (4) slide rails
and pulled free as shown in Fig 10.
Carefully move to a fee area and rest firmly against a solid
upright out of ‘harm’s way’.
Push the slide rails back in until they lock and continue to
maneuver the machine through the restriction.
Reverse the above procedure/s to reassemble.