2
0900-5104 REV-00
Procedure 2. PerForM THe cALIBrATIoN
If a PIN for Settings has been defined in the BladderScan i10 system, you will need to know that PIN to
complete this procedure. However, no unique authorization PIN is required.
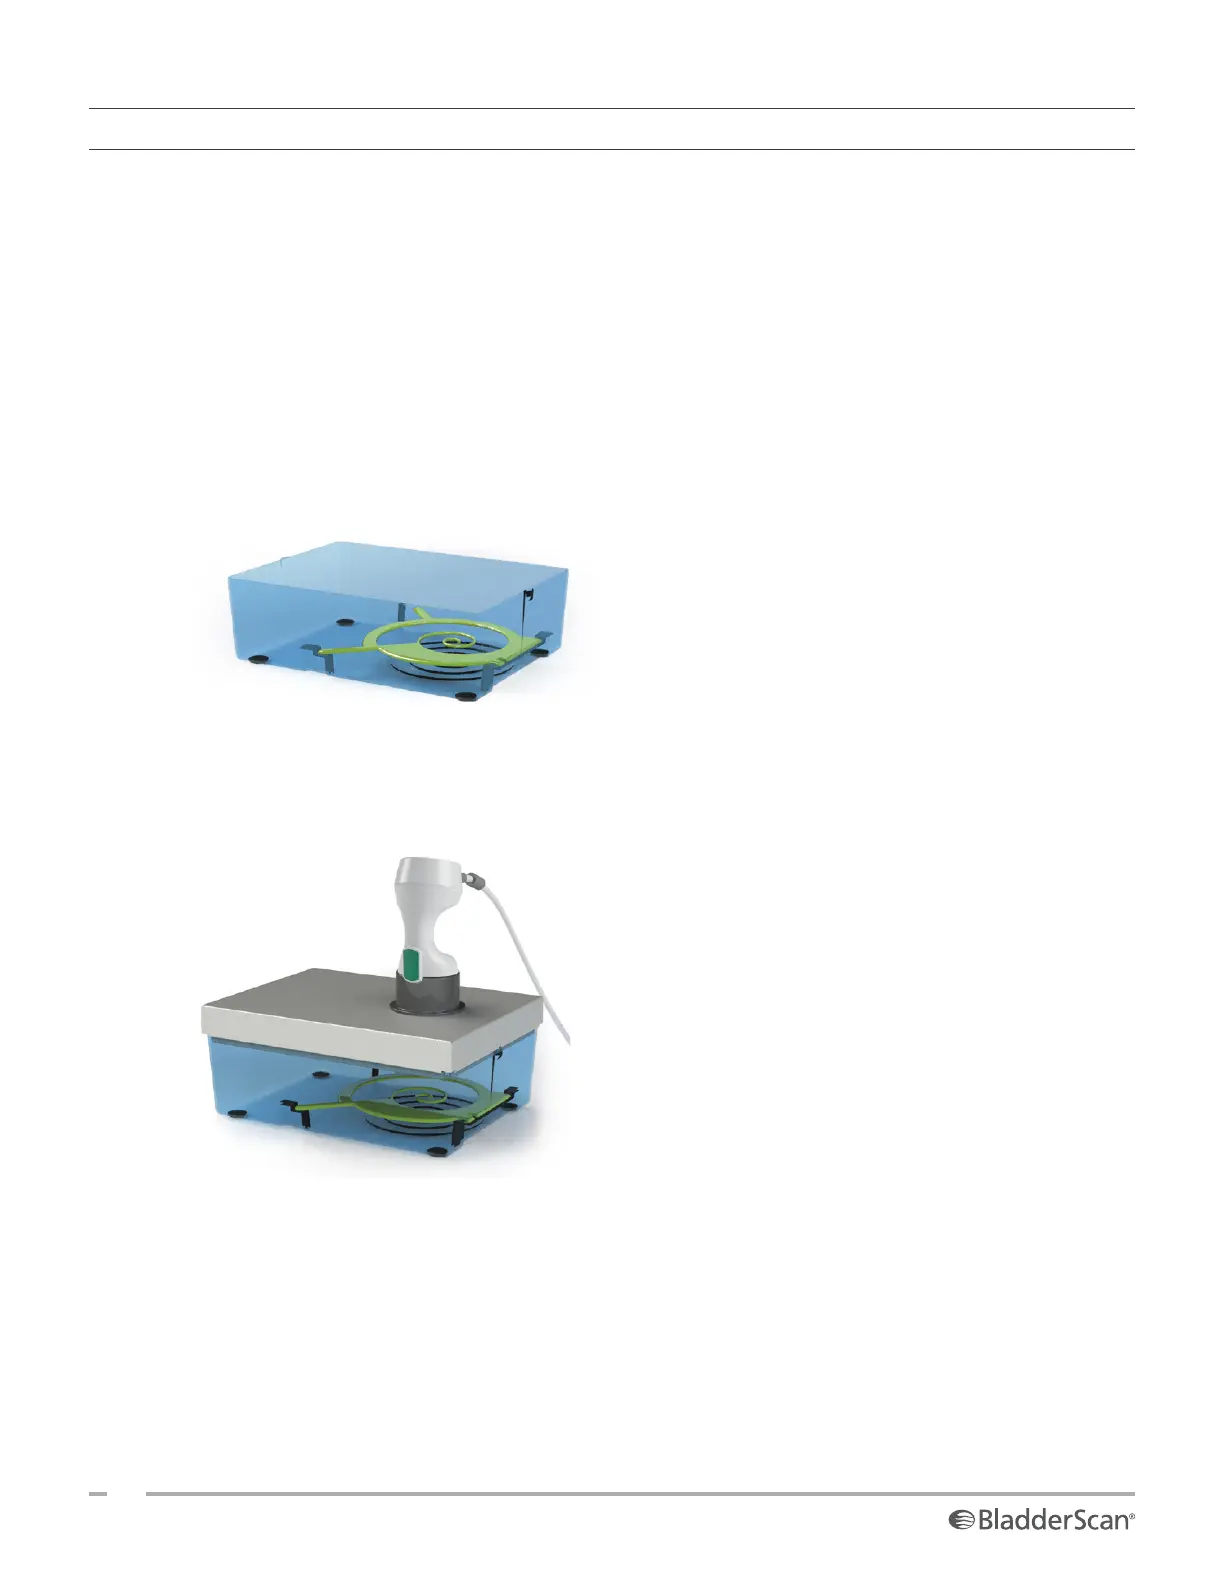
1. Place the calibration tank on a flat, non-reflective surface, and then remove the lid.
2. Install the spiral-shaped target in the tank base, using the notches in the base to position the target
correctly.
3. Pour clean, room-temperature water into the container, filling to the top of the textured section. Add the
water slowly, without splashing, to avoid mixing air into it.
4. Allow the water in the calibration tank to sit for at least 24 hours so that any embedded air can escape.
5. After the air has settled out of the water, skim or tap the target and the tank to remove as many air
bubbles as possible.
6. Replace the tank lid onto the base.
7. Place the probe into the collar in the tank lid. Align the probe button with the notch exactly as shown,
and then verify that the tip of the probe is submerged in the water.
8. If necessary, tap or agitate the probe to remove as many air bubbles as possible from its submerged tip.
9. On the system’s Home screen, tap Settings, and then tap Admin.
10. If a keypad appears, key in the PIN for Settings, and then tap Enter.

 Loading...