©2015 Green Manufacturing, Inc. 5
18. Remove the one set of straight pockets (Notice you will be leaving this area blank).
19. Proceed to the pocket set below the space left empty in step 18. This should be an angle pocket
set.
20. Remove the one set of angle pockets (Notice you will be leaving this area blank).
21. Proceed to the pocket set below the space left empty in step 20. This should be an angle pocket
set.
22. Remove the one set of angle pockets (Notice you will be replacing this pocket set with an angle
pocket set).
23. Clean both sides where the pockets contact the wheel, with a wire brush. Be sure to remove
all dirt and debris so the pocket is seated tightly against the wheel.
24. Apply Green-Seize™ to the threaded end of two LoPro™ bolts.
25. Starting with the angle pocket install a LoPro™ bolt into the counter-bored hole and then do
the same of adjacent pocket of that set.
26. Slide the LoPro™ bolts through the empty holes in the wheel and thread them into the
adjacent pocket’s threaded holes. For now, firm up the LoPro™ bolts until pockets are seated.
(Figure 1.11)
27. Proceed to the pocket set below the new pocket set installed in step 26. This should be an
angle pocket set.
28. Remove the one set of angle pockets (Notice you will be leaving this area blank).
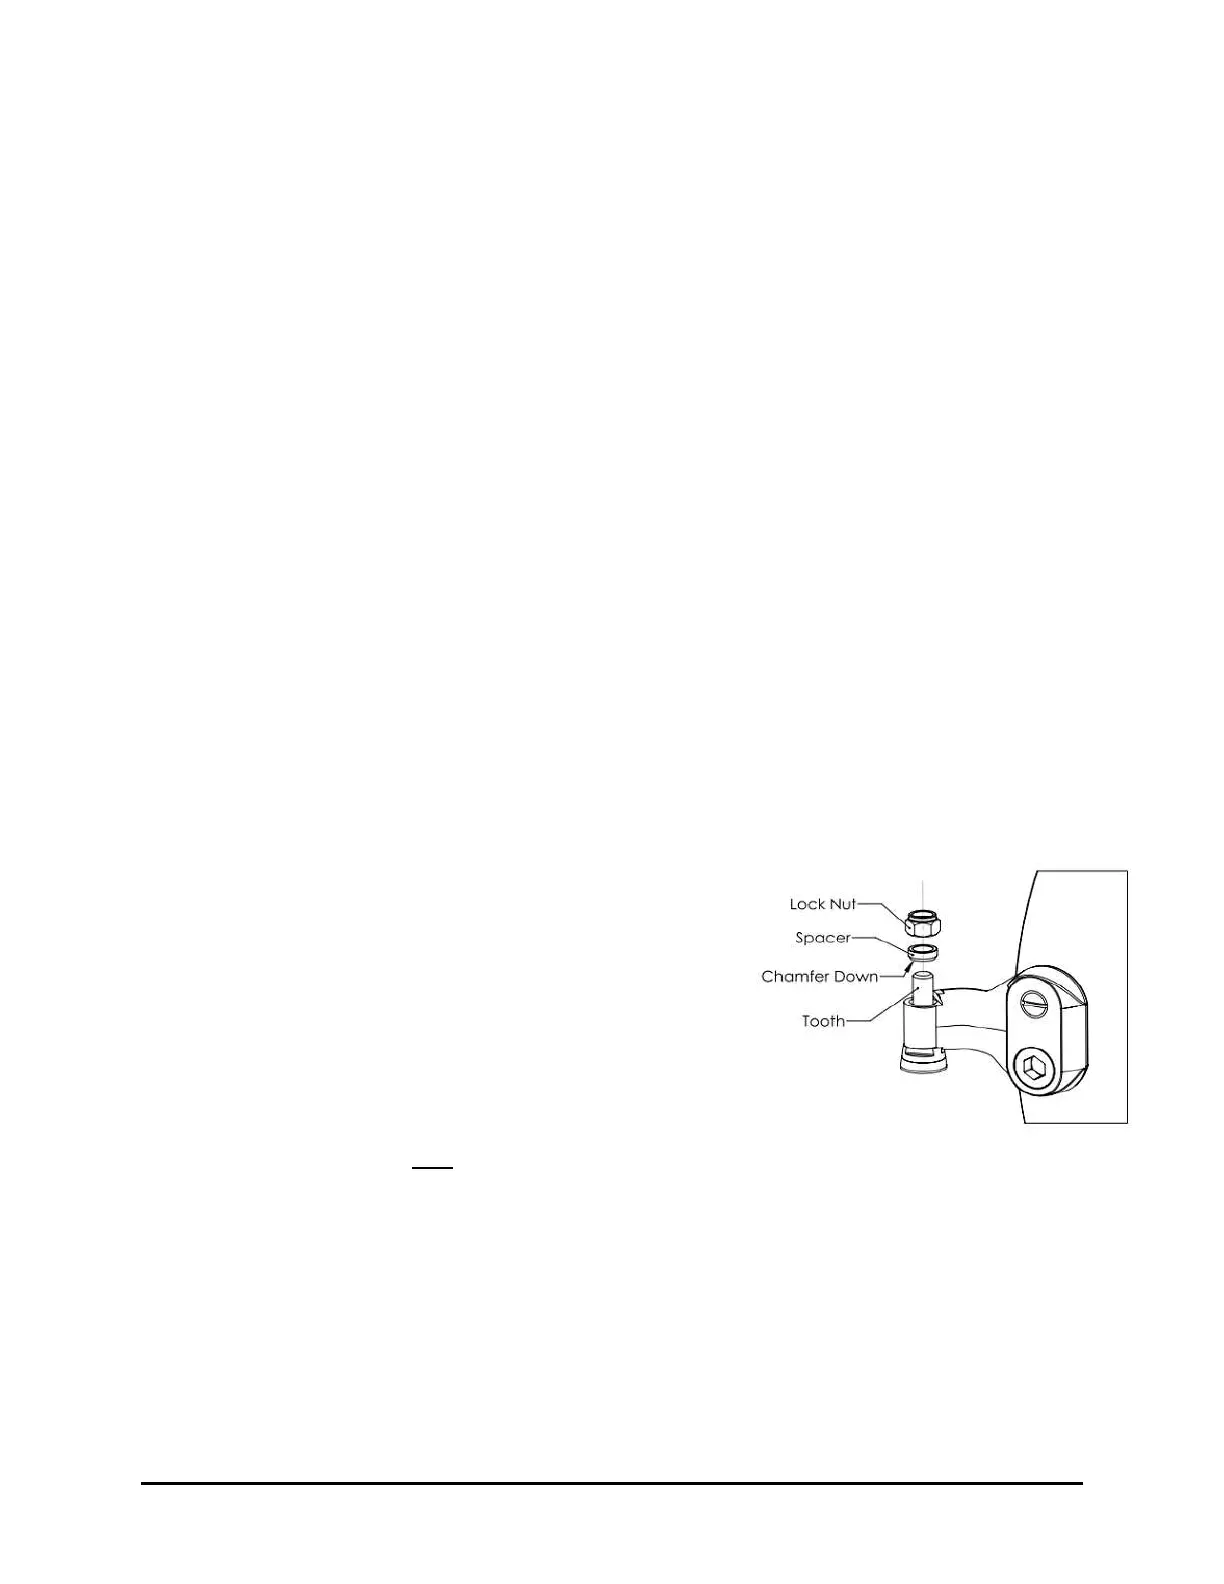
29. Install your teeth with the carbide facing down. The
shoulder of the tooth will meet the flat indent of the
pocket and the tooth will not rotate. Insert spacer
over shank Chamfer down then thread one of the
lock nuts onto the top portion of the tooth. Hand
tightening is good for now. Repeat until all teeth are
installed. (Figure 1.2)
30. Make sure the pockets are seated on the wheel and
the bolts are seated in the pockets. Continue
tightening your LoPro™ bolts until they are all
torqued to 180-200 foot lbs. (244 Nm).
31. Before torqueing your tooth down, first make sure that the tooth is seated properly in
the pocket. Then tighten the top nut until the tooth is firmly seated and torqued to
35 ft. lbs. (47 Nm). You may need to hold the tooth in place. Repeat until all teeth are
properly torqued.
Over-tightening the nut will stretch the threads and degrade the fasteners ability to retain the tooth.

 Loading...