-6-
REV. 10/2018
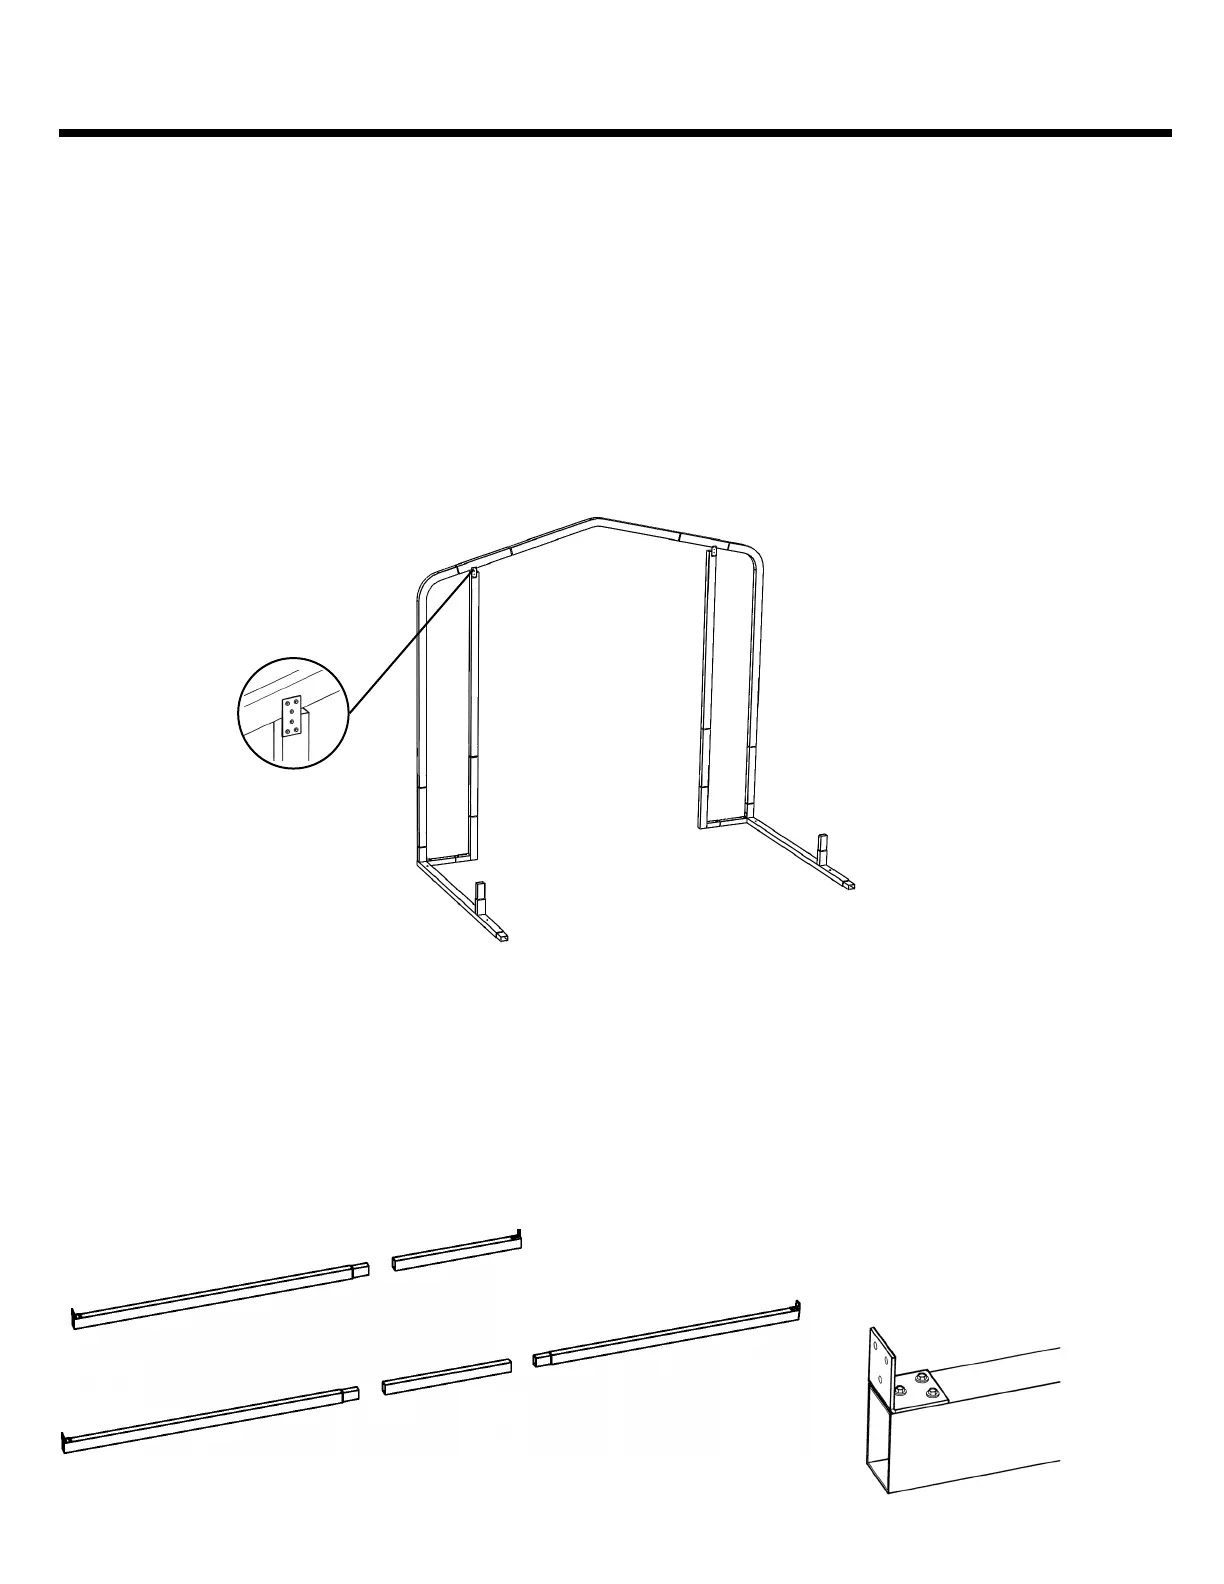
STEP 3: ASSEMBLE DOOR VERTICALS
If the structure is over 7.5’H, the door jambs will be made of (2) pieces: a cut length 2”x3” and a swaged (reduced end)
height extension. The height extension length is determined by the height of the structure (on Front Enclosure Diagram pag-
es). If needed, assemble the cut length to the height extension without screwing together. Place (1) door jamb/door jamb
assembly on to (1) L-Connector. Square the door jamb vertical with the building by measuring and setting the distance from
the outer edge of the building to the inside (door opening) edge of the door vertical at the top. The top and bottom measure-
ments should match. Put a mark on the rafter above to use as a placement guide.
(IMPORTANT: Make sure that your build-
ing frame is square before attaching the vertical door tube.)
Attach the door jamb vertical to the rafter with a BK-20 Flat
Bracket and (6) framing screws. The bracket should be placed at the outside edge of the Vertical Door Tube. Mount the
bracket on the inside of the structure. Secure the L-Connector/Door Jamb Vertical Assembly joint and the cut length/height
extension joint (if needed) with (2) framing screws per joint on the side of the Door Vertical away from the door opening. Re-
peat this assembly procedure for the other Door Jamb Vertical.
Front Enclosure Assembly (continued)
STEP 4: ASSEMBLE DOOR HEADER
The door header will either be a 2-piece (for 8’W door openings) or 3-piece assembly (for 16’W door openings). A 2-piece
door header will be made of a 2”x3” cut length and a 5’ Height Extension (HE-5, 2”x3”x64 3/4”, 4 3/4” swage). A 3-piece door
header will be made of a 2”x3” cut length and (2) 6”5” Height Extension (71-8175, 2”x3”x81 3/4”, 4 3/4” swage). Assemble
the pieces without screwing together. Place the assembly on the ground with the 2” side facing up and fasten a BK-10 Angle
Bracket on each end with the outside of the bracket flush with the end of the tube. Use (3) framing screws.
 Loading...