-7-
REV. 10/2018
STEP 5: ATTACH DOOR HEADER
Make a mark on the door opening side of both Door Jamb Verticals at either 81 3/4” or 84” (depending on enclosure) from
the bottom of the L-Connectors.
(Note: It is advised to use two people to lift, position and attach the Door Header Assembly.)
Lift the Door Header into place and line up the bottom ends with the marks on the Door Verticals. Attach the BK-10 Angle
Brackets on the ends of the Door Header to the Door Verticals with (3) framing screws.
Front Enclosure Assembly (continued)
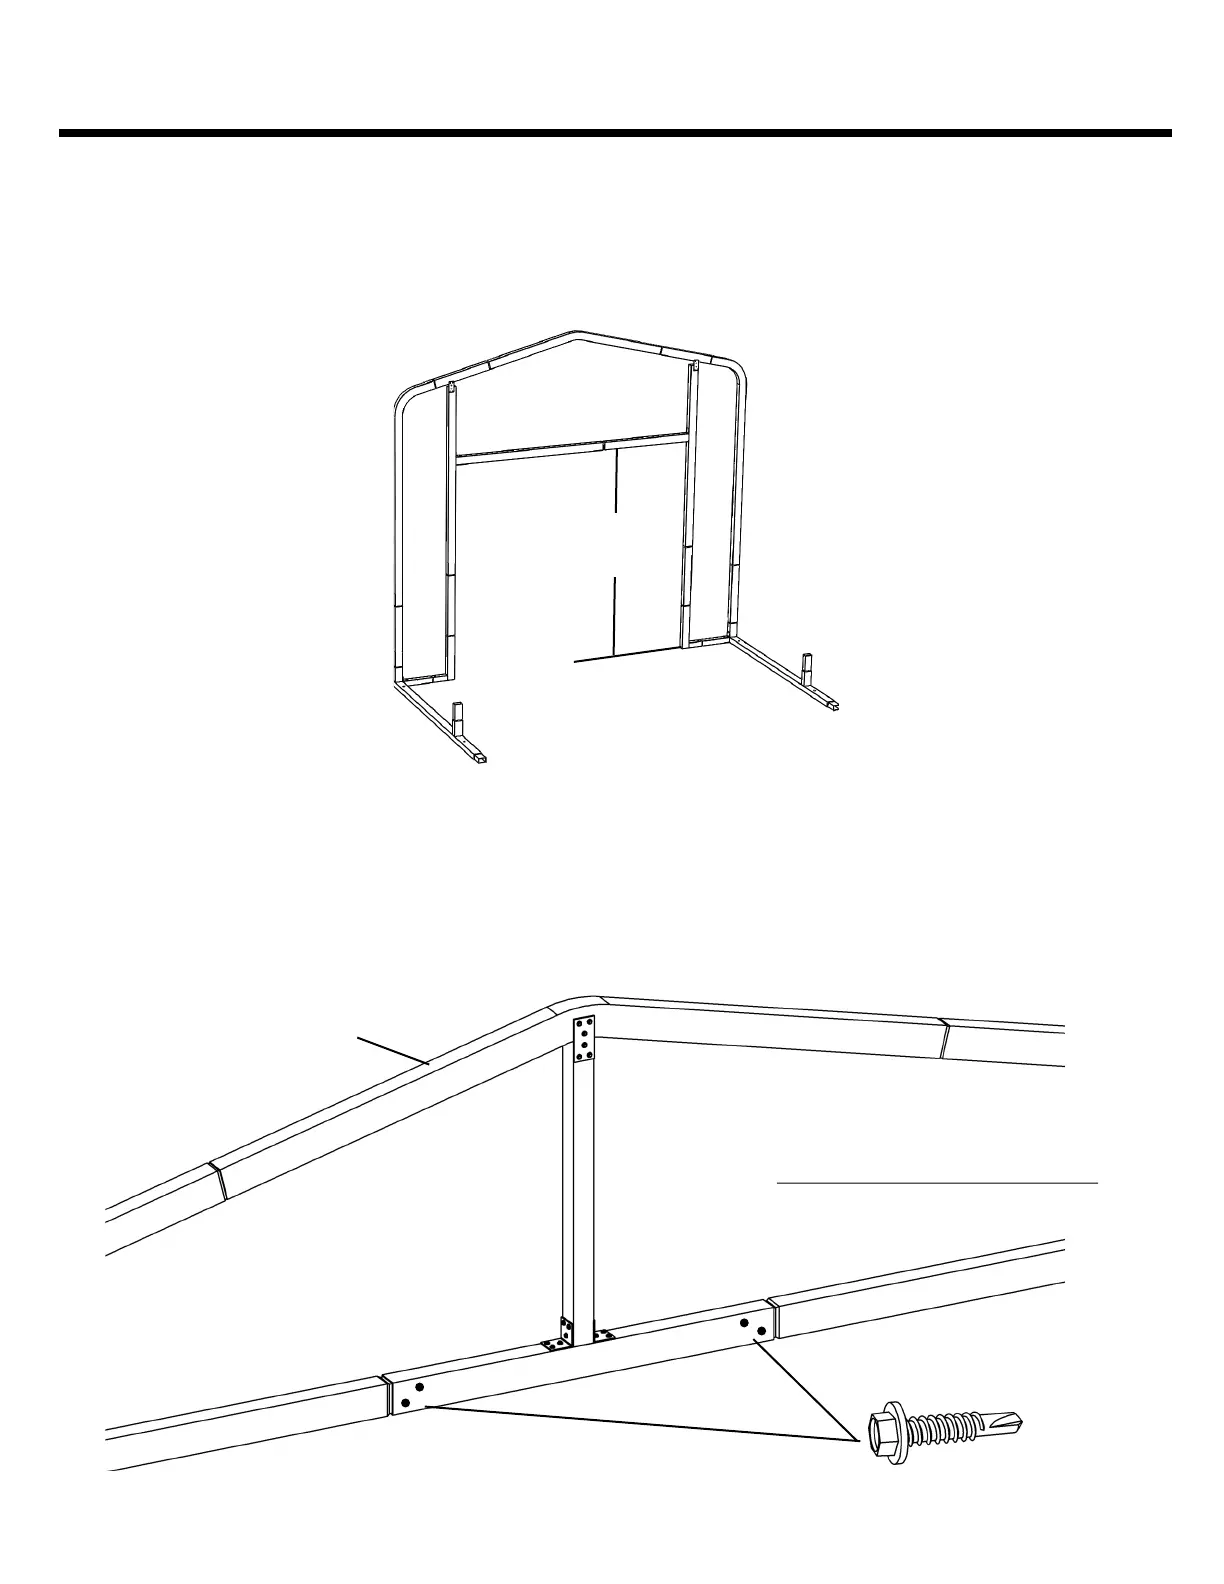
STEP 6: INSTALL DOOR HEADER VERTICAL BRACE (IF NEEDED)
Center and attach the Door Header Vertical to the top of the Door Header Tube with (2) BK-10 Angle Brackets and (6) fram-
ing screws per bracket. Level the Door Header Assembly and attach the top of the Door Header Vertical to the building Peak
with (1) BK-20 Flat Bracket and (6) framing screws. The Flat Bracket should be mounted on the inside of the building. After
attaching the Door Header Vertical, fasten the Door Header swage joint(s) at this time with (2) framing screws per joint.
Screws should be installed on the inside of the building.
81 3/4” OR
84”
PEAK
#12 x 1” Framing Screw
VIEW FROM INSIDE OF BUILDING