8
9
THE ICE-DUCER
Vexilar ice shing systems include a special type of transducer patented in 1997 called the
Ice-Ducer
®
. This transducer style is designed specically for the ice shing application. The Ice-Ducer
®
works o the “plumb-bob” theory. When suspended by the cable, the transducer cone is perfectly aligned
to point straight down.
Stopper - The stopper sets the depth of the transducer. It’s adjustable so you can set
the depth according to your preference or conditions. Generally, you want to set it so
the bottom of the transducer is even with the bottom of the ice.
Float - The oat suspends the transducer in the ice hole. You can also use the eye-bolt
included with the Vexilar ice shing systems to suspend the transducer. This can often
be the best choice for early ice conditions.
Cable - Ice-Ducer
®
cable is specically designed to stay exible in cold temperatures.
This exible cable will be more prone to be cut by your line or damaged if not stored
correctly. It’s a key part of the Ice-Ducer
®
system.
Transducer - The transducer is designed to allow a perfectly downward alignment
while suspended and be able to endure the severe conditions encountered in the ice
shing environment. Dierent cone angles are available to match your shing needs;
9° Pro-View, 12°,19°and Broad Band
(FLX-30 Only). Transducer sizes will vary.
See page 72 for more information.
SEEING YOUR LURE
The key to ice shing success when using a Vexilar
ice shing system is the ability to see your shing
lure and its relationship to the bottom, structure,
and sh. Ice shing with a Vexilar allows you to
present your lure to the sh. You see the sh on
the display and you raise your lure so it is right
above the sh on the display. If the sh is hungry,
it will bite. If not, it will react in some way to your
presentation, such as with disinterest or fear. You
can see this reaction on the asher display and
adjust your tactics accordingly.
Setting the gain level correctly is important to be
able to understand what’s going on below you.
Use the lure’s appearance as your reference for
adjusting the Gain Control. Set it so your lure
appears as a green signal. Because the sh are
much larger than your bait, they will appear as
stronger signals. Be prepared to readjust the Gain
Control up and down often, as small position
changes and the condition of any bait attached
will eect the strength of your lure’s signal.
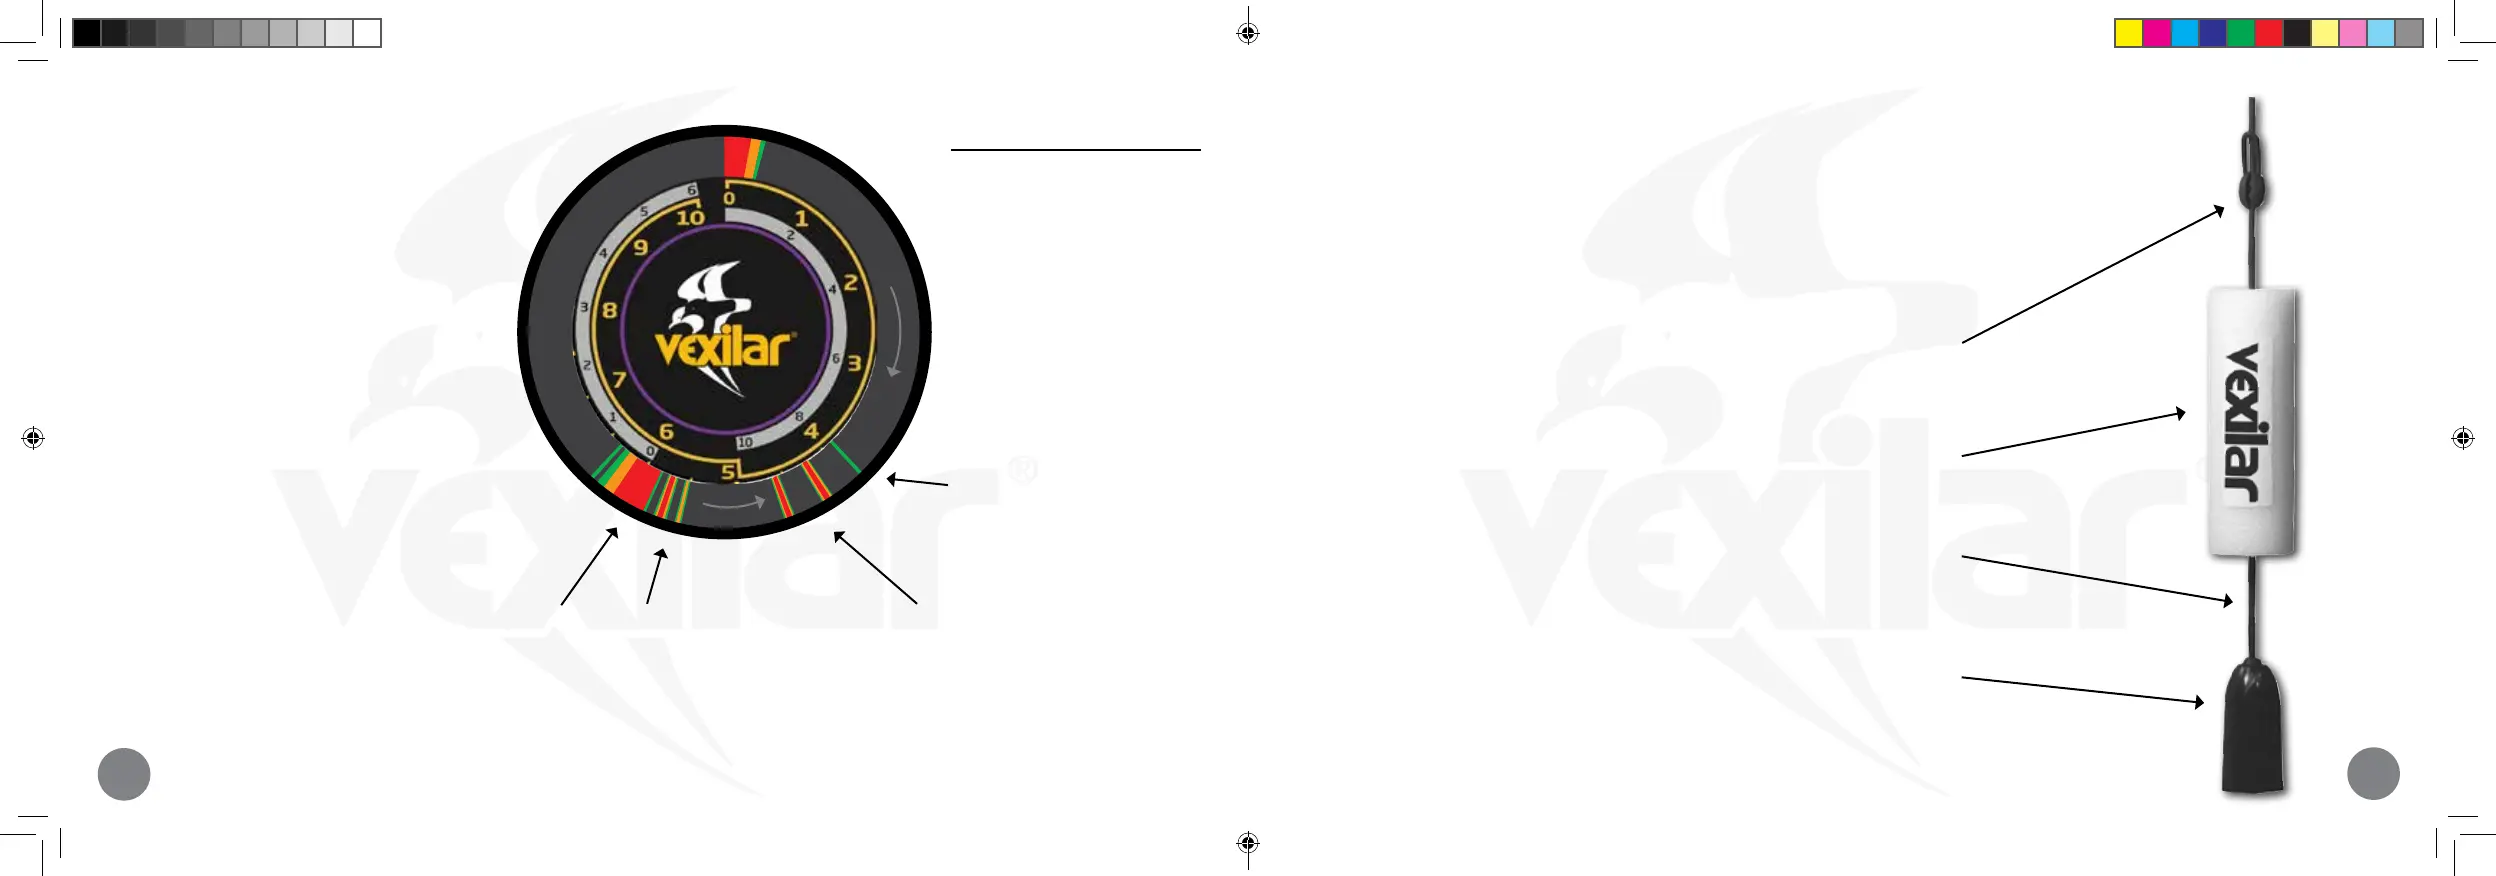
Typical Ice Fishing View
This illustrates a typical panfish
fishing view. As you lower your lure,
you see it going down on the display
while the curious fish rise to see what
it is. When the two signal lines meet,
it is time to be ready for a strike.
Bottom
Fish
Several fish are holding near the
bottom. The thin green line right on the
bottom may be a fish just up off the
bottom, as the others are, but some
distance to the side.
Fish
A pair of fish are rising to your lure as it is
being dropped down. This is a good sign, as
competition can make fish more aggressive.
Lure
With the Gain Control set properly,
your lure will appear as a weak
signal. You want it to appear small
next to the fish, which are much
larger.
Flasher-Family-Manual-2020.indd 8-9Flasher-Family-Manual-2020.indd 8-9 5/20/20 2:16 PM5/20/20 2:16 PM
 Loading...