4.
Remove the two (2) counterbalance springs
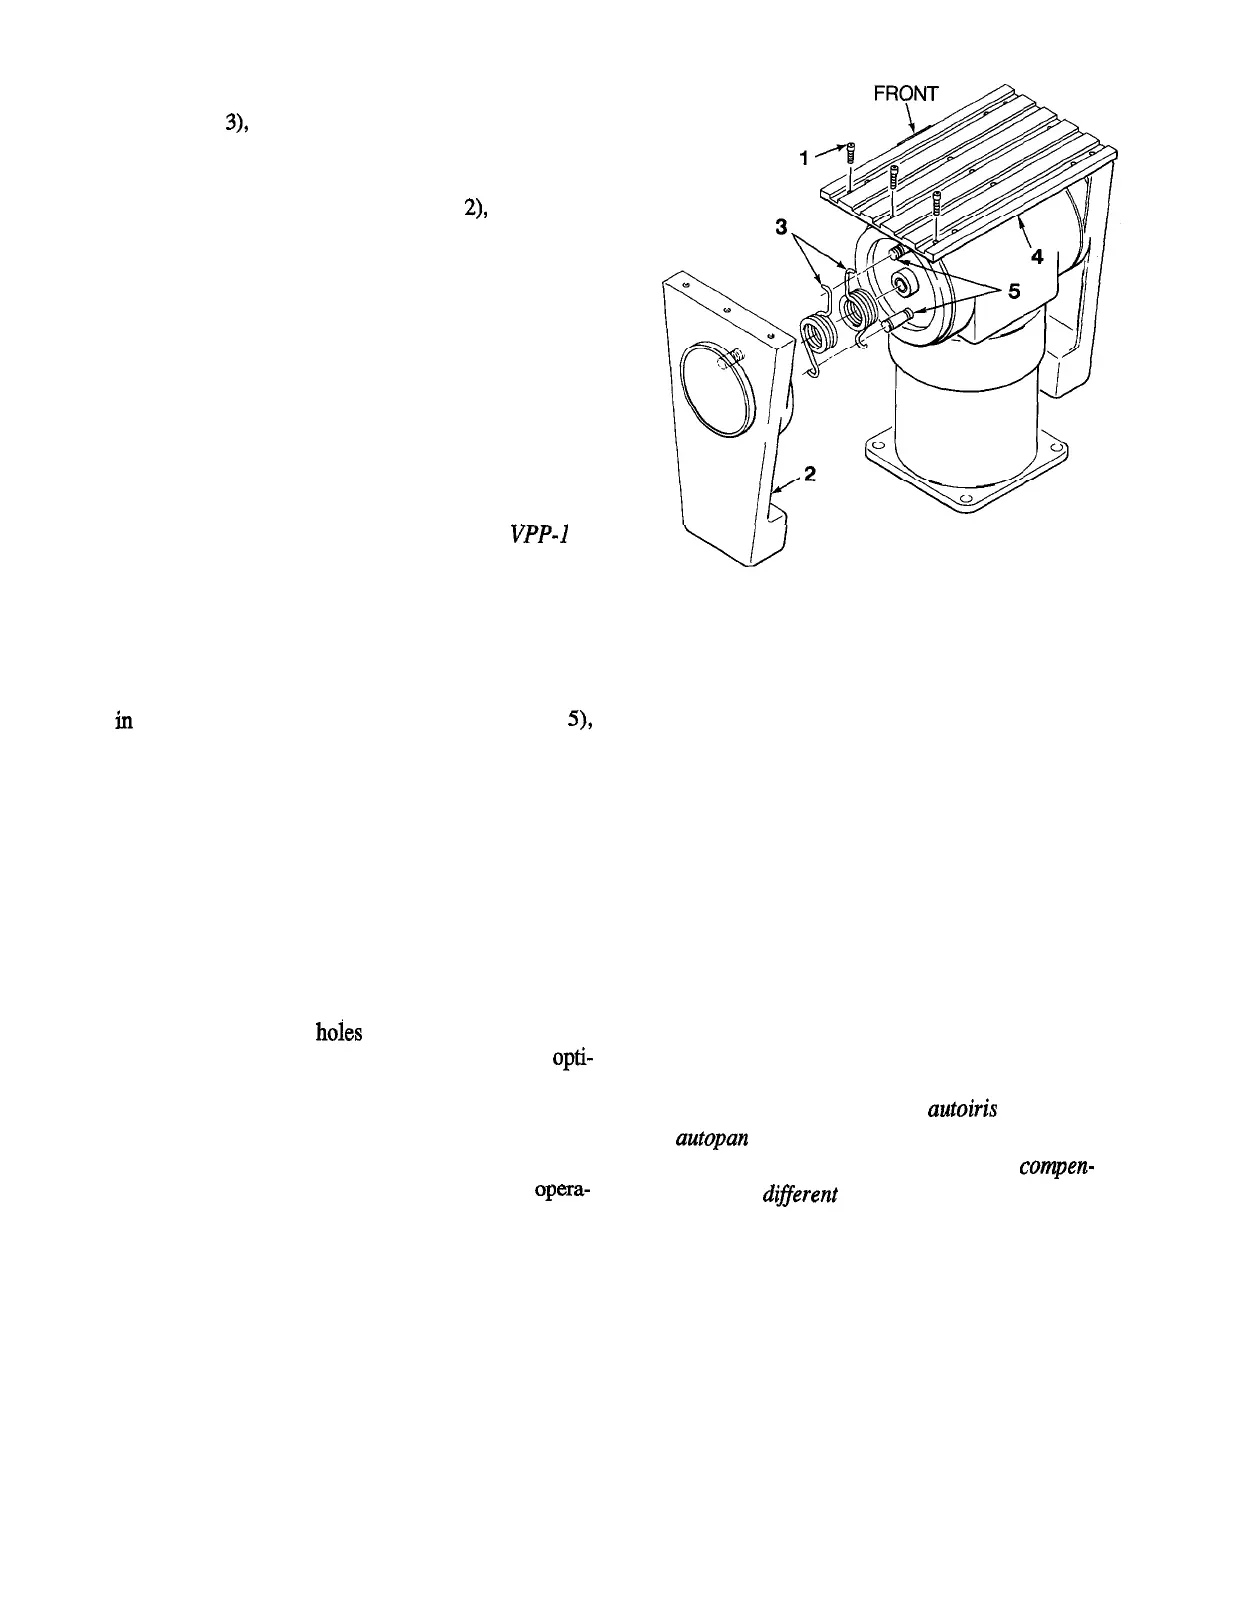
(Legend
3),
noting the position of the springs of the
grooved stop posts (Legend 5) for future reference.
5.
Replace the end support (Legend
2),
holding the
opposite tilt arm in position.
6. Replace the three (3) 10-32 screws (Legend 1).
When this unit is mounted in the inverted position, the
up-down and left-right directions are reversed for man-
ual operation. This must be corrected when wiring the
cable between the control unit and the pan-and-tilt.
Simply reverse the leads going to pins 2 and 3 and to
pins 5 and 6, respectively, at one end of the cable.
NOTE: For inverted mounting with the
VPP-1
Option, reverse the leads going to pins 10 and 12.
(Refer to Figure 6, Wiring Diagram.)
If the unit is returned to upright mounting from an
inverted position, rewire the leads to their original loca-
tions and replace the counterbalance springs (Legend 3)
in the correct positions on the stop posts (Legend
5),
following the procedure outlined in steps l-6.
LEGEND
1. 1 O-32 Screws (3).
2. End Support.
3. Counterbalance Springs (2).
4. Camera Mounting Plate.
5. stop Posts.
Figure 3
Removing Counterbalance Springs
for Inverted Operation
2.3 Mounting the Camera
Before mounting the camera to the pan-and-tilt drive,
note the label FRONT on the top mounting plate. The
camera should be mounted with the lens on this side.
Three center mounting
h&s
( Figure 5, Legend 5) are
provided for mounting lighter cameras. To obtain opti-
mum balance, the screw used to mount the camera can
be placed in any one of the three positions on the camera
mounting plate.
When mounting heavier camera/lens loads, best opera-
tion is obtained when the load is evenly balanced. With
the camera and lens resting on a flat surface, place a
pencil under the camera and move the camera until it
balances on the pencil. The position of the pencil under
the camera indicates the point which should be posi-
tioned at the center of the pan-and-tilt mounting plate.
The outboard mounting holes (Legend 6) can be used to
mount heavier cameras or enclosures.
CAUTION: Do not mount an
autoiris
lens on a
A
autopan unit. Such use will cause excessive wear
on the iris mechanism, as it constantly compen-
sates for
di&ferent
light levels. For lens control
connection instructions, refer to the manual that
accompanies the lens control unit being used.
4 X433-893