66550033-EN - V6.1 - 15/08/20
- 19 -
ESVK/6388 Series “2 wire Bus” videokit
ESVK/6388 Series - Installation handbook
PROGRAMMING
• Enter the ENGINEER’S CODE: rst time type six times 1 (111111
factory preset) and press ENTER (The red LED will illuminate);
• Conrm ENGINEER’S CODE (typing again the same) or
type the new code (4 to 8 digits) then press ENTER (Melo-
dy). Pressing twice the ENTER button without changing the
ENGINEER’S CODE, will exit from the programming;
• Enter the code (4 to 8 digits) to enable RELAY 1 or re-enter the
existing code then press ENTER (Melody);
• Enter the RELAY 1 operation time (2 digits 01 to 99 I.E. 05=5
seconds, 00= remain open time) or re-enter the existing time
then press ENTER (Melody);
• Enter the code (4 to 8 digits) to enable RELAY 2 or re-enter the
existing code then press ENTER (Melody);
• Enter the RELAY 2 operation time (2 digits 01 to 99 I.E. 05=5
seconds, 00= remain open time) or re-enter the existing time
then press ENTER (Melody);
• Enter the code (4 to 8 digits) to enable RELAY 3 or re-enter the
existing code then press ENTER (Melody);
• Enter the RELAY 3 operation time (2 digits 01 to 99 I.E. 05=5
seconds, 00= remain open time) or re-enter the existing time
then press ENTER (Melody);
• The system is ready to use (the red LED will be o).
PROGRAMMING NOTES
• After pressing enter following a command, press ENTER a fur-
ther twice to exit the programming menu.
RETURN SYSTEM TO PRESET ENGINEER’S FACTORY CODE
• Turn o power to code lock;
• Keep ENTER button pressed while turning the power back on;
• Release ENTER button;
• The engineer’s code is now set to 111111 (six times one).
OPERATION
• Type in the programmed code and press ENTER;
• If the code is correct, the green LED will illuminate for approx. 2 seconds and the relay relevant to the code will operate for the
programmed time;
• If a wrong code is entered, a continuous melody will sound for 4 or more seconds, according to the number of mistakes;
• To switch o any relay while operating, type in the relevant code then press the CLEAR button;
OPERATION NOTES
• To operate relays together, set the same code for each relay;
• If a wrong code is entered, the system will lock out for 5 seconds which will increase each time a wrong code is entered. The system will
operate only when the correct code is entered.
ADHESIVE GASKET PLACEMENT
Apply the
Y
seal as shown in Fig. 5.
ANTITAMPERING LOCKS FIXING
Fit the anti-tampering locks
W
as shown in Fig. 6.
Y
G
Fig. 5
W
Fig. 6
ENTER THE
"ENGINEER’S CODE"
CONFIRM
OR CHANGE
"ENGINEER’S CODE"
ENTER
"ACCESS 1 CODE"
ENTER
"ACCESS 2 CODE"
ENTER
"ACCESS 3 CODE"
ENTER
"ACCESS 1 TIME"
ENTER
"ACCESS 2 TIME"
ENTER
"ACCESS 3 TIME"
SYSTEM
READY TO USE
First time six times
1 “111111” factory
preset
Type again six times
“1” or the new en-
gineer’s code 4 to 8
digits
Code to enable relay 1
4 to 8 digits
Code to enable relay 2
4 to 8 digits
Code to enable relay 3
4 to 8 digits
Two digits (01 to 99)
i.E. 05=5 Seconds
00= remain open
Two digits (01 to 99)
i.E. 05=5 Seconds
Two digits (01 to 99)
i.E. 05=5 Seconds
Red led will be o
Press Enter
(Red LED will
be ON)
Press Enter
(melody)
Press Enter
(melody)
Press Enter
(melody)
Press Enter
(melody)
Press Enter
(melody)
Press Enter
(melody)
Press Enter
(melody)
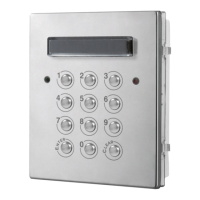
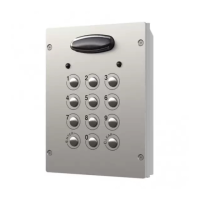
Art.4901 Digital codelock module

 Loading...