Istruzioni per l’installazione dei
Videocitofoni serie 3000 Art.3311-3411-3511
Applicazione Videocitofono alla piastra di fissaggio
(Art.3980)
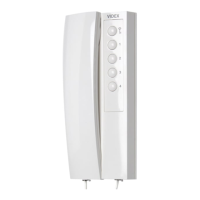
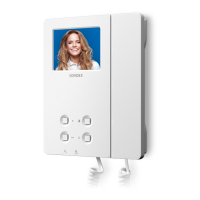
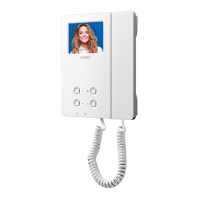
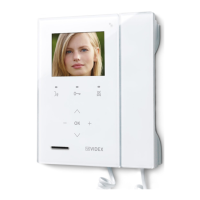
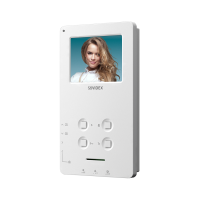
Pulsanti (fig.2a)
Regolazione volume del tono di chiamata, contrasto e
luminosità
Compatibilità con la serie 900
!
!
!
!
>
>
>
Avvicinare, come da , il videocitofono alla piastra per agevolare la
connessione del flat .
Come mostrato in inserire il connettore del flat , che fuoriesce dalla
parte posteriore del videocitofono, nel connettore della scheda di
connessione .
Facendo corrispondere le 4 fessure presenti sulla base del videocitofono
con i 4 incastri della piastra , appoggiare il video sulla piastra e spingerlo
verso il basso fino allo scatto, compiendo un movimento come mostrato dalle
frecce in .
Per rimuovere il videocitofono, spingere con un cacciavite a taglio il dente
verso il muro e, contemporaneamente, tirare il videocitofono verso l’alto.
“ ” :Attiva la serratura elettrica solo con video acceso e cornetta
sollevata.
“ ” :Attiva l’impianto dall’interno (autoaccensione).
“ ” :Con JP1 in posizione “A” comando sul comune pulsanti;
:Con JP1 in posizione “B” autoaccensione (Vedi ).
“ ” :Con JP2 in posizione “A” comando sul comune pulsanti;
:Con JP2 in posizione “B” autoaccensione (Vedi ).
“ ” :Con JP3 in posizione “A” comando sul comune pulsanti;
:Con JP3 in posizione “B” autoaccensione (Vedi ).
“ :Acceso per tutto il tempo che resta acceso il monitor.
Per le varie regolazioni occorre agire sui controlli alla base del videocitofono
.
“ ” regola il volume del tono di chiamata (sia esterna che locale);
“ ” regola il contrasto del monitor;
“ ” regola la luminosità del monitor.
fig.1 L A
I
fig.1 I
M
F
L
NA
fig.1
O
Tab.2
Tab.2
Tab.2
Fig.2b
·
··
S
S
1
2
Led On”
I videocitofoni della serie 3000 sono compatibili con la serie 900 e
possono essere installati nello stesso impianto; l’unica differenza sta
nel fatto che per i modelli della serie 3000 la “chiamata esterna” e la
“chiamata di piano” (o “locale”), sono entrambe con nota elettronica.
La tabella presente sulla piastra di fissaggio dell’Art.3980, mette in
relazione i segnali (con la denominazione standard impiegata da
VIDEX) ed i morsetti della scheda di connessione, in base ai modelli
dei videocitofoni (ad esempio: per i videocitofoni Art.3311, 3411 e
3511 il segnale “TV2” è presente sul morsetto “3” della scheda di
connessione).
Art.3311-3411-3511 3000 Series
Videophones mounting instructions
Installing the Videophone onto mounting plate
(Art.3980)
Push Buttons (fig.2a)
!
!
!
!
As shown in , move the videophone close to the mounting plate so
that the ribbon cable will reach the connector .
As shown in , connect the female plug on the ribbon cable I coming from
the videophone to the male plug connector on the PCB .
Place the videophone against the 4 hooks on the mounting plate and
push down: the videophone will automatically lock into place using clasp
as shown in .
To remove the videophone from the wall, push the clasp in the direction of
the wall with a screwdriver and at the same time push the videophone
upwards.
fig.1 L A
I
fig.1
MF
LN A
O
fig.1
O
“ ” :Door opening button (only with video on and handset lifted).
“ ” :Camera recall button.
“ ” :With JP1 on “A” position, command on common push buttons;
:With JP1 on “B” position, camera recall button (look ).
“ ” :With JP2 on “A” position, command on common push buttons;
:With JP2 on “B” position, camera recall button (look ).
“ ” :With JP3 on “A” position, command on common push buttons;
:With JP3 on “B” position, camera recall button (look ).
:On only when the monitor is on.
Move slides controls (see relevant symbols , , ) presents on the
videophone lower side ( ) . Move slides controls right to increase or left to
decrease.
·
··
Tab.2
Tab.2
Tab.2
Fig.2b
S
S
1
2
“On Led”
Call tone volume, contrast and Bright regulation
900 Series compatibility
The 3000 series videophones are compatible with the 900 series
videophones and can be installed on the same system.The only
difference between the 3000 and 900 series is that the 3000 series
"main calls " and "local calls " are both electronic call as oppose to one
being AC buzzer. The label attached to the mounting plate shows the
conversion between 900 and 3000 series connections (I.E. "TV2"
signal will be on terminal "3" for videophone models 33/34/3511).
Fig.1 Fig.2
I
L
A
M
F
N
N
N
N
O
Fig.2b
Fig.2a
VIDEX
ON
218 mm
205,5 mm
53 mm
65330000 30/03/2007