Do you have a question about the Videx 6200 Series and is the answer not in the manual?
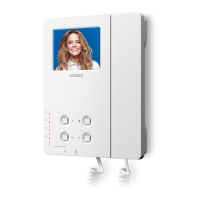
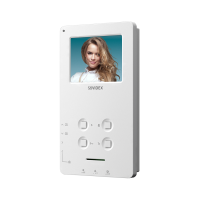
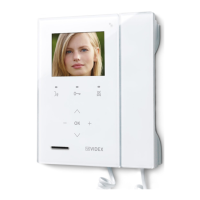
Details the IP videophone's 3.5" LCD touch screen, 4 function buttons, 5 LEDs, and adjustable/programmable options.
Configurable button for system status, used for relay triggering or taking pictures.
Manages privacy mode, video source switching, and call rejection.
Opens the door relay or starts an intercommunicating call in stand-by.
Initiates camera recall and enables speech during a camera recall session.
Illuminates when the privacy service is enabled.
Flashes slowly if the gateway is not found when keep alive is set to 'ping'.
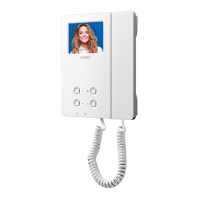
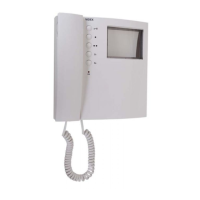
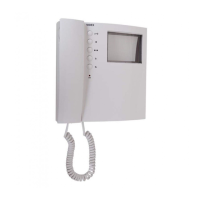
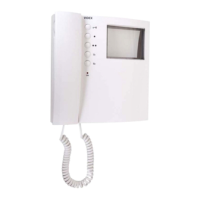
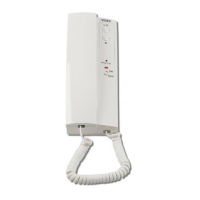
3-level switch controlling call tone and local bell volume.
Sliding wheel for adjusting picture brightness.
Explains the 'DEVICE NOT INITIALISED' message and the need for configuration software.
Details accessing the settings menu for programming and adjustments via the videophone.
Lists programmable options: privacy duration, melody, number of rings, date & time.
Details adjustable settings for speech and video quality toward a door panel.
Procedure to select and confirm privacy duration values via the touch screen menu.
Process to listen and select a desired call melody from the available options.
Procedure to select and confirm the number of rings for incoming calls.
Steps to adjust and confirm the date and time settings on the videophone.
Explains speech quality adjustment is password protected and affects the entire installation.
Procedure to select the door panel to connect to for speech adjustment.
How to use plus/minus buttons to adjust speech levels for selected door panel.
Video quality adjustment is password protected and affects the entire installation.
Procedure to select the door panel for video quality adjustment.
How to adjust video levels (brightness, contrast, saturation) for the selected door panel.
Details the binding code for smartphone app integration for remote calls and communication.
Steps to bind the videophone to the smartphone app using QR code or text code.
Displays the binding code in QR code and text format for smartphone app pairing.
Instructions on how to pair the smartphone app with the videophone using the binding code.
Describes how to access device information like model, IP, MAC, and firmware versions.
Procedure to answer incoming calls, start conversations, and open the door.
How to manually take a picture of the visitor during a conversation.
How to press the button to activate the door relay (defaulting to relay 1).
How to press the S button to enable privacy service, preventing incoming calls.
How to press the S button again to disable privacy service.
Using the 'S' button during conversation to activate a configured relay.
Using the 'S' button in stand-by mode to activate a configured relay.
How to use the O button to initiate a camera recall to a favourite door panel.
Displays warning to pick up handset and shows the camera recall initialising screen.
Details controlling speech and manually taking pictures during camera recall.
How to press the door open button during camera recall.
Procedure to switch between internal and external video sources during conversation.
Alert message shown when no external video sources are connected.
How to initiate an intercommunicating call to a favourite intercom.
Shows outgoing and incoming call symbols and names between videophones.
Indicates conversation status with speech symbol and connected videophone name.
Lists functions available from the main menu: camera recall, intercom calls, relay activation, event log.
How to perform camera recall to any door panel via the touch screen interface.
How to make an intercommunicating call to any intercom extension via the touch screen.
How to activate any door panel's relay using the touch screen interface.
Videophone stores events with date/time; external calls include visitor pictures.
Describes icons (speaker/intercom) and colors (green/blue/red) for different event types.
How to tap on an event to inspect it and optionally view a stored picture.
Relay 1 (OUT1) is activated when IN1 is active or videophone is ringing.
IN2 activation sends command to enable door panel relay 1 for access control.
Procedure to reset and pair the videophone with the entrance panel for default setup.
How to select the first or second monitor in a two-way video kit.
Steps to manually put the videophone into boot mode for firmware restoration.
Use of 'VidexFirmwareUpdater.exe' to upload firmware to the device in boot mode.
Details the function of IN1 and IN2 as active low inputs for implementation.
Details the function of OUT1 and OUT2 as dry contact relays for implementation.
Specifies connections for 12Vdc power supply, ground, and RS-485 interface.
Specifies the housing type as 'Surface mount'.
Details programming via PC and controls like call tone volume and brightness.
Specifies power supply (12Vdc/POE) and power consumption details.
Specifies the operational working temperature range.
Procedure to remove the videophone cover by disengaging clips.
Instructions for marking holes, feeding wires, and fixing the base to the wall.
Connecting wires to removable terminals and terminal blocks to electronics.
How to reassemble the videophone unit after testing.
Explains the WEEE directive and the crossed-out bin symbol for proper disposal.