- 5 -
6200 Series
Art.6296 - Installation instructions
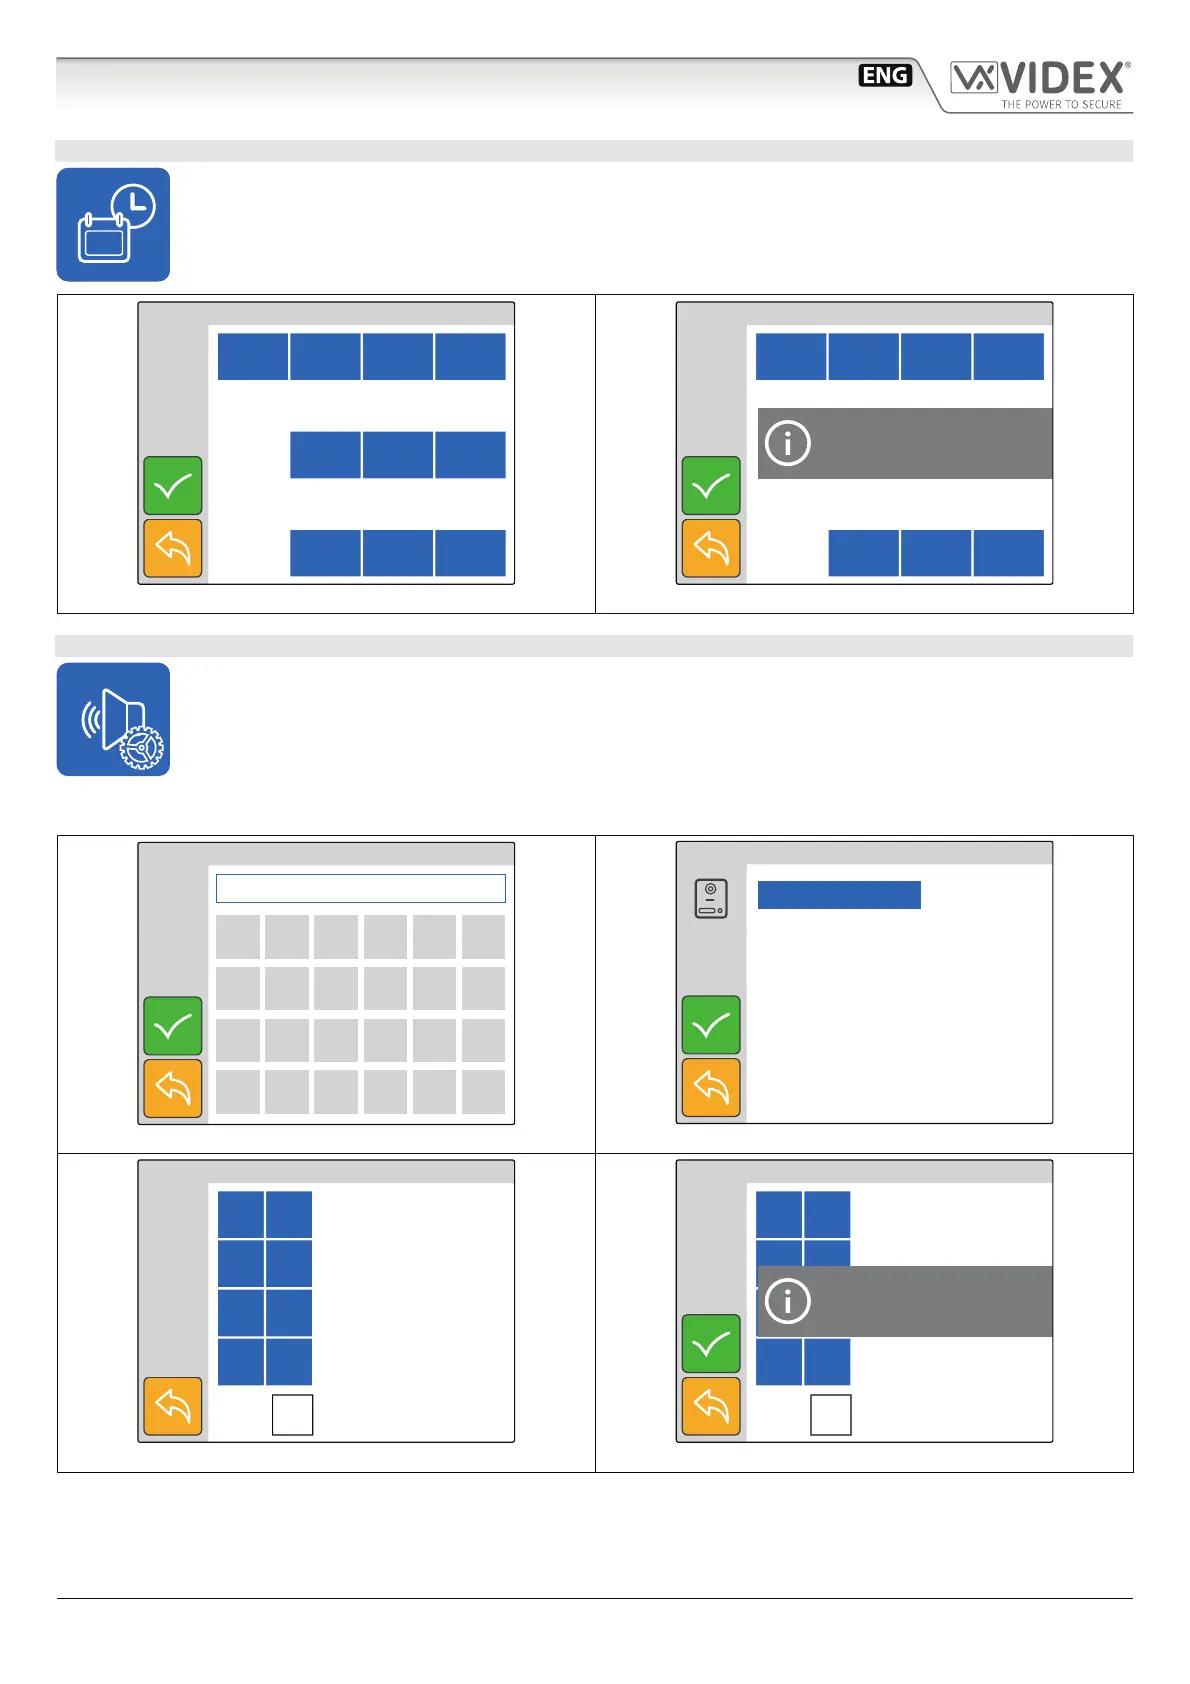
DATE & TIMES
• Tap on the date & time icon (Fig. 5 on page 3)
• The current date & time is shown (Fig. 13).
• Operate the buttons to adjust the date & time required then tap on the tick button to conrm (Fig. 14).
• A notice will inform that the value is saved (Fig. 14).
Tue 18 04/ / 17
+ Hour – Hour + Min – Min
+ Day + Month + Year
+ Day + Month + Year
15:30
SET DATE & TIME
14:52
Fig. 13 Set the date & time
Tue 21 06/ / 17
+ Hour – Hour + Min – Min
+ Day + Month + Year
+ Day + Month + Year
15:30
SET DATE & TIME
15:45
System Time Updated
Fig. 14 Save the value set
ADJUST SPEECH QUALITY
• This setting is password protected (Fig. 15) because the adjustment will aect the entire installation.
• Tap on the speech adjustment icon (Fig. 6 on page 3).
• The default password is “9876”, type it then proceed with the adjustment.
• Select the door panel to connect to then tap the tick button to open the communication (Fig. 17).
• Adjust the speech operating on the plus and minus buttons of the various settings.
• Once a good speech level is obtained tap on the tick button to conrm (Fig. 18).
• A notice will inform that the adjustment is saved (Fig. 18).
7 8 9
4 5 6
1 2 3
0 C
SELECT A CALL POINT
Fig. 16 Select the door panel to connect to
+ –
+ –
+ –
+ –
LOCAL TH.
LOCAL ATT.
REMOTE TH. (300)
REMOTE ATT (51)
ECHO CANC ENABLED
15:30
ADJUST AUDIO
Fig. 17 Adjust the speech for the selected door panel
+ –
+ –
+ –
+ –
LOCAL TH.
LOCAL ATT.
REMOTE TH. (300)
REMOTE ATT (51)
ECHO CANC ENABLED
15:30
ADJUST AUDIO
Saved
Fig. 18 Save the speech adjustment
Art.6296 IP Videophone for VIDEX IP System
 Loading...