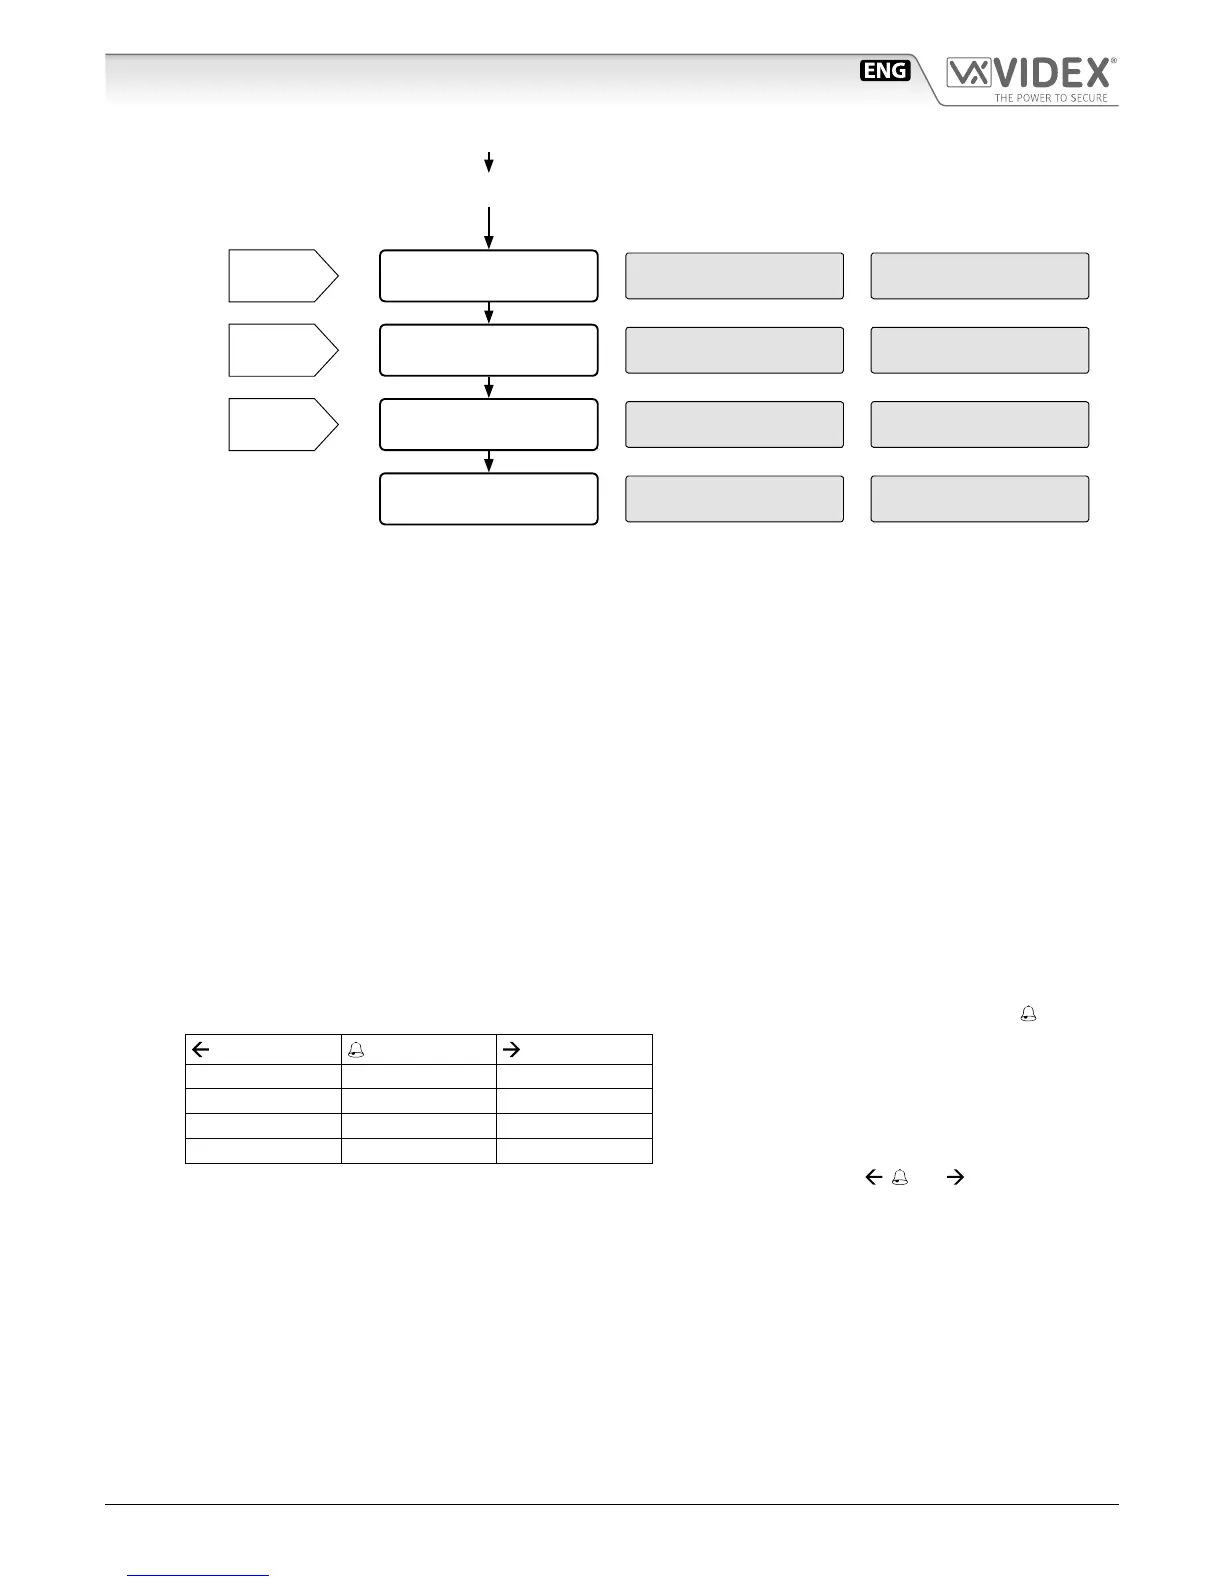
[0]=NO 1=ST 2=CMB
SPEECH BOARD
SET SPEECH PLAYBACK
MODE (0,1,2)
MASTER: NOT
1=YES
MASTER/SLAVE SETTING
(0=SLAVE, 1=MASTER)
1=TEST FLAT
"ENTER"=END
AUTOMATIC FLAT TEST
(1 or ENTER)
ENTER FLAT NR. OR
<- SEARCH ->
SYSTEM READY TO USE
[0]=NO 1=ST 2=CMB
SPEECH BOARD
MASTER: YES
0=NO
TEST FLAT 101
ID PH:101 OK
ENTER FLAT NR. OR
<- SEARCH ->
NOTE 8
NOTE 9
NOTE 10
CONTINUED FROM PREVIOUS PAGE
On LCD display Example
NOTA 1: To jump to the next programming press twice ENTER button and the existing information will be kept, while to insert
new data type the new information and press ENTER button just once. If you make any mistake while typing, press
CLEAR button to erase and insert back the information.
NOTA 2: To move to the next programming press 0 button for STANDARD mode, 1 button for MAIN mode or ENTER button to
keep the programming unchanged. Set MAIN mode when the panel is connected before one or more Art.2206N or set
STANDARD mode when Art.2206N are not installed in the system or the panel is connected after one of them.
NOTA 3: To move to the next programming, press twice ENTER button or type the location number you want to change and press
ENTER button to start inserting the location information.
From 5.0 Firmware revision and following, memory locations n. 0 and n. 999 are for display logo during stand-by mode.
NOTA 4: ATTENTION! If you press CLEAR button you will erase all memory location contents.
NOTA 5: This programming is available when the panel is set in main mode only.
NOTA 6:
This programming is only available in panels with name repertory where user name is required type the user name using
the push button and following the table below: once you have nished typing the name conrm by pressing button.
o A= Back
o B= Accept
o C= Forward
1= . & 2= ABC 3= DEF
4= GHI 5= JKL 6= MNO
7= PQRS 8= TUV 9= WXYZ
0= + – * /
To change the stand-by logo (special locations n.0 and n.999) use the same table above:
, and buttons are respec-
tively replaced by A, B and C buttons.
NOTA 7: To jump to the next programming , press twice ENTER button to keep existing information unchanged or press one of
the keys requested.
NOTA 8: To jump to the next programming, press twice ENTER button to keep existing information unchanged or press one of
the keys requested. In “ST” mode the speech boaro will speak numbers digit by digit while in “CMB” mode it will speak the
complete number.
NOTA 9: Among all the analogical or digital panels installed on the same level, one must be a “MASTER” unit. To move to the next
programming press once ENTER button otherwise press one of the button required ( 0 or 1).
NOTA 10: Press ENTER button to end the programming or 1 button to start the test. if you press 1 button the panel starts the con-
nection test with all the programmed devices and shows the test result in case an error occur the test stops: press ENTER
button to end or carry on by pressing 1 button.
Art.2202, Art.4202, Art.8202
Digital Panel programming owchart (Fw. rev 5.6 or later)