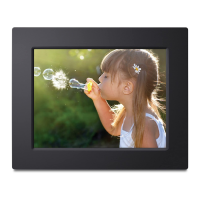
ViewSonic 8 DPG807
ENGLISH
Copy les from computer
Youcanconnectthedigitalphotoframetoacomputertocopythelestothebuilt-inmemory(dependsontheunityoupurchase)or
the card inserted on the photo frame.
1. Connect the mini plug of the USB cable to the mini USB port on digital photo frame, and other end to the computer.
2. Thecomputersystemdetects“Newhardware”andstartstoinstallthedriverautomatically.Waitforthesystemtonishthe
installation.Whenithasnished,several“RemovableDisk”,whichindicatealldriversofthedigitalphotoframe,willbecreated
in“Mycomputer”.Youcanidentifythedriversintheorder:CF,SD/MMC,XD,MS,Nandash.
3. Movethelesonyourcomputertothebuilt-inmemoryorcardinsertedonthephotoframeintheusualway(draganddrop).
4. Follow the Safely Remove Instructions to disconnect the USB cable.
Note:
• Make sure there is no USB mass storage device connected with Digital Photo Frame before connecting to computer.
• You must plug in and turn on the photo frame before connecting to the computer.
• When connecting with a computer, the USB HOST driver is not available.
• DonotdisconnecttheUSBcableorremovethecardwhencopingortransferringthelestothebuilt-inmemoryorcardonthe
photo frame.
• Make sure your computer is running Windows 2000 or above, e.g. Windows XP or Vista, with USB port supported.