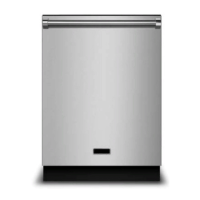
Wash Cycles
POTS/PANS
Heavily soiled pots, pans and casserole dishes.
Long heated prewash loosens up encrusted
food. High temperature main wash and final
rinse.
NORMAL WASH
Normally soiled dishes. Energy usage label is
based on this cycle.
LIGHT/CHINA
Lightly soiled dishware, china and crystal.
Lower temperatures for cleaning delicate items.
RINSE/HOLD
All dishware. Short rinse with no heat.
Wash Options
HI TEMP WASH
Increases the temperature, adding heat, time
and water for improved cleaning performance.
Available only with POTS/PANS and NORMAL
WASH.
Note: Periods of soaking will occur to aid in
removal of baked on food soils.
SANITIZED 155°F RINSE
Raises water temperature to 155°F in the final
rinse. Adds heat and time to the cycle. This
high temperature rinse sanitizes your dishes
and glassware in accordance with NSF/ANSI
STANDARD 184 for Residential Dishwashers.
Certified for residential dishwashers and not
intended for licensed food establishments.
Available only with POTS/PANS and NORMAL
WASH.
DELAY START
Lets you delay running the dishwasher for up
to four hours. To set “DELAY START”, select
the desired wash cycle and option(s). Press the
“DELAY START” button once and the number
“2” will light, indicating a two hour delay. If
you desire a longer delay, continue pressing
the “DELAY START” button to a four hour
delay. The corresponding number on the
button will light. Once you have set the desired
delay time, press the “START” button and
close the door. “DELAY START” is not available
with the Rinse/Hold cycle.
AUDIBLE SOUND SIGNAL
A single beep will occur when you select
cycles, options and press the “START” key. If
the “START” button is not pressed or if the
door is not closed within 4 seconds of pressing
the “START” button, 3 short beeps will occur.
The end-of-cycle signal consists of 2 long
beeps and activates 30 minutes after the last
drain, when the condensate dry portion of the
cycle is completed. For all other error
messages and to deselect the audible sound
signal, see the Troubleshooting/Fault Codes
section in the Use and Care Guide.
ILLUMINATION OF BUTTONS
Option, Cycle and Start buttons will only
illuminate after they are selected. The
"SANITIZED" indicator will illuminate when the
cycle has been completed. If your dishwasher
did not properly sanitize your dishes, the
indicator light will not illuminate. This can
happen if the cycle is interrupted or the water
could not be heated to the required
temperatures. The "SANITIZED" indicator light
goes off after you have opened and closed the
door or if you press and hold the
START/RESUME button.
Cycle Data
Changing a program after the unit has
started
The dishwasher is programmed to stop operating if
the door is opened during a cycle. To change a
program or option after starting the machine, open
the door slightly to let the spray arms stop rotating
and avoid getting sprayed with water. Press and hold
“START” for four seconds to cancel the current
selection, then press the touchpad(s) for your desired
selection.
Press “START” again and close the door. The drain
pump will run to remove any dirty water from the
dishwasher before starting the newly selected cycle.
Check to make sure there is still detergent in the
detergent dispenser.
Opening the door after Cycle has
started
If the door is opened after the cycle has started, the
”START” button will flash to indicate that the
dishwasher is in Standby Mode. Press the “START”
button and close the door securely within four
seconds to restart the cycle.
• Load all items so that the force of the water and
the detergent reach soiled surfaces.
• DO NOT let china, crystal, and other delicate items
touch each other during dishwasher operation.
• DO NOT use door to push racks in.
• DO NOT put stainless steel of different qualities
close to each other. Contact can damage metals.
• Rinse stainless steel items if they will not be
washed immediately. Prolonged contact with salty
or acidic foods will cause stains.
Note: DO NOT load dishes in a manner that would
block the detergent dispenser lid from completely
opening. The detergent dispenser lid could be
damaged.
Note: DO NOT put sterling silver or silver-plated
flatware in the same compartment with stainless steel.
Contact between the metals can damage silver.
Extra Quiet Operation Hints
Your dishwasher has been designed and engineered
to give superior cleaning results and to operate very
quietly. To avoid any extra clattering or thumping
noises during operation:
• Keep sink drain plugs inserted during dishwasher
operation to prevent noise transfer through drains.
• Load dishes so they DO NOT touch each other.
• Make sure lightweight items are secured in
the rack.
• Make sure pot lids and handles, pizza pans, cookie
sheets, etc., DO NOT touch interior walls.
The Silverware/Cutlery Basket
Tips for best cleaning results:
• Distribute items evenly and mix knives, forks, and
spoons so that items will avoid nesting.
• ALWAYS place forks and spoons with eating
portions up and handles down.
• IMPORTANT: Sharp or pointed items, such as
knives, should always be put in with the point
down to protect your hands.
Adjusting Racks
The Lower Rack
The lower rack is best for dinner plates, smaller
plates, serving plates, larger bowls, pots, and pans.
• Securely place heavily soiled cookware face down in
the rack.
• Use the fold-down tines to provide space for large
items such as
pots and pans.
• Make sure pot
handles and other
items DO NOT
stop rotation of
lower wash arm
by hanging below
the rack.
The Upper Rack
The upper rack is best for glasses, cups, bowls, small
plates, and saucers and can accomodate full sized
plates up to 10-1/4”.
• Make sure items hanging below the rack DO NOT
block the rotation of the wash arm.
Changing a Program
General Loading Guidelines
Dishwasher Controls/Wash Cycles/Wash Options