11.0 SHELL WATER REFILL PROCEDURE
The installed bladder tank will be either normally pressurized or non-pressurized, depending upon the type of system
(wet or deluge), and the piping design. If pressurized (wet pipe), refer to Steps 13-18; if non pressurized (deluge) refer
to Steps 13 and 19-21.
NOTE: IN SOME DELUGE INSTALLATIONS, THE PIPING DESIGN MAY REQUIRE THE TANK TO BE NORMALLY
PRESSURIZED. IF SO, FOLLOW STEPS 13-18. SHOULD THERE BE QUESTIONS CONCERNING WHEN OR HOW
TO PRESSURIZE THE TANK, CONTACT THE DESIGN ENGINEER OR VIKING.
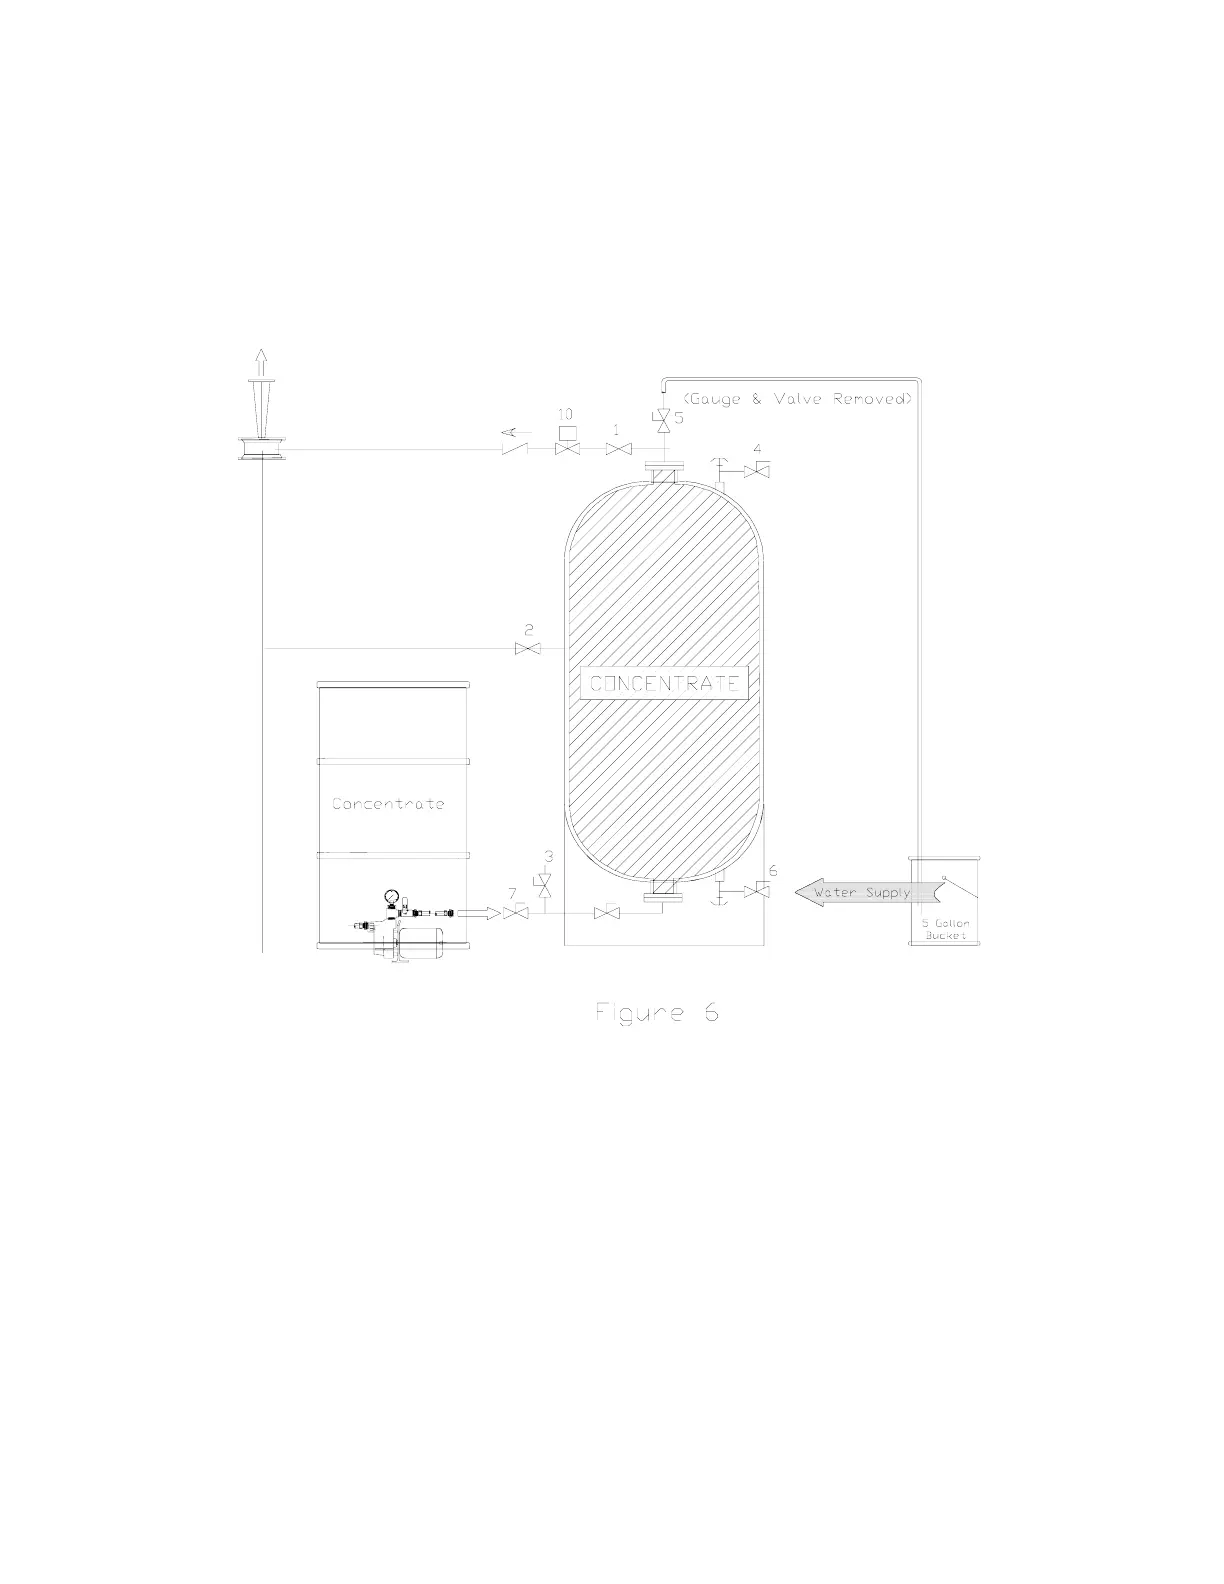
Step 13: Attach a water supply hose to Valve No. 6 and the clear flexible hose to Valve No. 5. Terminate the clear
hose into a 5 gallon bucket (see Figure No. 6).
11.1 NORMALLY PRESSURIZED
Step 14: Close all valves except for No. 4 and No. 5.
Step 15: Open Valve No. 6 (allowing water into the shell) until water overflows from Valve No. 4 and concentrate
overflows from Valve No. 5. Close Valve No.’s 4, 5, and 6.
Step 16: Carefully and partially open Valve No. 2 to allow water from the main supply to enter tank and equalize
to line pressure. When pressurized, open valve to full.
VERIFY AUTOMATIC VALVE NO. 10 IS CLOSED!
13