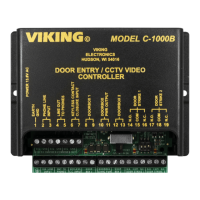
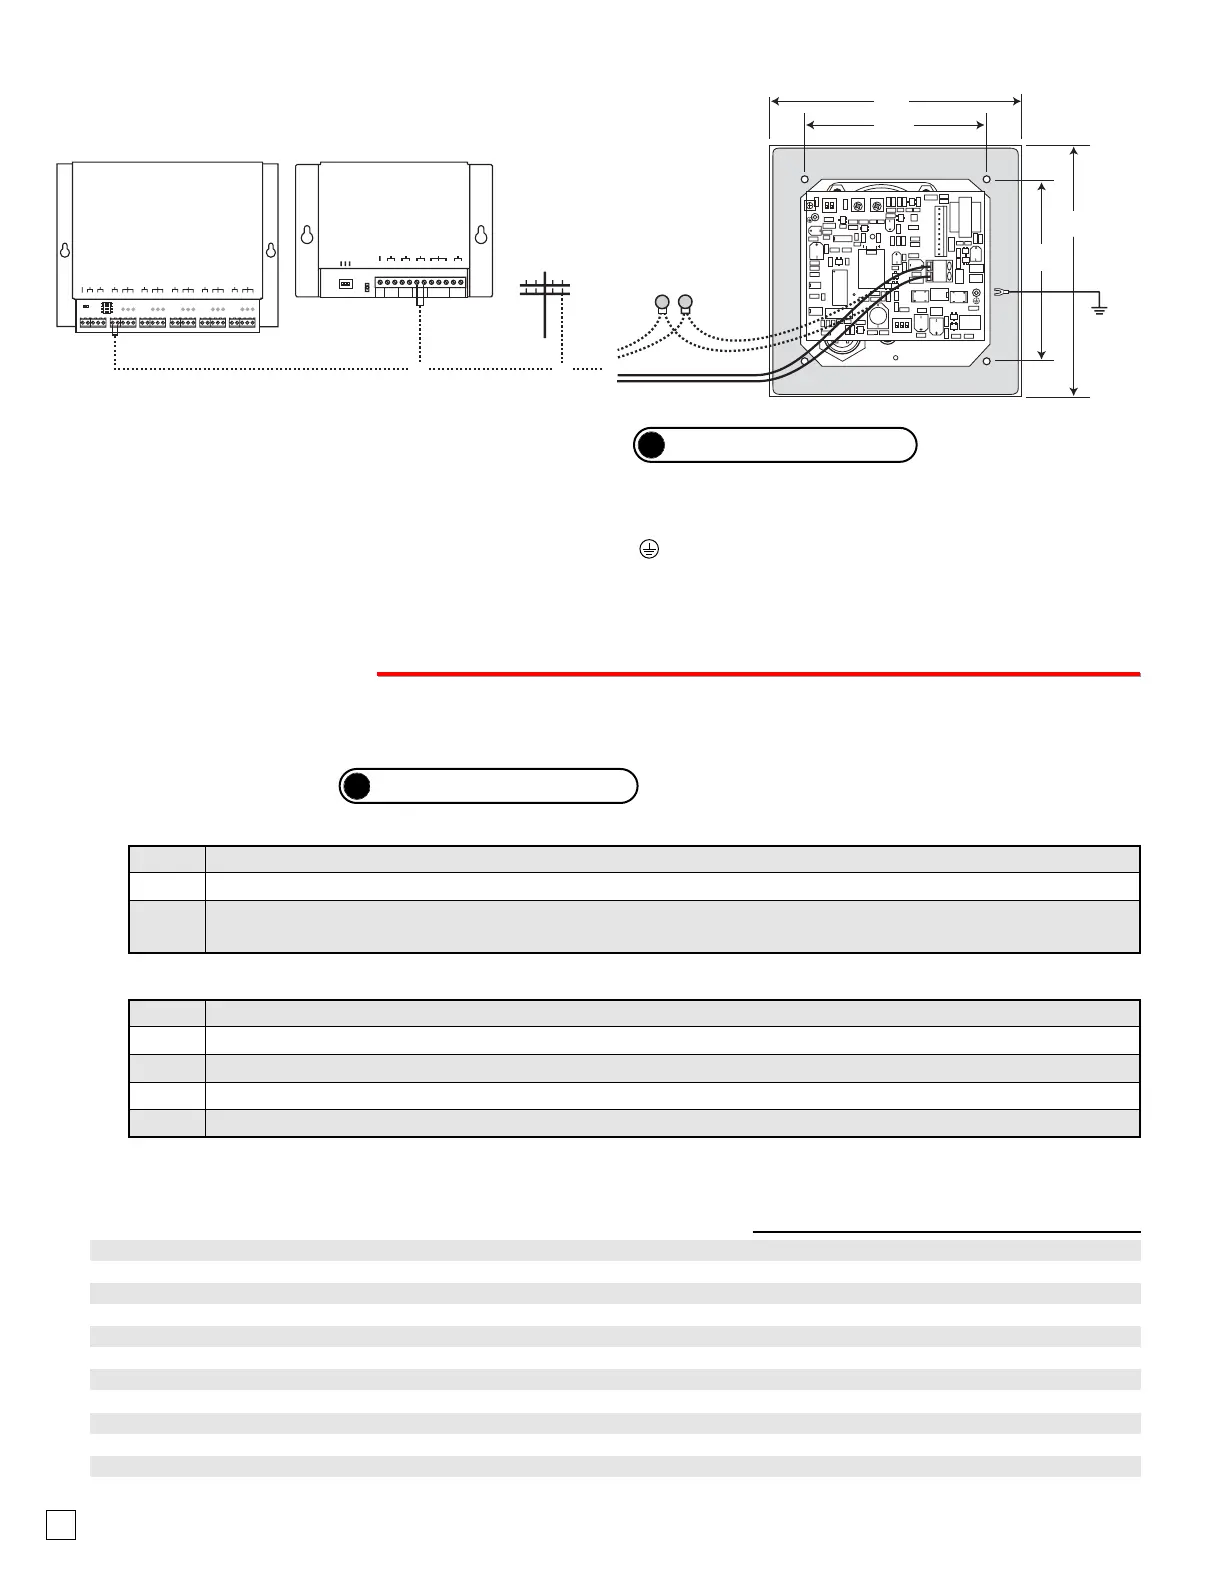
* C.O. Line
AUX. INPUT
AUX. CONTACT
C.O. LINE
N.O. COM N.C.
*** Note: To increase surge protection, loosen the PCB mounting screw labeled (as shown above) and fasten a wire with spade terminal (included)
from the mounting screw to Earth Ground (grounding rod, water pipe, etc.)
** Note: The gel-filled (water-tight) butt connectors are designed for insulation displacement on 19-26 gauge wire with a maximum insulation of 0.082
inches. Do not strip wires prior to terminating.
* Note: When installing a line powered phone on a low voltage and/or low loop
current phone system extension, a TBB-1 Talk Battery Booster may be required.
?
Need More Information on the TBB-1?
Call (715) 386-4345 and select 630.
B. Wiring the E-30 Phone Board
4
P
P
r
r
o
o
g
g
r
r
a
a
m
m
m
m
i
i
n
n
g
g
Step 1. Move DIP switch 2 to the ON position (sets unit to answer incoming calls - see section F).
Step 2. From a Touch Tone phone call the line attached to the E-30.
Step 3. When the E-30 answers, enter the 6-digit security code (factory set to 845464 - see section C). A double beep
should then be heard indicating you have entered the programming mode.
2. Without the Security Code
A. Accessing the Programming Mode
1. Using the Security Code
Step 1. Move DIP switch 2 to the ON position (sets unit to answer incoming calls - see section F).
Step 2. Move DIP switch 3 to OFF (incoming calls enter the programming mode without security code - see section F).
Step 3. From a Touch Tone phone call the line attached to the E-30.
Step 4. When the E-30 answers, a double beep will be heard and you will automatically enter the programming mode.
Step 5. When finished programming, move DIP switch 3 back to the ON position (see section F).
Note: If a valid memory position is entered, a double beep will be heard, four beeps indicate an error.
?
Need More Information on the DLE-200B?
Call (715) 386-4345 and select 605.
The E-30 phone can be programmed from any Touch Tone phone using a C.O. line, analog PABX/KSU station, or a
DLE-200B Line Simulator.
B. Quick Programming Features
First speed dial number ...........................................................................................
Second speed dial number ......................................................................................
Third speed dial number ..........................................................................................
Fourth speed dial number ........................................................................................
Fifth speed dial number ...........................................................................................
To add a
, at any point in the dialing string ...............................................................
To add a # at any point in the dialing string ...............................................................
To add a four second pause at any point in the dialing string ....................................
Toggle between Touch Tone and Pulse dialing .........................................................
Timing/Dialing options (factory set to 234111) .........................................................
Change security code (factory set to 845464) .........................................................
0-20 digits
0-20 digits
0-20 digits
0-20 digits
0-20 digits
,,
,#
,7
,6
6 digits (0-9)
6 digits (0-9)
#00
#01
#02
#03
#04
#18
#19
Enter Digits
then
then
then
then
then
then
then
- then -
Enter Memory Location
 Loading...