This document is an installation guide for the Viking 7 Series Integrated All Refrigerator and Integrated All Freezer units. It provides comprehensive instructions and specifications for proper installation, operation, and maintenance of these appliances.
Function Description:
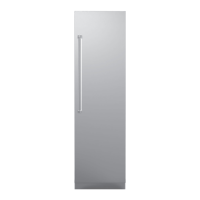
The Viking 7 Series Integrated All Refrigerator and All Freezer units are designed for built-in installation, seamlessly integrating with cabinetry. They offer advanced refrigeration and freezing capabilities, with models available in various widths (18", 24", 30", 36") to suit different kitchen layouts. These appliances are equipped with features for precise temperature control, water filtration (for models with ice makers), and custom panel integration for a cohesive aesthetic. The guide covers both standard and custom panel models, denoted by VRI/FRI/MVRI for refrigerators and VFI/FFI/MVFI for freezers.
Important Technical Specifications:
Integrated All Refrigerator (VRI/MVRI):
- Overall Width: 24", 30", 36" (61.0 cm, 76.2 cm, 91.4 cm)
- Overall Height (from bottom): 83-15/16" (213.2 cm) min to 84-3/4" (215.7 cm) max
- Overall Depth from Rear:
- To front edge kickplate: 22-1/16" (56.0 cm)
- To front of door panel: 24-3/4" (62.9 cm)
- To front of handle endcap (VRI): 27-11/16" (70.3 cm)
- To front of handle endcap (MVRI): 27-5/16" (69.4 cm)
- Cutout Width: Matches overall width (24", 30", 36")
- Cutout Height: 84" (213.4 cm) min to 85-3/16" (216.3 cm) max
- Cutout Depth: 25" (63.5 cm) min.
- Electrical Requirements: 115 volt, 60 Hz, 15 amp dedicated circuit; 3-wire cord with grounded 3-prong plug.
- Maximum Amp Usage: 9.9 amps
- Inlet Water Requirements: 1/4" copper tubing inlet waterline; minimum 20 psi; maximum 120 psi.
- Overall Interior Capacity:
- 24" models: 12.4 cu. ft. (351.1 liters)
- 30" models: 16.4 cu. ft. (464.4 liters)
- 36" models: 20.5 cu. ft. (580.5 liters)
- Approximate Shipping Weight: 450 lbs (202.5 kg) for 24" models; 499 lbs (224.5 kg) for 30" models; 502 lbs (225.9 kg) for 36" models.
Integrated All Refrigerator w/Custom Panel (FRI):
- Specifications are largely identical to VRI/MVRI, with the main difference being the depth to the front of the unit (24" / 61.0 cm) as custom panels do not typically include handles that extend beyond the door.
Integrated All Freezer (VFI/MVFI):
- Overall Width: 18", 24", 30", 36" (45.7 cm, 61.0 cm, 76.2 cm, 91.4 cm)
- Overall Height (from bottom): 83-15/16" (213.2 cm) min to 84-3/4" (215.7 cm) max
- Overall Depth from Rear:
- To front edge kickplate: 22-1/16" (56.0 cm)
- To front of door panel: 24-3/4" (62.9 cm)
- To front of handle endcap (VFI): 27-11/16" (70.3 cm)
- To front of handle endcap (MVFI): 27-5/16" (69.4 cm)
- Cutout Width: Matches overall width (18", 24", 30", 36")
- Cutout Height: 84" (213.4 cm) min to 85-3/16" (216.3 cm) max
- Cutout Depth: 25" (63.5 cm) min.
- Electrical Requirements: 115 volt, 60 Hz, 15 amp dedicated circuit; 3-wire cord with grounded 3-prong plug.
- Maximum Amp Usage: 9.9 amps
- Inlet Water Requirements: 1/4" copper tubing inlet waterline; minimum 20 psi; maximum 120 psi.
- Overall Interior Capacity:
- 18" models: 8.2 cu. ft. (232.2 liters)
- 24" models: 12.4 cu. ft. (351.1 liters)
- 30" models: 16.1 cu. ft. (455.9 liters)
- 36" models: 20.1 cu. ft. (569.2 liters)
- Approximate Shipping Weight: 350 lbs (157.5 kg) for 18" models; 450 lbs (202.5 kg) for 24" models; 494 lbs (222.3 kg) for 30" models; 497 lbs (223.7 kg) for 36" models.
Integrated All Freezer w/Custom Panel (FFI):
- Specifications are largely identical to VFI/MVFI, with the main difference being the depth to the front of the unit (24" / 61.0 cm) as custom panels do not typically include handles that extend beyond the door.
Water Filter System Specifications:
- Capacity: Certified for up to 750 gallons (2,838 L); up to nine months.
- Pressure Requirement: 20-120 psi (1.4-8.2 bar).
- Temperature: 33-100°F (0.6-37.8°C).
- Flow Rate: 0.78 gpm (2.9 l/min.).
- Reduction Capabilities (Certified by NSF International against Standard 42 & 53): Chlorine Taste and Odor, Particulate Class I, Lead, Lindane, Atrazine, Mercury, Toxaphene, Cyst, Turbidity, and Asbestos.
Usage Features:
- Integrated Design: Designed for flush installation within cabinetry, allowing for custom front panels to match kitchen decor.
- Control Panels: Features intuitive control panels for refrigerators (VRI/FRI/MVRI) and freezers (VFI/FFI/MVFI) with indicators for Sabbath Mode (SAB), Max Ref/Frz, Showroom Mode, and Filter status.
- Door Swing/Tipping Radius: Detailed diagrams illustrate the door swing clearance required for 90° and 105° openings, crucial for planning adjacent cabinetry and walkways.
- Anti-Tip Bracket: Includes an anti-tip bracket system to prevent the top-heavy appliance from tipping, requiring secure mounting to a wall stud or masonry.
- Water Line Installation: Provides instructions for connecting a 1/4" copper tubing water line for models with ice makers, emphasizing the importance of proper flushing and leak checks.
- Leveling Unit: Adjustable leveling legs allow for precise height adjustment from the front of the unit, ensuring stability and proper door operation.
- Kickplate Installation: Instructions for attaching the kickplate to the lower front of the unit after leveling.
- Flush Mount Side Trim: Details on fastening the unit to cabinetry using flat wood screws and installing decorative magnetic side trim for a seamless finish.
- Door Panel Adjustments: Allows for vertical and horizontal adjustments of custom door panels to ensure proper alignment and fit.
- Door Stop Adjustment: The door stop can be adjusted from a factory-set 90° opening to 105° by rotating the door stop 180 degrees.
- Performance Checklist: A checklist is provided to verify all installation steps and operational functions, including electrical and water supply, anti-tip device, unit leveling, door alignment, and internal packaging removal.
- Verify Operations: Instructions for initial power-on, checking and exiting Sabbath Mode and Showroom Mode, and understanding factory temperature settings.
Maintenance Features:
- Power On/Off Switch: A power switch located behind the header panel allows for easy power disconnection for cleaning or servicing.
- Water Filter Replacement: The water filtration system requires periodic cartridge replacement, with warnings about freezing and unpleasant tastes/odors.
- Service & Registration: Provides contact information for authorized service agencies and Viking Range, LLC, along with fields to record model/serial numbers and purchase details for future reference.
- Cleaning: The guide implicitly suggests cleaning by providing instructions for power disconnection and removal of internal packaging.