15
Preparation
Ensure the spa is lled to its correct operating level. After turning
the power on at the main power panel, the control panel will
display a splash, or startup screen.
Priming Mode
As soon as the spa has power, it
will enter Priming enter “Priming
Mode.” If your spa is equipped
with two or more pumps, two
icons labeled “Jets 1” and Jets 2”
will appear in the display window.
Press to select “Jets 1” press
to activate pump 1 on low.
Press again to move the
pump into high mode. If your pump is equipped with a second
pump, press to select the “Jets 2” icon. Press twice to put
the pump on high speed. All pumps should be running in at their
highest speed to facilitate priming.
IMPORTANT: A pump should not be allowed to run
without priming (water owing out of the jets) for more than 2
minutes. Under NO circumstances should a pump be allowed to
run without priming beyond the end of the 4-5 minute priming
mode. Doing so may cause damage to the pump and cause the
system to energize the heater and go into an overheat condition.
NOTE: Turning the power o and back on again will initiate a
new pump priming session. Sometimes momentarily turning the
pump o and on will help it to prime. Do not do this more than 5
times. If the pump(s) will not prime, shut o the power to the spa
and call for service. Once the system has exited Priming Mode,
the control panel will display the Main Screen. e temperature
will not be displayed but will show four dashes as pictured below.
e system requires approximately 1-2 minutes of water owing
through the heater to determine and display the correct water
temperature.
– – –°F– – –°C
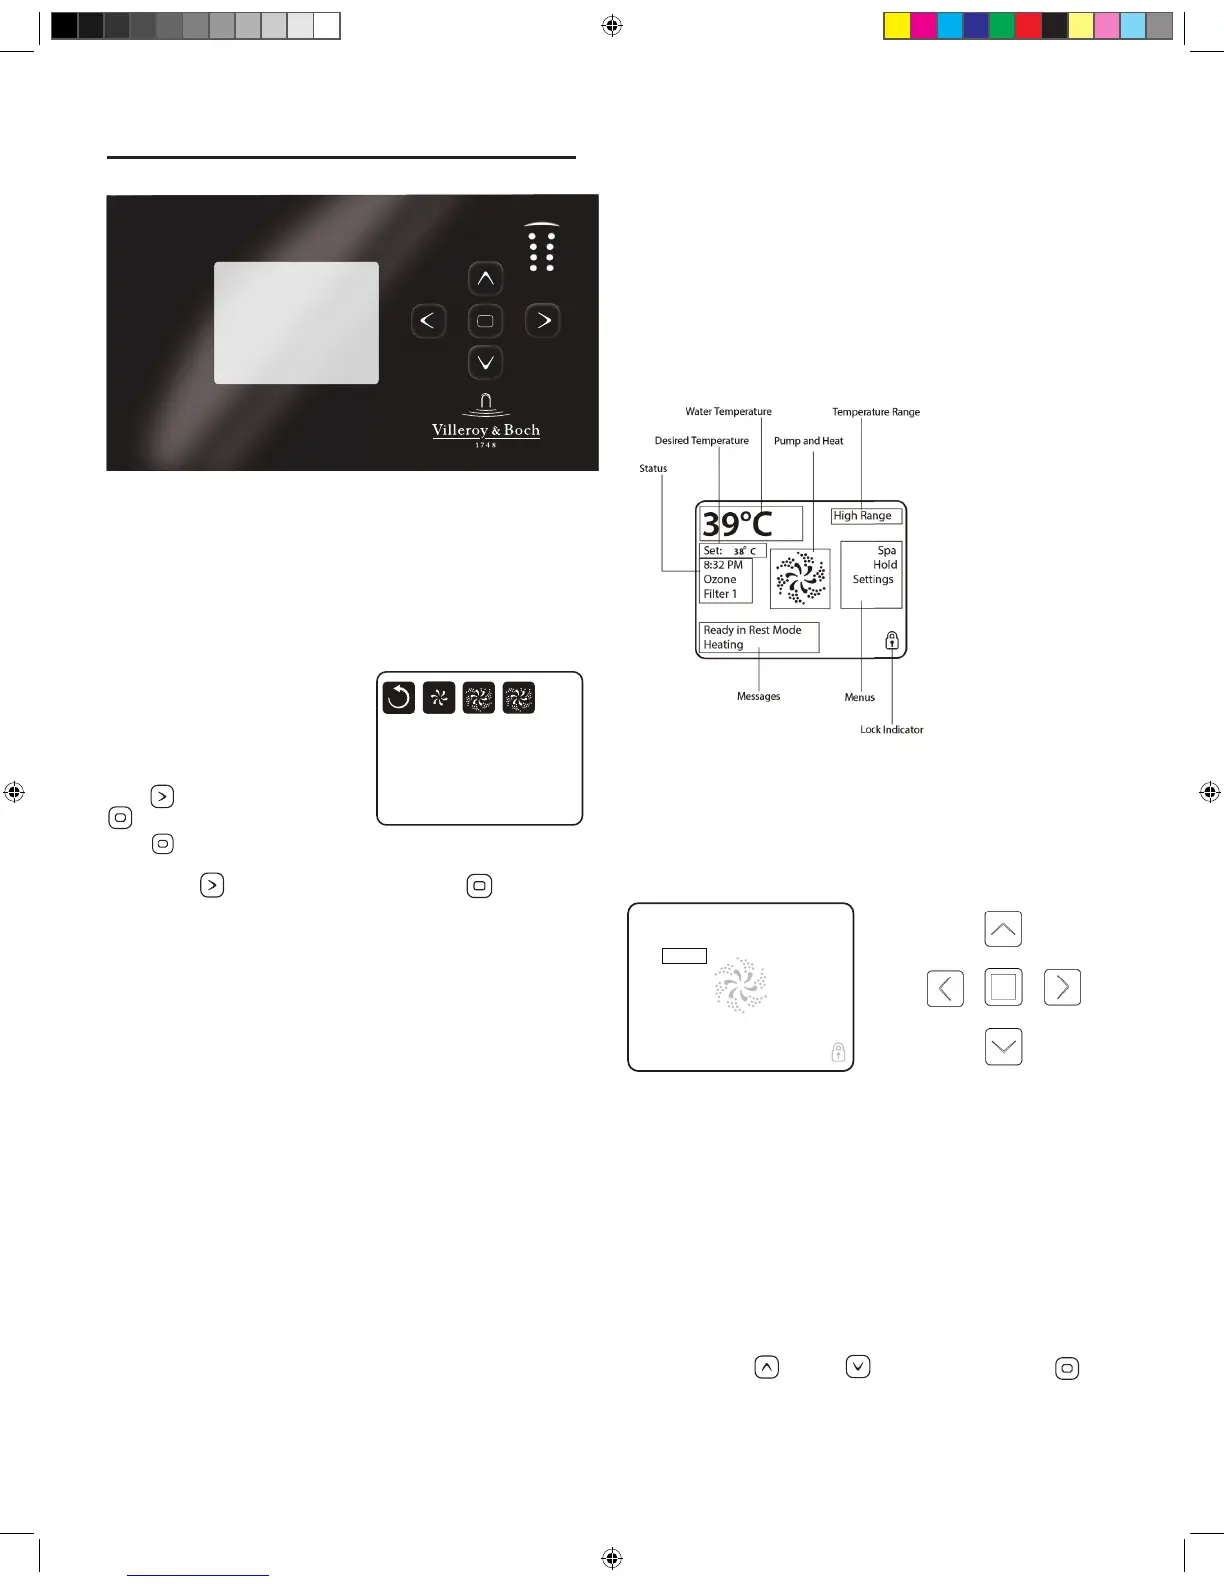
The Main Screen
Important information about spa operation can be seen quickly
from the Main Screen. e most important features, including
Set Temperature adjustment, can be accessed from this screen.
e actual water temperature can be seen in large text and the
desired, or Set Temperature, can be selected and adjusted. Time of
day, ozone operation, and lter operation status is available, along
with other messages and alerts. High temperature Range vs. Low
temperature Range is indicated in the upper right corner. e
Jets Icon in the center will spin on if any pump is running and
changes color when the heater is on. A Lock icon is visible if the
panel or setting is locked.
e menu choices on the right can be selected and the screen
will change to show more detailed controls or programming
functions.
Navigation
Navigating the entire menu structure is done with the 5 buttons
on the control panel. When a text item changes to white
during navigation, that indicates the item is selected for action.
Operating or changing a selected item is generally done with the
center or “Select” button. e only item that can be changed on
the left side of the Main Screen is the Set Temperature. Press
the Left Arrow button to change the Set Temperature number
to white. e Set Temperature can then be adjusted with the up
and down buttons. Pressing the Select button or the Right Arrow
button will save the new set temperature.
On the right side of the screen, the menu selections can be
selected with the
Up and Down Buttons. Use the
Select Button to choose an item. Selecting one of these items will
change to a di erent screen with additional controls.
PREMIUM LINE SPAS
 Loading...